Coloring quail eggs for Easter. Natural dyes: how to make them brighter
10positive psychology 28.03.2018

Dear readers, very soon we will meet Holy holiday Easter. Let me remind you that in 2018 to celebrate Orthodox Easter we will be April 8th. We will bake Easter cakes, pastries and, of course, paint eggs.
The tradition of coloring eggs goes back to ancient times. And if earlier eggs were painted mainly in red, symbolizing the blood of Jesus Christ, now the creativity and creative approach of people around the world are simply amazing. Find out how beautifully you can paint eggs for Easter, starting from the most simple ways and ending with very unusual!
Where did the custom come from
When to paint eggs for Easter
What day should eggs be dyed? According to church canons, eggs should be dyed on the eve of Easter in Clean Thursday. On this day, it is customary to clean the house, wash and prepare Easter eggs, Easter eggs. If you did not have time to paint eggs on Maundy Thursday, then you can do it on Saturday. Thursday and Saturday are the most lucky days for dyeing Easter eggs.
On which day you can not paint eggs
It is believed that on the day of the death of Jesus, that is, on Friday, one should not do household chores, including painting eggs. However, many priests say that even on Good Friday, you can start preparing krashenka. When and when is the best time to do this? - only after 15.00 hours.

Easter eggs have long ceased to be just ritual food. They are given to friends and relatives, decorate festive table. Therefore, every year they try to decorate them as interesting as possible. This process is especially liked by young children, who are happy to join this creative game.
- Chicken eggs will not burst during cooking if you add a tablespoon to the pan table salt. In addition, the eggs should be removed 1-2 hours before the start of cooking. This step will also protect the shell from damage;
- in order for the paint to evenly cover the shell, you need to wipe the boiled egg with alcohol;
- if you like mirror shine Easter eggs and Easter eggs, rub the eggs with a drop of vegetable oil;
- to fix the shade, place the eggs in a 9% vinegar solution based on the proportions of 1 tablespoon per 1.5 liters of water;
- the brightness of the shade depends on the concentration of the dye and the time spent by the egg in the liquid;
- You can paint not only chicken eggs. Try coloring quail eggs and you will see how beautiful it is!
If you have small children, then when staining it is better to abandon chemical dyes. The risk of dye penetrating into the egg is minimal, but still present, especially if the egg burst during cooking.
Therefore, it is better to give preference to traditional natural ingredients for coloring, which definitely will not provoke allergies in our children. There are several ways to dye Easter eggs without store-bought dyes. The choice of staining tactics depends on the desired shade.
Informative shade chart
Dear readers, I offer you a list of products that will help you achieve the desired shade when coloring Easter eggs. This table can be printed and used as a guide.
How to dye eggs in onion skins. Classic way
Many people know how to dye eggs in onion skins, but let's remind once again about this method for beginners. This recipe is pretty easy to make. You just need to stock up onion peel in advance.
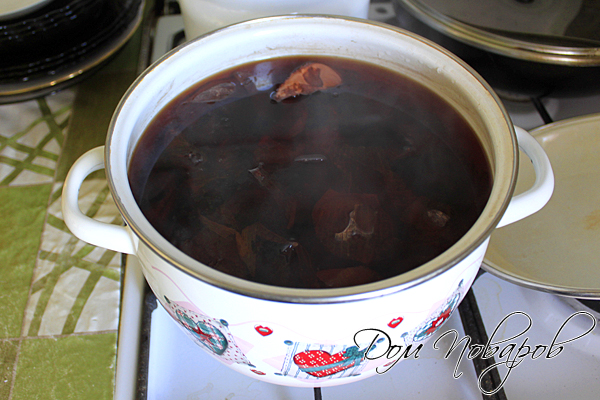
In order to get a crimson-red hue, take the husk from 8 onions and pour 400 ml of water. Bring the mixture to a boil and continue to simmer over medium heat for 30 minutes. As soon as the coloring solution has cooled, it must be filtered.
Now you can start coloring - immerse the eggs in water so that they are completely covered and boil them for 10 minutes. If at the end of cooking the shade is not saturated enough, you can put them back into the strained coloring broth and leave for another 10 minutes.

How to dye eggs in marbled onion skins
There is another way to color eggs in onion skins with a pattern. This recipe produces marbled eggs. To do this, in addition to onion peel, you will need:
- a jar of pharmacy greens;
- gauze or nylon stockings;
- gloves.
First, grind the onion husks into small crumbs. Moisten the eggs with water and roll them in the husk. Now you need to wrap each egg with gauze or nylon so that the husk is fixed, and dip in water for cooking.
In a container with eggs, you need to add brilliant green at the rate of 10 ml per 1.5 liters of water. Now it remains only to boil the eggs in this coloring solution for 15 minutes. At the end of this simple manipulation, you need to cool the eggs by dousing them cold water and free from onion peel.
I would like to emphasize that the use food products when dyeing eggs does not give such an intense color as chemical dyes. The end result also depends on natural color shells. Therefore, to obtain a deep shade, it will take more time, up to 12 hours.
Turmeric for a golden hue
Did you know that you can get a yellow-golden color with spices? To do this, add 3 tablespoons of fragrant turmeric to a container with boiling water. Give the solution time to cool and infuse, and then dip the eggs into it and boil it. If the shade is too weak, then you can leave the eggs in the broth overnight.
Beetroot for a crimson hue
How to dye eggs with beets? Sugar beet gives the eggs an interesting crimson hue during dyeing. To do this, grate a medium-sized vegetable and squeeze the juice. Add to a container of water beetroot juice, bring to a boil and leave the liquid to infuse for half an hour.
Strain the coloring solution and add eggs to it. Cook them over medium heat for 15 minutes to get a light brown hue. Adjust the staining time depending on the intensity of the desired color.
Red cabbage for purple
There are a lot of ways to beautifully paint eggs for Easter. One of the most popular is the method using red cabbage which gives the eggs a purple hue. To color this recipe, you need:
- Cut the cabbage and pour it with 1.5 liters of water.
- Bring the mixture to a boil and simmer over low heat for 60 minutes.
- After the solution has cooled, it must be filtered and allowed to brew for another 10-15 minutes.
- Add the eggs to the bowl with the broth and boil them for 10 minutes. During this time, they will acquire a light pink hue. To get rich purple you need to leave the eggs in a container with natural dye for 4 hours.

Food coloring for eggs
Using purchased dyes is very simple and many resort to this method as the fastest. Before purchasing food coloring, pay attention to the instructions on how to color eggs for Easter. The thing is that different paint manufacturers represent various ways its application. Sometimes you need to boil the eggs in water with dye, and in other cases, put the boiled eggs into the solution.
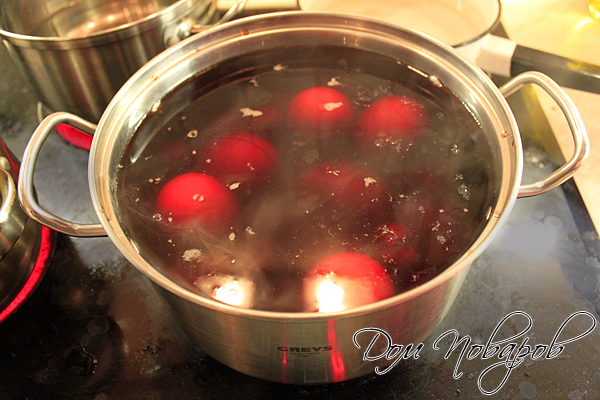
Most often in stores there are bags with water-soluble paint. For coloring in this way, you must first boil the eggs. Pour into a metal container cold water, 1 teaspoon of vinegar and food coloring. The mixture must be thoroughly stirred and wait for the complete dissolution of the grains of the dye.
Then you need to put eggs in a container and leave for 30-60 minutes. Ready-made krasnki are soaked with napkins and decorate the festive table with them.
I suggest watching a video on how to color Easter eggs with food coloring in rainbow colors.
How to make a pattern on an Easter egg
Many families have preserved the tradition of dyeing eggs using sprigs of home flowers, leaves, and grass. If you want to do Easter eggs original, you should definitely try this coloring method.
Choose any dye with which you will get the base color of the eggs. It can be the usual onion peel, beetroot juice or purchased dyes. The choice is yours.
Pour water into a metal container, dilute the dye and bring to a boil. Then reduce the heat and boil the solution for 10 minutes. During this time, you will have time to prepare the eggs for coloring.
To get a picture, leaves of trees, plants, parsley are suitable. Moisten the egg with water and attach the leaf. Now wrap the shell in cheesecloth or nylon stocking, fixing the ends.
In a slightly cooled coloring solution, add a tablespoon of salt and carefully lower the eggs there. You need to cook them for 10-12 minutes, then pour cold water and free from capron. The result is original Easter eggs with a floral pattern.

Coloring eggs for Easter using the "speck" technique
In Ukrainian villages, the tradition of making rags, kraponkas or shkrabanks for Easter is still preserved. These are ordinary painted eggs, on which ornaments are then made.
If you want to try to make such Easter eggs, then dye them with natural dyes, because the purchased ones are very smeared when drawing a pattern. Experienced housewives share advice that for this method of decoration it is better to use dark eggs because they have thicker shells.
I suggest watching a master class on this technique from Olga Proyda, who participated in the competition with her 6-year-old son Dima.
We will need:
- boiled eggs;
- candle;
- dyes;
- rags.
Boil the eggs, dilute the dyes in a convenient container. Better solution make it rich enough.

When everything is ready, lay out the rags, light a candle and drip melted wax on the testicle. After each drop, you can lightly blow on the wax so that it hardens faster. After drying the egg with a cloth, then apply wax to the egg in other places. This can be repeated several times.

When all the drops you need are in place, dip the egg into the paint. It is convenient to do this with a spoon.

You can see everything in more detail
Easter engraving
For a floral or geometric pattern, use a thick gypsy needle, a sharpened orange stick. Sometimes in stores you can find ready set"Easter engraving", which has all the necessary tools.
Decoupage Easter eggs
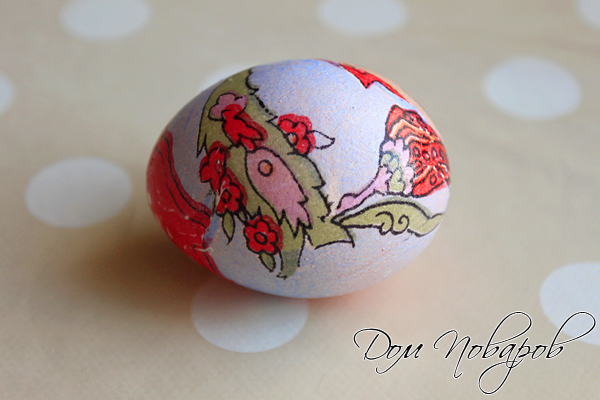
Experienced craftswomen recommend trying to decorate Easter eggs using an interesting decoupage technique. Using this method, you can translate any pattern. Coloring in this way is more time consuming, but the end result is worth the effort.
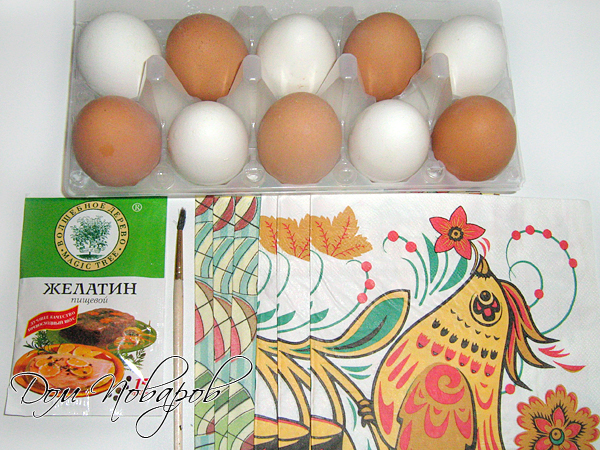
You will need beautiful napkins with a pattern that you would like to transfer to the shell. Previously, you can color the eggs in any way convenient for you, or simply boil them in water, leaving a natural shade.
You will also need gelatin glue, which is very easy to make yourself. To do this, soak the purchased gelatin according to the instructions on the package, drain the excess liquid. The resulting mixture must be heated in a saucepan, without bringing to a boil, until the fine particles are completely dissolved.
Now cut out a pattern or fragment from a napkin and separate upper layer which you will use. Place the pattern on the boiled egg, and cover it with glue on top. Brush movements should be smooth from the center to the edges. Let the drawing dry and enjoy the beauty of Easter eggs.
Master class "Decorating an Easter egg"
To begin with, we take multi-layered paper napkins with a pattern and cut out patterns, in this case this is flowers.

Never smear the first layer with plain water, otherwise the water will dry out and the pattern will fall off.
In any order you like, we attach our flowers to the eggs. Here's what happened in the end.

The master class is taken from the competition work " Easter miracle» by Nina Kuzmenko
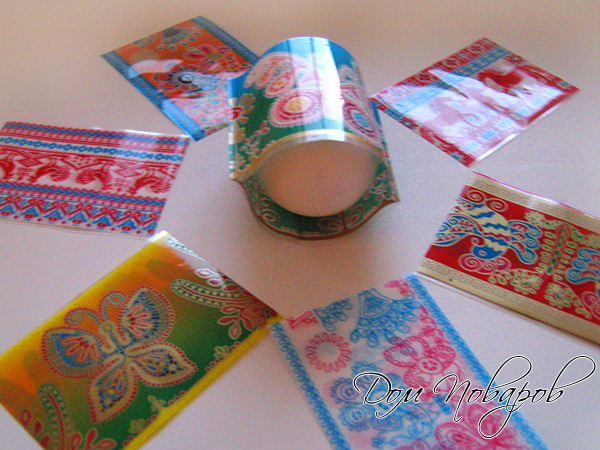
Stickers - thermal films
It is not always possible to devote enough time to dyeing Easter eggs. In this case, purchased thermal stickers come to the rescue. Perhaps this is the fastest and easiest way. Such stickers are made with a wide variety of patterns: Khokhloma or Gzhel, biblical motifs, butterflies, rabbits, cartoon characters, geometric patterns, holiday inscriptions.
Boil the eggs first, put a thermal base on them and place in boiling water for a few seconds. The sticker will instantly wrap around the shell and the Easter egg is ready!
How easy and fun it is to color eggs with little kids
All children love to participate in coloring eggs. Let them be creative. Children's fingers, whatman paper and dyes or paint - that's all you need.


Read more about this master class in the competition article from Anastasia and her wonderful sons.
As you can see, there are ways to color eggs for Easter. great amount. You can choose any option you like or try each for the sake of experiment.
I would like to add at the end that Happy Easter – family celebration. Color the Easter eggs together with your little children, relatives. It is not only easy to do, but also exciting. Touch a piece of beauty with the whole family!
And how do you paint Easter eggs: the old-fashioned way with onion peel or in unusual ways? Be sure to share your experience.
I suggest you read other articles on this topic:
And for all of us a musical gift. beautiful sunny music Wolfgang Amadeus Mozart .
see also


If until recently, eggs were considered the culprits of high cholesterol and atherosclerosis, now this dietary gift of nature is being tried in every possible way to “rehabilitate” and elevate it to the rank of very useful products. Quail eggs are considered especially valuable. If nutritionists are to be believed, these small, speckled eggs are capable of maintaining health and even treating some diseases. Therefore, let's find out how quail eggs can be useful.
The quail egg is distinguished by its low weight, which ranges from 8 to 13 g. The egg shell is light with small dark spots. This product It has high dietary qualities, therefore it is recommended for children, pregnant women, the elderly, as well as people in the period of illness or rehabilitation.
Taking into account the shelf life, quail eggs are divided into two categories: dietary (marked with the letter "D") and table ("C"). Diet eggs are called eggs with a shelf life of no more than 11 days, and table eggs are called eggs, the shelf life of which is from 12 to 30 days.
To inform buyers, eggs are always marked accordingly: class (“D” or “C”) and sorting date.
Quail eggs are always packed in a consumer container - a plastic or cardboard tray.
Useful properties of quail eggs

benefit quail eggs determines their composition. Eggs contain many vitamins and minerals, proteins, fatty acids.
Vitamin complex:

Macronutrients:

Trace elements:

Essential acids:

Essential acids:

Fatty acid:

The benefits of quail eggs:
- Eliminate brittle nails, make the hairline smooth and radiant.
- Strengthen memory, increase the ability to concentrate and learn, especially in childhood.
- Restore immunity and reduce the frequency of seasonal colds.
- Normalize the work of the digestive and nervous systems.
- Improve eye accommodation, increase vision, restore dark adaptation.
- Accelerate energy metabolism, balance the acid-base balance.
- Prevent oxygen starvation of tissues, hypoxia, fatigue, anemia.
- They are a prophylactic against connective tissue dysplasia.
- Normalize sugar levels by increasing insulin sensitivity.
Quail eggs benefits for women
Quail eggs support women Health. They can be used regularly to prevent violations of the reproductive system. Quail eggs are especially useful during pregnancy. The introduction of this product into the diet of a pregnant woman can reduce toxicosis, improve well-being, prepare the mammary glands for breastfeeding. In addition, quail eggs provide a small organism with the necessary substances so that it fully grows and develops in the tummy.
The intake of raw quail eggs in the form of a cocktail is also shown in the second half of pregnancy. In this way, it is possible to get rid of constipation and reduce the exacerbation of hemorrhoids, which often occurs during pregnancy.
What else are useful quail eggs:
- Thanks to the presence fatty acids and proteins, a woman is not disturbed hormonal background. This prevents ovarian dysfunction, early menopause, mastopathy.
- Given the low calorie content, quail eggs do not overload the diet extra calories especially if the woman is overweight.
- In addition to medicinal properties, quail eggs are able to provide cosmetic effect. Due to the content of tyrosine, masks based on quail eggs tighten the skin, improve tone, and rejuvenate the face. Pores are noticeably narrowed on the skin, acne and swelling disappear.
- Applying masks with a quail egg on the hair allows you to moisturize the strands, give them shine and health, and stop their loss.

Quail eggs do not cause allergies, and even, on the contrary, have a calming and anti-inflammatory effect on the skin.
The benefits of quail eggs for children
After the introduction of complementary foods to babies, eggs begin to be introduced into the menu. Preference is given to quail, since they are not allergenic, and their size excludes division into parts.
The presence in the composition of lecithin, calcium, amino acids and most vitamins contributes to the prevention of diseases and the strengthening of children's health:
- Eggs provide normal vision.
- Help the nervous system to fully develop.
- Support the functioning of the digestive tract.
- Promote blood formation, prevent anemia.
- Strengthen bone and muscle tissue, prevent the development of rickets.
- Increase immunity.
- They remove toxins, radionuclides and allergens from the child's blood.
- Improve well-being, relieving migraines, overwork, dizziness.
The benefits and harms of quail eggs for men
Quail eggs not only make a man hardy, stress-resistant, strong and healthy, but also have a beneficial effect on him. male power. Unique mineral composition stabilizes the hormonal background of a man, strengthens his resistance to sexual infections and prevents erectile dysfunction.

Quail eggs provide the body with protein structures, thereby strengthening blood vessels and muscles. And by stimulating the synthesis of male hormones, the blood supply to all organs, including the genitals, improves. As a result of increased blood circulation useful material diverge more effectively throughout the body, which improves erection, patency nerve impulses, sensitivity, sex drive, and sperm quality.

For getting maximum benefit men are recommended to take 3 quail eggs a day raw.
How to check the freshness of quail eggs
In order for quail eggs to be not only healthy, but also safe, you need to buy only fresh goods. It is not difficult to do this. Being at the stage of choosing eggs in the store, first of all, study the expiration date of the eggs. If the eggs are stored at room temperature, they remain fresh for no more than 30 days. Then determine the integrity of the shell: there should be no cracks that serve as a gateway for pathogenic microbes.
If quail eggs have already been bought, you can check their freshness at home:
- Dip the egg in a container of water: if it sank to the bottom, then it is fresh, if it floats, the product is already spoiled.
- Weigh the egg on a kitchen scale: if it weighs less than 7 g, you should not eat it.
- Crack an egg onto a plate: fresh egg will have a dense protein and a whole yolk, if the protein and yolk have spread, the egg is stale.
How long do quail eggs keep

The nutritional properties and freshness of quail eggs are preserved for 30 days if the storage took place in room conditions. Storing eggs in the refrigerator extends their shelf life by up to 6-8 weeks.
How to boil quail eggs for a child

For babies from 7 to 18 months, quail eggs are boiled and yolks are given. Eggs are hard boiled because the runny yolk can cause diarrhea and bloating.
To prevent salmonellosis, eggs are disinfected before cooking. To do this, they are soaked in soapy or soda solution for 3-5 minutes. At the same time, you should not rub the shell, because it is very fragile.
Boil eggs like this:
- Put a saucepan with water on fire, add a pinch of salt, bring to a boil.
- With the help of a spoon, lower the eggs into salted boiling water.
- After 5 minutes, remove from heat, pour cold water.
- Then the eggs are cleaned, the yolk is removed and given to the child in pure form or along with another meal.
Starting from the age of three, a child can be given a whole soft-boiled quail egg. It is cooked in the same way as hard boiled, but you need to keep the egg in boiling water for 2-3 minutes.
How long to cook hard-boiled quail eggs after boiling

To boil a hard-boiled quail egg, you need to wait until the water boils, then wait 5 minutes and remove the container with the egg from the stove. To facilitate the cleansing of the shell, the egg is immediately poured with ice water.
How long to boil soft-boiled quail eggs after boiling
If you need to boil soft-boiled eggs, the duration of heat treatment is reduced. In order for the protein to completely harden and the yolk to remain liquid, the egg after boiling is boiled for strictly 3 minutes.
How many quail eggs can a child
You can introduce your baby to quail eggs at 7 months. You need to start introducing the yolk in the amount of ¼, and then gradually increase the portion. The yolk is given boiled, adding to vegetable puree, milk mixture, cereals.
For babies older than a year, the yolk is given along with the protein. The egg can be served as a steam omelet or as part of a casserole, cheesecake, pudding. At the same time, it is important to comply heat treatment: boil the egg for 4-5 minutes after boiling.
Quail eggs per day:
- from 7 months up to a year - 1 yolk;
- from 1 to 3 years - two whole eggs;
- from 3 to 8 years - 2-3 eggs;
- from 8 to 12 years - 3-4 eggs;
- after 12 years - 4 pieces.
It is unacceptable to give quail eggs to children in raw form, since they can be a source of salmonellosis, pullorosis, and helminths.
Is it possible to drink raw quail eggs
But to consume raw eggs may not be for everyone. If you have a metabolic disorder, a diseased liver, or if you often have allergies, it is better to give up a raw food diet.
Drinking raw quail eggs is best on an empty stomach half an hour before breakfast.
The benefits of raw quail eggs
Raw quail eggs retain all useful nutrients and are 100% absorbed, which makes them indispensable in therapeutic dietology.
In addition to all the properties described just above, raw eggs have pronounced medicinal qualities:
- eliminate headaches caused by migraines;
- stabilize arterial pressure with hypertension;
- facilitate the process of digestion with pancreatitis;
- contribute to the synthesis of hemoglobin in anemia;
- balance glucose levels in diabetes;
- help stop inflammation of the gastric mucosa with gastritis;
- put in order the nervous, reproductive and respiratory systems.
What do quail eggs give the body
If you eat 2-3 quail eggs daily, you can get the following effects:
- improved digestion;
- acceleration of metabolism;
- immunity stability;
- lack of fatigue, pain in muscles and bones;
- normalization of blood pressure;
- improvement of skin, teeth and hairline;
- uninterrupted functioning of the endocrine system;
- full work of internal organs;
- regular hematopoiesis;
- stable functioning of the nervous system.

Quail eggs on an empty stomach benefit or harm
List useful properties quail eggs expands significantly if consumed on an empty stomach:
- If a person is ill with tuberculosis, asthma, bronchitis or other lung disease, eggs improve his respiratory function and help to overcome the disease more quickly. Also, quail eggs can prevent these ailments.
- Quail eggs on an empty stomach improve intellectual properties, in childhood they allow you to fully learn.
- Due to the presence of the entire line of B vitamins, the unequal system can normally perform its functions, preventing the development of nervous disorders.
- Quail eggs perfectly replace pharmaceutical vitamins and minerals, providing the body with everything it needs. Therefore, when eating eggs, there are no problems such as osteoporosis, anemia, alopecia.
- Quail eggs effectively remove all radionuclides and toxic compounds that enter the body from the outside.
- At daily use eggs immunity regularly controls all processes, preventing malignant processes, colds, autoimmune diseases.
However, eating quail eggs on an empty stomach can be harmful if you have liver disease, an allergy to animal protein, obesity, and a tendency to diarrhea.

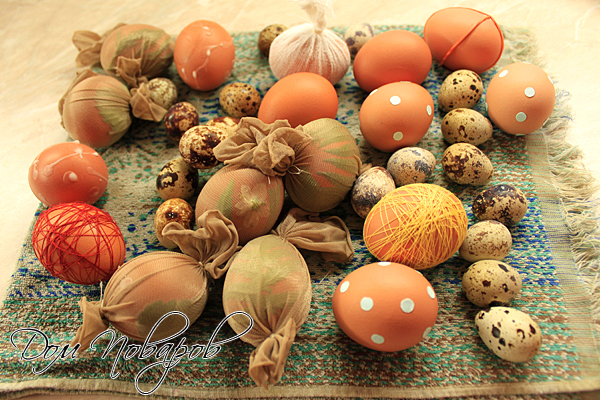
How to dye quail eggs for Easter
Colored eggs are one of the symbols of Easter, but you can paint not only chicken, but also quail eggs. Thanks to their interesting coloring and miniature size, quail eggs look elegant and new, decorating the festive table.
You can paint quail eggs in any way possible - with onion peel, artificial dyes, edible paints.
How to dye quail eggs with onion skins
- Take the husks of 15 onions and 1.5 liters of water, cook for 40 minutes.
- Then strain the broth, cool, add 20 g of salt.
- Immerse the eggs in the broth and simmer for 15 minutes over low heat.
- Leave the eggs in the broth until cool, then dry and cover with a layer of oil for shine.
If the uneven color of the shell bothers you, immerse the egg in water with vinegar (1: 1) for a while until all the spots disappear.
How to dye quail eggs with dyes
- Hard boil the eggs.
- Dissolve dyes in hot water according to the instructions in the manual.
- Immerse the eggs in the dye liquid for 3 minutes.
- Then lay them out on a napkin and, after drying, grease the shell with oil.
To obtain an unusual color, the eggs can be pre-wrapped with threads, gauze, or with the help of a protein, glue a leaf, flower, cereal. Then you need to immerse the egg in the dye, and when the shell is colored, remove the glued structure.

How to replace chicken eggs with quail
Quail eggs can be easily replaced with chicken eggs. In dishes, they will show the same properties and taste qualities while increasing them biological value. Most culinary specialists agree that quail eggs make some dishes more tender and refined, especially salads and pastries. But to get the desired result, you need to follow one rule: follow the recipe exactly and choose the right amount of quail eggs.
One chicken egg is how many quail
Perhaps the only difficulty that arises when replacing chicken eggs quail, this is the calculation of the need for the amount of new product. There is no exact way out of this situation, because all eggs are different in size, so the number of eggs is always relative.
Based on the fact that average weight 55 g of a chicken egg, and 10 g of a quail egg, then 5 quail eggs are taken per chicken egg.

The temperature of incubation of quail eggs at home
If you are going to breed quail chicks from the testicles, you will need eggs that are no more than 10 days old. They had to be kept at a temperature not higher than + 15⁰С, otherwise the percentage of young animals would be scanty.
After laying eggs in the incubator, you must observe the temperature regime presented in the table:

At low temperatures, the chicks will not be able to hatch on time, and if there is an insufficient level of humidity, the eggs will dry out. If all the conditions have been met, the first brood will appear on the 16-18th day.
Quail eggs - indispensable product, which will support your health and add variety to your daily menu!
If dishes are prepared for family and guests, then eggs are presented to all acquaintances and strangers. From children who bring the news of the Resurrection of Christ in the morning to work colleagues. "Christ is risen!" - they say at the same time. "In truth, he has risen!" - hear in response and get a testicle in return.
What are Easter eggs?
Interestingly, dyed Easter eggs have their own names, depending on how the eggs were dyed. Krashenki are plain eggs, krapanki are eggs covered with multi-colored spots, which are obtained with the help of droplets of wax. And if we paint the eggs and scratch out the drawing, then we get a drape. Separately, it is worth noting the Easter eggs. This is not just an Easter attribute, but a work of art! Drawings on eggs are made with a special tool - a scribbler.
The article is collected as known ways painting eggs, which everyone knows very well, but perhaps they forgot the nuances, and more interesting and “unhackneyed”. In addition, we will talk about quick options beautifully paint eggs with the least labor, about methods of decorating them that you can do with your child, and about such original ways where fantasy can be let go in free swimming and expect excellent result! For convenience, all 20 methods are divided into thematic blocks.

Key to start - preparing eggs for painting
Whatever method you choose, it is very important to properly prepare for the process. The result will directly depend on this. Here are a few secrets that will help eliminate possible "pitfalls" that await those who do not know them. And you can order all the ingredients you need, including eggs, in the Instamart service, there is an application for android and iphone - the first delivery is free.
- First: never start boiling eggs without first taking them out of the refrigerator at least an hour or two before coloring. Eggs must be at least room temperature so that they do not burst during cooking. You can prevent the explosion of eggs in another way. They need to be pierced with a thin sharp needle. However, the first option is much easier and safer.
- Second: when cooking, add 1 tbsp. l. table salt per 1.5-2 liters of water. It is believed that this is done so that the shell does not burst. In fact, it is correct to say that salt will prevent the protein from leaking out and forming white “growths” if the shell suddenly cracks.
- Third: the eggs should be thoroughly washed, perhaps even using a dish sponge. This is done so that the paint lies more evenly. You can also wipe the testicle soapy water or alcohol.
- Fourth: you can paint eggs for Easter not only chicken, but also quail. It turns out very interesting and unusual! We also pre-keep them at room temperature, rinse and cook for 4-5 minutes.
- Fifth: in order for the paint to hold better, vinegar (9%) is added during the dyeing process. On average, 1 tbsp. l. for 1.5 l. water.
- Well last tip how to give already colored eggs holiday look. Rub them, after wiping dry, vegetable oil.

How to dye eggs in onion skins
First: classics of the genre - onion peel and its variations
The traditional crimson, brown or dark yellow eggs are obtained by dyeing them with onion skins. In this case, it is used as a husk of the usual onion, and red. When calculating the color, you can focus on such a hint. If you take the husks of 8 onions for 2 glasses of water, you get a red-brown color.
- Prepare the dye solution. To do this, pour onion peel into a pot of water.
- Bring to a boil and simmer for about half an hour.

- Let the broth cool down. During this time, he will insist.
- Strain the "paint", discarding the husk.

- Immerse the prepared eggs in the solution so that it completely covers them.
- Boil the eggs in onion broth over low heat "hard boiled", that is, 12-15 minutes.
- Cool them quickly with cold water to make it easier to peel off the shell.
- If the eggs have not received the desired shade during this time, return them back to the coloring solution.
Second: a tandem of husk with brilliant green
Very interesting option- maroon-green or brown-brilliant eggs. For their execution, you will need onion peel, brilliant green (standard vial, 10 ml per 1.5 l.), nylon stocking (or gauze), gloves (to protect the skin of the hands from brilliant green).
- Mash on small pieces husk. You can also grind it in a blender.
- Washed eggs, while they are still wet, roll in the husk so that its pieces stick to them.

- Firmly fix the husk on the eggs with a nylon stocking.
- Put them in the boiling water.
- Add brilliant green to the water.

- Boil the eggs until hard boiled (12-15 minutes).
- Now pour them over with ice water and free them from capron.
Third: coloring in the husk with patterns
You can diversify the coloring with onion peel if you first apply a patterned figure to the egg and fix it with a piece of nylon. At the same time, to obtain a pattern, you can take what is at hand. For example, parsley, parsnip, dill, peppermint, fresh or dried flowers. Dry material must first be soaked with hot water, and then applied to the egg.

The chosen motif - a leaf or flower, tightly fix with a nylon stocking (or bandage, gauze) and carry out standard staining with onion peel. Then remove the stocking, remove the stencil for the pattern, and an egg painted with onion peel, but with an imprint of a leaf or flower in the natural color of the shell, will appear.
By the same principle, you can decorate the dot with chaotic dots of the color of an unpainted shell. To do this, roll a wet egg before painting with onion peel in rice, crushed peas or millet, or attach a piece of lace to it. Fix the croup or lace patterned motif with stocking capron. 
You can get a variety of patterns without using a fixing material:
- for straight lines in the natural color of the shell on the egg, put rubber bands on it for money;
- any pattern can be made from masking tape, plaster, self-adhesive paper, or simply paint the egg with wax crayons;
- eggs in the "cell" will turn out if you put on them mesh stockings or a vegetable mesh.
Methods with dyes - natural and not very
Fourth: gifts from nature - natural dyes

- Pour water into a 1.5 liter saucepan and put a natural pigment - the source of color.
- Bring to a boil, let it boil a little and leave to infuse for half an hour.
- Strain the broth, pour in 1 tbsp. l. 9% vinegar and put eggs in a saucepan.
- Simmer over low heat until at least tender (12-15 minutes). If the color is taken poorly - up to half an hour.
- If the coloring is not successful even within half an hour, leave the eggs in a saucepan with a coloring solution overnight.
Fifth: a scientific alternative to natural dyes - food grade dyes
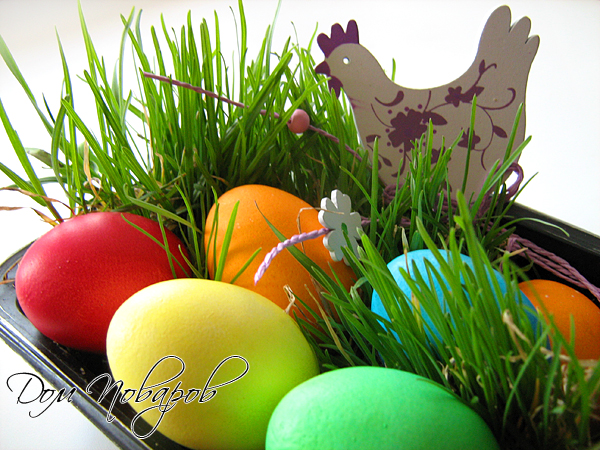
Multi-colored eggs on young grass, what could be fresher and more attractive for Easter? To make them quickly and without special trouble, you can buy in the store special easter set. When choosing it, please note that dyes are different according to the method of application.
One of the options is precisely the paint that needs to be applied directly to boiled egg. The other is a powder or tablet for diluting a colored solution. Eggs are lowered into it and kept there until the paint is taken.
The staining method must be indicated on the dye packaging. There is nothing complicated in using ready-made liquid paint. It is applied to the prepared egg, evenly distributed and allowed to dry. The method of coloring with water-borne dyes in the general case looks like this:
1. Boil the eggs.
2. Pour 1 tsp into narrow deep containers (for example, glasses or tea cups) with cold water. vinegar (9%) and dilute the dye.
 |
 |
3. Put eggs in them. The solution should cover them.
4. Keep them there until they are stained.
5. Dry the dyes.
Sixth: with the world on a string - a colorful egg

A riot of colors in one egg is a method of dyeing with floss threads. Very simple and beautiful:
- Wrap multi-colored floss threads on a raw, room temperature, pre-washed egg. Combine colors and arrangement of threads as your fantasy tells!
- 2. Boil them in the usual way to the state of "hard boiled" (12-15 minutes).
- 3. Remove threads.
Seventh: fabric translators
Translate beautiful pattern from cloth to egg? It is quite possible. Just take the choice of fabric seriously. In our age of an extremely developed chemical industry and the desire to reduce the cost of things at any cost, you can run into a fabric dyed by chemical means. Despite the beauty of the drawing on it, it is better to refuse to use it. Examples of permitted material are a Pavloposad shawl or a silk tie with an interesting pattern.
- Place the selected fabric with the right side on the egg. Secure it by stitching along the contour.
- From above, you can additionally fix the matter by wrapping the egg with a nylon stocking or white cotton cloth.


- Add 9% vinegar (3 tablespoons per 1.5 liter saucepan) to the cooking water and boil the hard-boiled eggs (12-15 minutes).
- Drain the water, cool the eggs and free them from the tissue. The drawing should appear with gentle contours on the shell.
We paint with the children

Both adults and children look forward to Easter with the same impatience. Give the kids the opportunity to make a beautiful craft egg and give it to, for example, grandparents. Being engaged in such creativity, we encourage the children's desire to make beautiful things and give it to loved ones. Moreover, it is very interesting and fun!
Eighth: craft egg

From krashenka you can make a perky chicken:
- Color the egg yellow food coloring. Although chickens can be of other colors: blue or pink, for example. Even a child from 3 years of age can cope with coloring with colored powders or tablets diluted in water. Of course, under the supervision and strict guidance of an adult.
- Cut out details for decorating a chicken from colored paper: eyes, wings, tail, beak, scallop. And also: a bow - if it's a girl or a bow tie, a tie - if it's a boy. You can also use decorative fluff from a needlework store. It turns out cool and very cute!
- Use gelatin glue to fix the prepared parts. To do this, soak the gelatin as indicated on the package. Drain excess liquid, and heat the granules until they dissolve. It is not necessary to bring to a boil.
- Apply gelatin glue with a brush on the details, the egg and gradually turn it into a chicken!
Ninth: funny faces
Show your children that you can draw on the egg in an unusual way. But since this is a product and it is then eaten, the paints must be natural. For example, it is very easy to make an edible "gouache" from cocoa powder. She can draw the face of an animal, the face of a funny weirdo, or even a portrait. Eyes can also be depicted, but it will be more interesting to glue ready-made ones from a needlework store. 
- Boil the eggs. If necessary, color with food coloring, for example, if you are making a lion's face - yellow.
- Pour a little cocoa into a tablespoon warm water to the thickness of sour cream.
- Put the finished eggs on stands, for example, on lids from plastic bottles, and draw.
- Let the chocolate gouache dry.
- Then glue the eyes with gelatin glue if they do not initially have an adhesive base.
Tenth: wax crayons (pencils)
This is the way for children school age. Since you have to work with a hot, freshly boiled egg.

- Take them out of the pot, pat dry with a towel.
- Place the egg on a stand, such as a bottle cap.
- Start applying wax pencils drawing. The wax will diverge from the heat and create bizarre transitions, overflows. Choose colors carefully!
- You can paint eggs in this way not only with pencils, but also with the help of sprinkling with wax crumbs. To obtain it, crayons are rubbed on fine grater. And then poured onto a hot, freshly boiled egg.
- And another way to decorate with wax crayons is to melt them and dip an egg into it.
Time saving
When a woman is not only a housewife, but also the main earner in the family, there is not so much time for home life. Moreover, Easter eggs are painted on Maundy Thursday. Until the weekend, this activity is not postponed. Therefore, in the absence of time, you can resort to "quick" ways to make Easter eggs.
Eleventh: thermal film stickers
Once and done - this is about one of the easiest ways to create an Easter mood using thermal stickers. How beautiful they are: with Gzhel-style painting, Khokhloma, with intricate patterns, butterflies, flowers, church plots, as well as rabbits, kittens and even children's cartoon characters! If you plan on using thermal stickers, choose smaller eggs. Otherwise, they simply will not enter the thermal basis. Stickers can be applied to unpainted boiled eggs, and you can also use them as a fallback option, if the shell cracked when painted with husks.
Please note: eggs in thermal stickers are stored less than, for example, dyed with husks or food coloring.
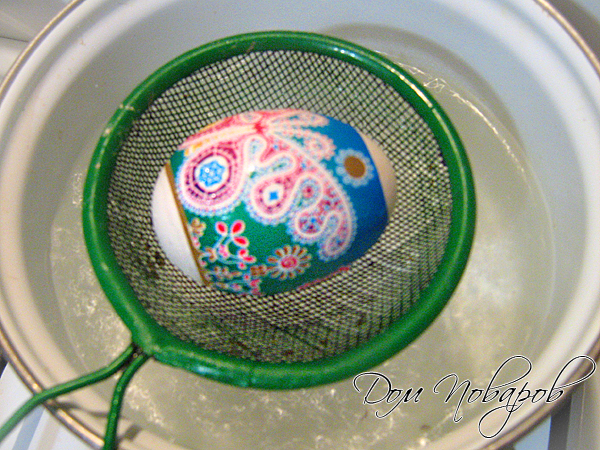

- Boil the eggs in the usual way.
- Put the thermal base on the egg and put it in a strainer.
- Dip the strainer in boiling water for a few seconds. As soon as the thermal sticker "hugs" it, pull it out.
Twelfth: holiday attire
Being one of the most important easter symbols, the egg requires an appropriate attire. So far, we have talked about its color, but you can do it differently. boiled egg just wrap it in bright foil. Voila! And it is in the spotlight. And in addition, it will be decorated with exquisite decoration. 
- Boil the eggs.
- Cut multi-colored foil (sold in stationery stores) into rectangular pieces of such a size that it is enough to wrap an egg.
- Prepare decor elements or just use confetti.
- Wrap cooled eggs in foil. Attach decor to them with glue.
flight of fantasy
If standard traditional ways coloring eggs seems boring and monotonous, let your imagination fly and follow it like a white rabbit.
Thirteenth: the power of the rainbow
This method is a variation of food coloring. The combination of colors, the depth of staining, the number of layers ... All this is chosen individually. Therefore, such dyes are 100% original. However, in order for the eggs to turn out like in the picture, you need high-quality dyes that give saturated colors. You need to breed them, following the instructions. Another tip: you need to start with light tones, gradually resorting to darker and darker ones, and finish with the darkest ones. 
- Boil the eggs.
- Take one and paint it completely in the lightest color.
- Dip the painted egg into the paint a tone darker, but not completely, but up to half.
- Wait for the paint to take. Then dry it.
- Then do the same, applying paint in layers.
Fourteenth: eggs "on style"
Easter, originally a religious holiday, has now become more secular. Therefore, eggs are not only traditionally painted red or a pattern corresponding to the holiday is applied, but they also approach this activity more simply and creatively. For example, eggs will be stylish if you apply a pattern to them with a permanent marker. You can come up with a coloring book yourself or get ideas from the Internet.

- Boil the eggs, be sure to hard boil.
- Set them on stands and apply the chosen pattern with a permanent marker.
- After finishing work, let it dry. This will take approximately an hour.
Fifteenth: stencil work
This method is relatively traditional. We find a stencil, apply it to the egg, paint it with natural or food coloring. A flight of fancy should manifest itself in the choice of a stencil. Here everyday experience, information from books, magazines, the Internet can come to the rescue. Or maybe you have family symbols. The main thing to remember is that the selected color and stencil should be in harmony with each other. 
- Choose a stencil pattern.
- Apply it to ultra-thin paper (tracing paper).
- Moisten the paper so that it becomes plastic and can be easily applied to the egg.
- Firmly fix the attached stencil on the egg with a nylon stocking or bandage (gauze).
- When the preparation for coloring the eggs is completed, do it in any way: onion peel, food coloring. Only if the eggs are dyed with onion skins, they do not need to be boiled first. And if the method of coloring with food coloring is chosen, then they must be pre-cooked “hard-boiled”.
- Remove the fixing material and stencils from the finished cooled eggs.
Sixteenth: marble effect
Artistic flair will be needed for those who decide to paint eggs in marble color. It is not difficult to do this. The main thing is to choose colors beautifully and purchase high-quality dyes. 
- Boil the eggs.
- Color them in a light-colored dye: yellow, orange, blue. Let dry.
- Dilute in a deep narrow container (in a glass, tea cup) a dark-colored dye: purple, brown, dark blue. Add 1 teaspoon to each cup of dark solution. vegetable oil. Stir so that a spoonful of oil disperses into many small oil droplets.
- Dip light dyes in dark dye. It's ideal to do it once.
- Let dry. Marble eggs are ready!
Options for decorating ready-made dyed eggs
If the simple coloring of eggs is not enough and the soul asks for an artistic continuation, choose one of the proposed options. Turn paint into a work of art!
Seventeenth: 3D decor
Quite laborious, but worth it way. To decorate eggs, you need wax or paraffin candle, as well as a variety of cereals, small pasta, confectionery dressing and whatever else your heart desires. 
- Take the finished dye.
- Light a candle and use melted wax (paraffin) to apply a pattern on it. Do it very carefully. The flame should not touch the shell, otherwise a gray trace of soot may remain.
- Roll the egg in the material of your choice. You can also put decorative elements on the adhesive base with your hands.
- When the work dries, you can grease the decorated surface with vegetable oil for a more presentable look.
Eighteenth: sugar lace
Eggs in voluminous lace are very stylish, festive and go well with any traditional pattern on krashenka. To make them, you need powdered sugar (about a glass) and water. If powdered sugar is not at hand, you can make it yourself. For this you need granulated sugar and coffee grinder. 
- IN powdered sugar slowly pour in water so that a white mass of thick consistency is obtained.
- Place the decorative sugar mass into a confectionery syringe.
- Take the finished dye.
- Put a pattern on it.
- Let dry.
Nineteenth: decoupage technique

In order for a picture to appear on the dye, it is not necessary to apply a thermal sticker on it or transfer the pattern from the fabric. You can remember about the decoupage technique. It is designed to decorate not only plates and furniture, but it can also be transferred to the plane. Easter decor. To do this, we will have to use beautiful napkins or their elements and gelatin glue. To prepare the glue, gelatin is soaked according to the instructions on the package. Then the excess moisture is drained and heated, without bringing to a boil, until the granules dissolve.
- Take a pretty napkin. Tear out with your hands (without using scissors) an interesting fragment. Remove the top layer - we will use it.
- Prepare gelatin glue.
- Apply the selected fragment to the dye.
- Apply gelatin glue over the napkin with a brush. You need to do this from the center to the edges.
- Let dry.


Twentieth: drapanki
Colored eggs with a white pattern can be made not only by applying a stencil. The pattern can be scratched on the surface of an egg painted with onion peel with a clerical knife or a thick, sharp needle. This method is laborious, but applicable when it is planned to make a thin, elegant pattern on the egg, which is difficult to achieve by applying a stencil. 
- Make dye with onion skins.
- Draw a pattern on it with a simple pencil. You can do without it if you feel confident or your hand is full.
- Walk along the line drawn with a pencil with a clerical knife, scratching the outline.
Easter is a family holiday that gives hope for the future and faith in a miracle. Touch and you a piece of beauty - choose the way you like and paint the eggs for the Easter table. There is only one minus in dyeing eggs according to the methods described. It can turn out so beautiful that it will be a pity to eat!
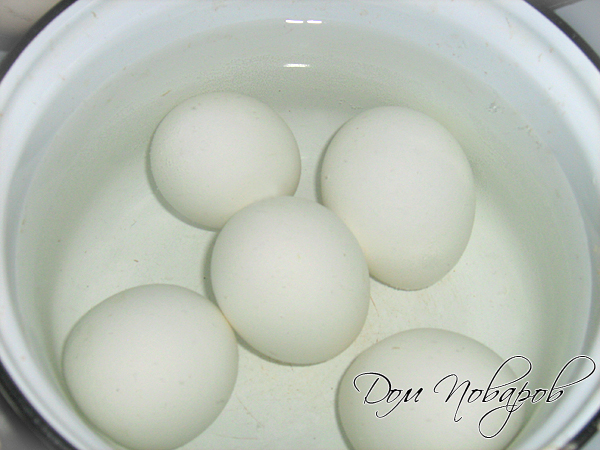
Decorate Easter table original eggs very simple, just take on the experience of antiquity. I will tell you how to paint quail eggs for Easter in an original and beautiful way. We will paint with nettles. This process is easy, at home even a man can cope with painting krashenok with natural paints.
You will need:
1. A dozen quail eggs.
2. A couple of bunches of fresh nettles. If there is none, then take dried 100-200 grams. I left a small one for a 2-liter pan plastic bag freshly picked nettle herb.
Coloring quail eggs for Easter with nettles
We put on gloves, wash the nettles under running water. Then we load it into a saucepan, press it with our hands, tamp it down and fill it with water for 2/3 of the container. We send it to the gas, cook over low heat, as the water boils, about 25 minutes. Turn off, let the broth cool down.
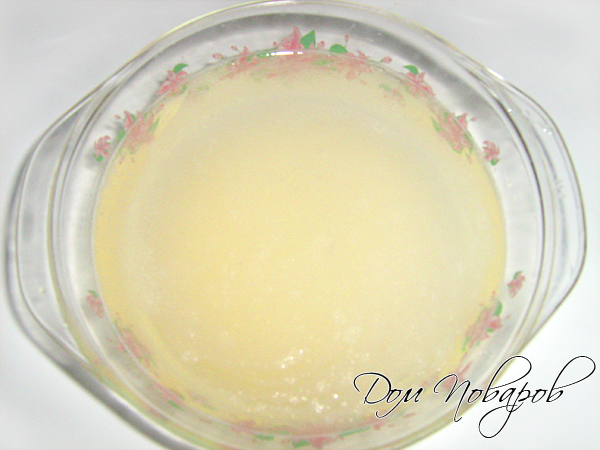
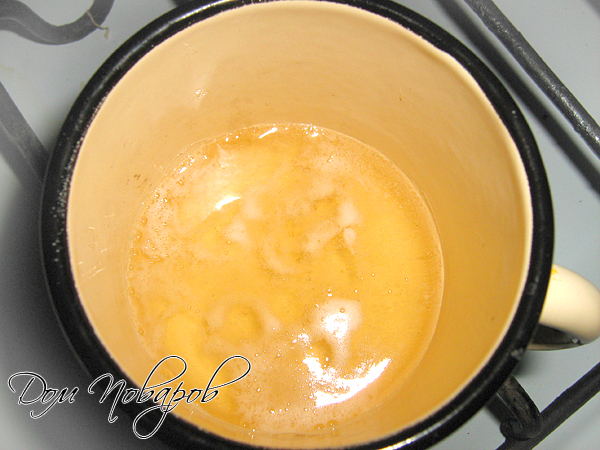
Meanwhile, wash the eggs. And carefully place in the cooled broth, covering with nettle leaves. We put on fire and cook for 10-15 minutes after boiling. 

Then we get it with a slotted spoon. Let dry, rub sunflower oil. Everything is ready, you can go to consecrate Easter food in the church. Just remember, consecrated eggs are not thrown into the trash, the shells are burned or buried in the ground! 
Such original quail eggs for Easter, hand-painted with young nettles in marble-green color, will be an excellent gift for loved ones and will decorate the Easter table in a new way. Also find out.
Look how cute, bright miniature eggs!
Kids love these Easter eggs. Do you know how many pluses there are in not chicken eggs, as usual, but quail ones!

- Firstly, the mini-speckled krashanochki look very nice and original!
- Secondly, they can be eaten by those who are allergic to chicken eggs (but be careful, as there is an allergy to quail eggs).
- Thirdly, quail eggs are small and therefore it is very convenient to decorate Easter dishes with them.
Can be put in a sweet "nest" - easter flower; you can decorate them with a cottage cheese pasta ... There are a lot of ideas!
Let's make such unusual krashankas for the holiday!

We will need:
- quail eggs;
- various dyes.
It's very easy - the principle is the same as when painting chicken eggs. Just keep in mind that tiny quail eggs boil faster.
We paint with onion skins
In the evening, soak the onion peel in water, or, if you need to quickly, steam the peel with boiling water, let it stand for half an hour. Then we lower the eggs into the pan with the husk and cook for 3 minutes after boiling. So that the shell does not crack, the eggs should not be from the refrigerator, but at room temperature. You can add a teaspoon of salt to the broth. It turns out dark orange, brown, brick-colored eggs.
And if you want colorful...
Coloring with dyes
We breed in glass jars food colorings for eggs, according to the instructions indicated on the package (250 ml of water at a temperature of 70-90C), add 1 tablespoon of 9% vinegar (to fix the color), gently lower the eggs with a spoon and hold for 1-2 minutes.

And then we catch it with a spoon and put it on paper napkins to dry. Be careful, at first the dyes can stain both your hands and dishes, so we put them on napkins :)
If you do not trust dyes, but you want to please the children with multi-colored quail eggs, there is an alternative - natural dyes.
- Red-brown - onion peel;
- Pink - beet juice;
- Orange - carrot juice;
- Yellow is turmeric seasoning powder, it must be diluted in water and eggs boiled in this water - but turmeric paints bright yellow not only the shell, but also the dishes, so take the one that is not very sorry.
- Green - spinach juice, parsley;
- Blue - red cabbage, it needs to be grated, boiled and added baking soda;
- Lilac - the same red cabbage, only you need to add not soda, but vinegar.
Natural dyes do not give such bright colors as artificial ones, but they are natural.
You can collect a whole rainbow!

Happy Easter to you!


