How to cook pork jelly so that it is transparent. Simple jellied meat recipes
 Favorite domestic Russian dish- aspic. It is prepared from different types of meat and even fish.
Lovers of this dish do not stop at one type and continue to invent. Almost everyone has it on the table at almost all holidays. Unfortunately, jellied meat is prepared less frequently these days.
Many housewives cannot cook it so that it turns out delicious. However, do not forget about such a delicious dish.
1. Choose your meat carefully at the market or in stores..
The main ingredient is the pig's legs, that is, their lower area that ends in the hooves. These invisible “particles” guarantee complete hardening. Then you can add other meat as you wish.
The meat should have veins and skin, which promotes rapid hardening. Pork legs should be in any jellied meat!
2. Toss the meat in liquid before cooking..
This procedure will help remove remaining blood from meat product. Soaking will make the skin softer, then it will easily peel away from the meat. To do this, take the saucepan in which you want to cook the jellied meat. 
The meat should be completely covered with liquid. Leave it to soak overnight. Soaked meat, namely the legs, must be scraped diligently.
If there is skin, you need to clean it from the remaining particles of meat. To do this you will need a small paring knife.
3. When boiling, the first liquid must be drained. This procedure will make the jellied meat transparent and low-calorie. You will no longer feel the specific greasy taste.
After draining the broth, rinse the meat under water, which will help remove small protein residues stuck on. Now fill it with liquid again so that it is 2 cm more from the meat. Do not pour any more, otherwise the jellied meat will not boil away during cooking, and then it will not harden.
If there is not enough liquid, you will have to add it, which will not give the jellied meat a normal consistency. For transparency, do not bring to a strong boil.
It takes about 6 hours to cook on low heat. Then it will turn out appetizing and will harden without adding.
4. Add seasoning spices the right way.
After 5 hours of cooking, add whole carrots and onions for flavor. Just don’t peel the onion, but rinse it. Thanks to it, the broth will taste pleasant and golden.
Jellied meat is salted after 5 hours of cooking, but not immediately. This way you can over-salt it, because it boils away and concentrates. Before turning off, add laurel and peppercorns 30 minutes before turning off.
5. Divide the product correctly.
After finishing cooking, take the meat into any container and filter the broth with a colander. Discard the carrots and onions. Slowly separate the meat from the bones, then cut it. Pass the garlic cloves through a press. This will place it more evenly.
Save the skins with cartilages - they thicken the jellied meat. Finely chop and mix with meat. Place on plates and pour in broth. Stir until the broth becomes cloudy.
6. Select required temperature
. The jellied meat will not freeze either in the kitchen or on the windowsill.
It is also not recommended to take it out into the cold, because the frozen dish will lose its properties. Maybe try taking it out onto a glassed-in loggia with insulation.
To ensure that the product freezes perfectly, place it on the middle shelf of the refrigerator.
You can place the trays tightly, but after cooling and covering them with a board. It should harden within 5 hours.
Make sure that the hot jellied meat does not hold the lid together. Do not immediately remove the lard from the surface of the dish. It protects the dish from “chapping”.
A big plus goes to those who know how to cook jellied meat without adding any auxiliary components. Gelatin or agar will not make the dish natural.
You can cook this way, but the real dish must harden on its own, with the help of properly prepared broth.
The meat should be solid, and light meat indicates that the pig is young, and the broth will not be rich. Be sure to check if the leg is singed and cleaned.
Pork knuckle is perfect for gelling jellied meat. For this purpose, small hoofless legs that do not have bristles are taken.
They have no meat, but in their bones, tendons and skin there are properties that give necessary taste broth.
For beef dish take drumsticks that contain tendons and cartilage.
For chicken dish you need wings, legs and a head. Only the wings have enough gelatin to set.
Pour in the liquid and cook the wings for about two hours, the shanks and shanks for about three. After this, the main meat is added, the chicken is cooked for an hour and a half, and the beef and pork for two hours. 
10 minutes before the end of cooking, add a bay leaf, peppercorns and salt into the broth.
You need more salt than for soup, because it is not noticeable in a cold dish. The salty jelly should compensate for the blandness of the meat.
The dish can become crystal clear when prepared with aspic with quickly dissolving gelatin.
Real jellied meat should not be very transparent. It cooks for a long time, the real gelling properties come out of the cartilage, and the broth becomes cloudy. However, it is possible to make jellied meat more transparent.
Don't let the broth boil too much. While cooking, gradually remove any fat and protein flakes that float to the top. To get a taste of the beauty of the broth, throw vegetables into it.
Carrots, parsley root and onions are perfect. You can also add washed onion skins, then the jellied meat will turn out golden.
Cook the broth without a lid, which will improve the taste and prevent it from becoming cloudy. In a couple of hours there will be less liquid, so take a rather large container and pour three times more liquid than you want to get.
The finished broth must be filtered. To do this you will need more than one layer of gauze.
 Jellied meat recipe for a 5-liter container
You need to take one pork leg and drumstick, 400g of any meat, the same amount of chicken, one carrot, onion, garlic, one pepper, laurel leaf and allspice.
- Wash the drumstick and leg thoroughly, pour over it, and place on the stove.
- After boiling, the water must be drained, the meat washed and put back to cook.
- After half an hour has passed and the liquid has boiled, add the rest of the meat.
- After 2 hours and 30 minutes, add chicken, onion, carrots, salt and pepper.
- Cover the container and cook for another hour.
- Disassemble the meat and place it on the bottom of the plate grated garlic, then fill with filtered broth.
Remember that without the “pork leg + knuckle” combination, the jellied meat will not turn out tasty and properly prepared. It hardens very quickly.
An important rule - be sure to drain the first liquid. Doctors say that this way hormones, antibiotics, and other additives unnecessary for our body are removed.
Do not take stale legs or meat from long-lived animals, otherwise the taste of the dish will deteriorate.
When buying frozen legs, pay attention to the shade. They should be the same, light shade without defrosting marks or spots.
When choosing meat, be sure to smell it. If it is fresh, it should smell sweet and pleasant.
Avoid meat that smells like ammonia or old fat. The jellied meat will spoil and will not be tasty.
If you can, try adding venison or duck meat to the jellied meat. The dish will turn out to be unusual and interesting in taste.
Jellied meat is not only a traditional holiday Russian dish, great snack To strong drinks, but also very useful product. The fact is that jellied meat contains natural gelatin, which every person needs for the health of bones, cartilage, and tendons. Both children and adults need it, especially the elderly.
Each housewife prepares jellied meat in her own way. Particularly carefully selected starting products— someone buys hooves, someone loves the tail, and someone cooks jellied meat from the ears. There are lovers of jellied meat made exclusively from poultry, and specifically from rooster. Of the mandatory seasonings, we can only name Bay leaf, peppercorns and salt, and then - whatever you like. Jellied meat can be watery, where there is a lot of congealed broth, or meaty, where meat predominates. For beauty, greens, carrots, lemon, chicken and quail eggs are added. It turns out not jellied meat, but a work of art!
But everything can be ruined by the dark and cloudy broth. Sometimes this happens to the broth, which should be crystal clear and transparent, like a tear darkens. And this real tragedy, because appearance jellied meat with such a broth will be completely unpresentable.
To prevent this from happening, you need to cook the jellied meat correctly.
The meat must be washed well, cleaned, trimmed if necessary, and singed. Sometimes housewives prefer to let the meat boil quickly, then drain the water and foam, rinse the meat again, and only after that put the jellied meat to boil. But you can cook jellied meat the first time. In any case, after boiling it should cook barely, at the very minimum heat. You can leave it to boil overnight, then it will be ready by morning.
The pan must be covered with a lid; it just seems like there is no boiling, but in a few hours without a lid, half of the broth will have time to evaporate. It is very important not to disturb the jellied meat and when it is ready, you need to move the pan as carefully as possible to a convenient place and slowly drain the broth using a ladle or hose, then the sediment will not float up. Afterwards, the cold broth is additionally filtered through cheesecloth to remove excess fat.
How to clarify broth if it is cloudy
But if the broth still becomes cloudy, then do not despair. It can still be saved and brightened. To do this, separate the cloudy broth from the sediment, strain it through several layers of gauze, let it sit for a while. Pour the dark broth into a clean saucepan and slowly bring it to a boil.
In a bowl, beat 1-2 chicken squirrel with ice and pour into the boiling broth in a thin stream. The protein will begin to coagulate and take with it the smallest particles of suspension, which makes the broth cloudy. Let the broth for jellied meat cool; the protein will settle to the bottom in the form of sediment. All you need to do is carefully pour off the clarified broth.
Delicious clear jellied meat made from beef, pork or chicken, with mustard or horseradish - this dish is difficult to refuse even for those who count every calorie on their plate. But, unfortunately, preparing jellied meat yourself so that it hardens, is tasty, transparent and beautiful, unfortunately, is not always possible and not for everyone. So, how to make the perfect jellied meat that claims to be a culinary masterpiece?
Not every housewife will undertake to make tasty and beautiful jellied meat. Some are afraid that the jellied meat will not freeze. Others, despite attempts to cook jellied meat, instead of appetizing, tasty and transparent, get cloudy, unattractive in appearance, or even inedible. It’s very disappointing when you’ve been cooking and boiling all day, but the jellied meat has not frozen, or it has frozen, but there is a dregs in the plate of an indeterminate color, and the carefully cut out figures from carrots, laid out peas with herbs, etc., are simply not visible. After all, it’s not enough to be able to decorate jellied meat beautifully – first you need to cook it properly. Let's start with this.
____________________________
Content:
2. Recipe for homemade jellied meat (prepared meat):  |
3. Recipe for jellied meat in a pressure cooker (prepared meat):  |
|
4. Recipe for Italian aspic with tongue:  |
5. Recipe for pork and turkey jellied meat:  |
6. Jellied eggs (jelly with gelatin in the egg):  |
7. Homemade recipe chicken jellied meat:  |
8. Festive jellied meat with tongue (aspic):  |
9. Chicken jelly recipe:  |
10. Chicken giblet jelly:  |
HOW TO COOK TRANSPARENT JELLY SO THAT IT FROZES?

This dish was inherited from our distant ancestors. The hunters took it with them in birch bark bags. When the hunter stopped for a rest, he either ate the frozen jellied meat, if it was impossible to light a fire, or turned the jellied meat over the fire into meat rich broth, which could satiate and warm. In those days they hardly thought about the transparency of jellied meat. Yes, in fact, there was no point in decorating the jellied meat beautifully then.
Now the housewife, when preparing jellied meat, cares not only about its taste and nutritional value. The jellied meat must be transparent and beautifully decorated. And of course, for the jellied meat to freeze, it is not necessary to put gelatin in it. It is enough to add the “correct” meat components that are actively involved in hardening. The best option perform pork feet, beef shin and chicken legs and wings - in general, those parts of the carcass where there is cartilage and tendons. But you can spoil jellied meat even by choosing the right meat. There are a number of rules, following which you can easily prepare delicious homemade jellied meat, transparent and fragrant. So, how to cook jellied meat correctly.
Rule one: CHOOSE THE RIGHT MEAT
One of the most important ingredients of jellied meat is pork legs, or rather, their lowest part, ending with the hooves. It is these unsightly pork “spare parts” that guarantee that the jellied meat freezes.
The rest of the meat can be added to your liking: chicken, turkey, beef on the bone, pork (shank - great option), or all together. In order for the jellied meat to freeze, it is desirable that the meat has skin and veins. But, no matter what jellied meat recipe you prefer, pork legs are a MUST!
Also, in order for the jellied meat to freeze, certain proportions must be maintained, approximately 1:2. That is, for a pair of legs weighing 700 grams you need to take no more than one and a half kilograms of other meat. Too much meat can, oddly enough, harm the jellied meat - it simply won’t harden.
Rule two: BE SURE TO SOAK THE MEAT BEFORE COOKING
This procedure is important not only for hardening, but also for cooking transparent jellied meat. Remains of coagulated blood must be removed from the meat. Pre-soak It will soften the skin, and then it can be easily peeled, and it will yield better fat.
To soak the meat you will need large saucepan, the same one in which you will cook jellied meat will do. You need to pour the meat so that it is completely hidden under water, and leave to soak for at least three hours, or better yet, overnight. After soaking, thoroughly scrape the pig's legs to remove any sooty areas. Also clean the skin on others. meat parts. And only after that it will be possible to send the jellied meat to the stove.
Rule three: DRAIN THE FIRST WATER AND COOK CORRECTLY
To cook clear jellied meat, after boiling the jellied meat, the first water must be drained. Some housewives neglect this recommendation, believing that in order to obtain clear broth It is quite enough to remove the scale with a slotted spoon. It’s a matter of course, but by draining the first broth, you will ensure the clarity of the jellied meat and reduce the calorie content ready-made dish and get rid of the greasy specific taste. In general, the jellied meat will turn out more beautiful and tastier, and the fat content in the meat will be enough for a second broth.
After draining the first broth, rinse under running water the entire contents of the pan - this will help remove small adhering remnants of coagulated protein.
Then the washed meat is again filled with water. Moreover, the water should be two centimeters above the level of the meat. If you pour more, the broth may not have time to boil away during cooking, and accordingly, the jellied meat may not freeze. If you pour less, you will have to add additional water during the cooking process, which again has a negative effect on hardening.
To cook clear jellied meat, do not allow it to boil intensely. As soon as the contents of the pan begin to boil, immediately turn the heat to low and do not add until the very end. It is necessary to cook the jellied meat over low heat so that it does not boil, but rather simmers. This will take at least six hours, but this is the only way you will ensure that the jellied meat hardens without adding gelatin and turns out really tasty.
Rule four: ADD CONDITIONS AND SPICES CORRECTLY

When the future delicious jellied meat cook for five hours, add a whole onion and peeled carrots to it. There is no point in adding vegetables earlier - during cooking, all the flavor will disappear from them.
By the way, if you want to give the broth a nice golden hue, do not peel the outer skin of the onion, just rinse it thoroughly and put it in the pan. The onion in the husk does not give transparency to the broth, only a golden hue.
The jellied meat should also be salted after four to five hours of cooking, otherwise it can easily be over-salted, since the broth will boil away during the cooking process and become concentrated.
You need to add spices, in particular peppercorns and bay leaves, half an hour before the end. To cook clear jellied meat, you need to add peppercorns, not ground pepper. Straining its grains properly afterwards will not work, and they will precipitate and look like garbage. And besides, peppercorns will give best scent and taste than ground.
Rule five: CORRECTLY CUT MEAT FOR JELLY
When the jellied meat has finished cooking, remove the meat from the broth with a slotted spoon. And be sure to strain the broth itself through a colander, or even better, through cheesecloth. Then properly cooked jellied meat will definitely be transparent and without small protein flakes. Discard the carrots and onions.
Let the meat cool slightly and carefully separate it from the bones with your hands. You can help yourself with a small knife. It is also advisable to cut meat with a knife and hands, and not with a meat grinder or food processor, so as not to miss small bones.
But it is advisable to crush the garlic rather than cut it, then it will be more evenly distributed in the meat mass and will give off aroma and taste. By the way, you can’t boil garlic - it will definitely lose all its charm, and it may even leave bad taste. Remember also, when making jellied meat with garlic, that it cannot be stored for a long time - you have a maximum of three days to eat it - the garlic will “suffocate”.
Do not throw away the cartilage and skins, cut them finely and mix with “good” meat - they will add “strength” to the finished dish.
Placed in trays meat mass, fill it with broth. If the trays are deep, then the jellied meat must be mixed very carefully so as not to cloud the broth. This is necessary so that the broth completely saturates the meat, leaving no voids at the bottom of the tray.
Rule six: ENSURING THE CORRECT PURGE TEMPERATURE
For jellied meat to freeze well, it needs the “right” temperature. Do not leave it in the kitchen on the table, or even near the window on a cool windowsill - the jellied meat will not freeze there. Carry it out to winter time You should also not go to the balcony/loggia - frozen jellied meat will irrevocably lose its delicate consistency, and after defrosting it will not harden again (you will have to boil everything again for the jellied meat to harden, and after that, as you understand, the appearance will be completely lost).
With that said best place The middle shelf of the refrigerator is used for freezing the jellied meat. Before placing the trays in the refrigerator, allow the broth to cool at room temperature. If you do everything correctly, the jellied meat will freeze perfectly in three to five hours.
And further. Do not immediately remove everything from the surface of the finished jellied meat. rendered lard– it will help protect the jellied meat from “weathering”.
Actually, these are all the main rules on how to prepare delicious transparent jellied meat. There are few of them and they are simple, and therefore everything will work out for you!
HOW TO LIGHTEN JELLY, MAKE CLIDY JELLY TRANSPARENT

Of course, it is better to immediately cook clear jellied meat, but how to save jellied meat that has already been cooked and for some reason turned out cloudy? We'll have to contact emergency measures to lighten the jellied meat.
To lighten aspic, you will need:
1. 1 chicken egg;
2. whisk or fork;
3. piece of gauze;
4. small cup or bowl.
STEP #1
Do everything so that you don’t have to clarify the jellied meat. Try to cook clear jellied meat right away. If your experiments are not successful, add ingredients strictly according to the recipe. First put the jellied meat on high heat, and after waiting for it to boil, reduce the flame, and then cook only on low heat. low heat, do not add, do not change the temperature during the cooking process.
STEP #2
If the broth still turns out cloudy, do not despair - this can be corrected, you can lighten the jellied meat. First, remove the meat from the pan. Cool it in in this case no need, just lay it out so it doesn't interfere. Take out the vegetables too if you are boiling them together. In this case, the broth should not be removed from the heat, just reduce the heat to low.
STEP #3
Take an egg and separate the white from the yolk. It's easy to do traditional way: Crack the egg in half and carefully pour the yolk, holding your hands over the bowl, from one half of the shell to the other. At the same time, all the protein will flow into the bowl - we only need it. Egg white contains albumin, which is an excellent sorbent. It will “bind” everything unnecessary and rid the jellied meat of turbidity.
STEP #4
Beat the whites with a whisk or fork as for regular omelet. Now turn up the heat a little higher, as when cooking jellied meat. Gradually pour the whipped egg white into the broth. To lighten the jellied meat, stir continuously and thoroughly, otherwise even the beaten egg white will curl into a lump without absorbing what it should. Continue stirring the broth until it comes to a boil.
STEP #5
Now remove the broth from the stove. Let it sit until all unnecessary substances precipitate. Then strain the broth well through cheesecloth and continue the process. Return the meat and vegetables, do not forget to add salt and spices. If you lighten the jellied meat in this way, then its broth is also suitable for aspic, and, as you know, the requirements for it are higher; it must be transparent.
RECIPES FOR PREPARING JELLY WITH PHOTO
How to cook jellied meat classic recipe- ordinary homemade jellied meat - many people know. However, this dish can be used to make a real cooking masterpiece, and using not only pork legs or beef shin, but any meat ingredients, tongue, offal, and even no meat at all. Yes, and you can cook jellied meat for 5 hours, or you can finish it in 30 minutes. And this is how you can prepare jellied meat.
- RECIPE FOR TRADITIONAL PORK JELLY

Despite the fact that preparing jellied meat is a labor-intensive and time-consuming process, this dish is an invariable attribute festive table and a great snack to go with alcoholic drinks. A traditional jellied meat from pork, the recipe for which we offer, will become worthy decoration any holiday table.
Recipe pork jellied meat, Ingredients:
1. 2 pork legs,
2. 1 kg pork meat,
3. 1 pork shank,
4. 1 carrot,
5. 2 onions,
6. 1 white root (parsley, parsnip or celery),
7. 3 pcs. bay leaf,
8. 3 pcs. allspice corns,
9. 5-7 pcs. black peppercorns,
10. salt to taste,
11. water – 4 l.
View recipe
Preparation of jellied pork:If necessary, oil the pork legs and drumsticks over the fire. Then steam them for 1 hour in hot water and process them, thoroughly cleaning the skin of bristles and dirt. After thoroughly washing the legs and drumsticks, cut them at the joints with a knife - just cut them, do not chop them, so that there are no small fragments. Wash the meat and cut into large pieces. Place all the bones and meat in a saucepan and pour cold water. The water should be 6-7 cm above the meat level. Bring the broth to a boil. Before this, do not leave the stove, it is important not to miss this moment. When the broth comes to a boil, reduce the heat and skim off any foam that has formed. You can simply drain the first broth and continue cooking in new water. Reducing the heat to low, cover the pan with a lid and leave to simmer for three hours. The broth should not boil, but only move slightly. Wash and peel the vegetables. After 3-4 hours, add vegetables, salt and spices to the broth. Now it’s better to undersalt the broth a little, the jellied meat will still need to cook for 1-2 hours, the liquid will boil away, and there is a risk of cooking over-salted jellied meat. The water will boil away, but it is not advisable to add it - the jellied meat may not freeze. In total, preparing jellied meat takes 5-6 hours. The jellied meat can be removed from the stove when the meat completely and easily comes away from the bone, and the cartilage tissue seems to have “dissolved.” Now you can taste the broth for salt and add more salt if necessary. The viscosity of the broth, that is, the freezing of the future jellied meat, can be checked by rubbing a drop of liquid in your fingers - if they stick together, it means that the jellied meat will definitely harden. If there is no stickiness and the meat is already ready, “save” the jellied meat by adding gelatin - see the instructions for the quantity. Remove the meat from the broth, carefully select the bones from it and divide it into pieces. Strain the broth well. Place the meat in prepared jellied containers and fill with strained broth. You can decorate the jellied meat with herbs and boiled carrots. After 10-15 minutes, remove excess fat from the surface of the cooling jellied meat. Let the jellied meat cool completely, and then put it in the refrigerator so that it completely hardens. The jellied meat will be completely ready for consumption in 3-4 hours. And it is best served with horseradish or mustard. Bon appetit! |
- HOMEMADE JOLD RECIPE

(photo: jellied meat)
Homemade jellied meat is perhaps the most delicious and richest jellied meat recipe. Guests will admire you for such a dish, and your family will simply adore you. Try the recipe for making jellied meat from pork legs, beef and rooster, and you will understand everything yourself.
Jellied meat recipe for 20 servings, ingredients:
1. Pork leg- 1 PC.,
2. Rooster – 1 pc.,
3. Beef on the bone – 1 kg.,
4. Beef tails – 2 pcs.,
5. Carrots – 1 pc.,
6. Onions – 2-3 pcs.,
7. Bay leaf – 2-3 leaves,
8. Salt - to taste,
9. Peppercorns and other spices - to taste and I wish,
10. Garlic – 1 head.
View recipe
Wash and trim all meat parts well. Soak for 1-2 hours. Place the meat ingredients in a saucepan and fill with cold water so that the water in the saucepan is 5 cm above the level of the meat. Bring to a boil over high heat, skim off the foam and reduce the heat to low, cook for 6-8 hours. Peel and wash the carrots and onions, you need to add them after 3-4 hours of cooking, then add a little salt to the broth. About 15-20 minutes before the end of cooking, remove the onions and carrots, and add peppercorns and bay leaves. Turn off the stove and let the broth cool slightly. Remove the meat, leave to cool, and then separate from the bones and disassemble into pieces with your hands; large ones can be cut. Peel and crush the garlic. Strain the cooled broth through several layers of gauze. Add salt, garlic, ground black or allspice (optional). Place all the meat on the bottom of plates or jellied containers. Pour in broth. Cover with lids and refrigerate for several hours (usually 3-5 hours is enough to set). When serving jellied meat to the table, simply turn the bowl over onto a plate and lay out the jellied meat. Decorate homemade jellied meat with herbs and serve with horseradish and mustard. Bon appetit! |
- JELLY RECIPE IN A PRESSURE COOKER

IN good jellied meat, everything is fine. Except for the cooking time. To prepare jellied meat in the traditional way you need a lot of it - just cooking takes from 5 to 8 hours, depending on the recipe. But if you don’t have that much time, this is not a reason to refuse delicious dish, especially if you have a pressure cooker! This method of preparing jellied meat not only saves time. You don’t need to worry about whether it will harden - it will harden like a sweet little thing, you don’t need to check it all the time, skim off the foam and so on. Very comfortably! And it tastes incredible!
Recipe for jellied meat in a pressure cooker, ingredients for 8 servings:
1. Pork legs – 1 pc.,
2. Pork tongue – 1 pc.,
3. Beef bone or pulp on the bone - 1 pc.,
4. Chicken wings- 2 pcs.,
5. Chicken back- 1 PC.,
6. Turkey neck – 1 pc.,
7. Carrots – 1 pc.,
8. Onion – 1 small onion,
9. Celery – 1 stalk,
10. Bay leaf – 1 pc.,
11. Peppercorns – 3-4 pcs.,
12. Cloves – 1 pc.,
13. Salt,
14. Garlic,
15. Parsley.
For decoration:
1. Boiled egg,
2. Pickled cucumber,
3. Green pea.
View recipe
How to cook jellied meat in a pressure cooker:Place the well-washed meat ingredients, vegetables, peeled onions, spices into the pressure cooker - everything except garlic and parsley. Fill with water so that it covers your finger with the ingredients in the pan. Salt. Close the lid, wait for it to boil and start to hiss, and from that moment cook over low heat for 3 hours. This time is absolutely enough to prepare jellied meat in a pressure cooker. The broth will turn out transparent, although it was not possible to skim off the foam endlessly. It is, of course, a little fatty, but all the fat on top can be skimmed off when the broth has cooled slightly. We remove the meat by hand from the bones. Cut large pieces and tongue with a knife. Pepper, add salt, add chopped herbs and garlic. Mix everything well. We place decorations at the bottom of the dish at our discretion, “upside down”. Place the meat on top, pour thoroughly strained broth over everything, cool and put it in the refrigerator to harden. Before serving, dip the container with jellied meat in hot water for 10-15 seconds so that the jellied meat moves away from the walls. Turn the bowl over and place the jellied meat on a plate. Serve with mustard, horseradish, and homemade adjika. Bon appetit! |
- ITALIAN JELLY RECIPE

(photo: Italian aspic)
Italians love to cook aspic, and one dish they have is very similar to jellied meat. At the same time, it is no less tasty, and the entire process of preparing 8 servings of aspic will take only 3 hours, and your time will require no more than 15-20 minutes. Try cooking jellied tongue in Italian - it’s very tasty, and not at all difficult!
3 hours (your 15 minutes)
To prepare Italian aspic with tongue (8 servings) you will need:
1. Water – 3 l.,
2. Pork legs – 2 pcs.,
3. Beef bone – 1 pc.,
4. Pork tongue – 1 pc.,
5. Wine white vinegar– 100 ml,
6. Carrots – 1 pc.,
7. Onion – 1 small onion,
8. Celery stalk - 1 petiole,
9. Bay leaf,
10. Peppercorns,
11. Cloves,
12. Salt,
13. Parsley,
14. Pickled onions.
View recipe
Preparing tongue aspic:Prepare the meat ingredients and vegetables: soak the meat, wash it, peel it. In a pressure cooker over low heat, cook the broth to high beef bone and pork legs. 1 hour is enough. Release steam from pressure cooker and open. Add to the legs and bone pork tongue. If you decide to choose beef tongue, then half is enough. Place carrots, onion, celery, bay leaf, peppercorns and cloves in a saucepan. Pour half a glass of white into the broth wine vinegar. Now close the pressure cooker and let the jellied meat cook for another 2 hours. Remove your tongue from the broth and immediately place it under running water. cold water. Peel the tongue and cut into beautiful slices. The gelling components of the broth are natural, so there is no need to add gelatin. The dish should turn out to be something between jellied meat and aspic. The jelly in the aspic will not be very cool; if you want the jellied meat to harden more, add a little gelatin. If you want it to be more transparent, we recommend lightening the jellied meat using egg white. Beat the whites with a whisk or fork, and gradually pour the whites into the boiling broth, stirring continuously and thoroughly. Continue stirring the broth until it comes to a boil. Let cool and settle, and strain through several layers of gauze. Place the tongue slices beautifully in a deep bowl. Place pickled onions, cut into quarters, between the slices. You can use other vegetables for decoration, or add meat by removing it from the bones. Add chopped herbs and fill with filtered broth. Once cooled, place in the refrigerator overnight. It is best to serve Italian aspic with tongue with a boiled egg and pickled vegetables. Bon appetit! |
- RECIPE FOR PORK AND TURKEY JELLY

This jellied recipe uses pork legs and turkey, so it is possible to combine the strength, hardening of jellied legs and usefulness lean meat turkeys
To make jellied turkey you will need:
1. pork legs (with hooves) – 2 pcs.,
2. turkey leg – 1 pc.,
3. carrots – 1 pc.,
4. onion,
5. garlic - to taste,
6. ground black pepper - to taste,
7. salt.
View recipe
Preparation of jellied turkey and pork legs:Pour cold water over the pork legs and soak for several hours (it is better to soak overnight). Then wash thoroughly and scrape the legs sharp knife, put in a deep saucepan. Add the washed turkey leg and cover with cold water. The water should be three fingers higher than the level of the meat. Bring to a boil, skim off the foam, reduce heat to low. Cover the dish with a lid and cook, or rather simmer the jellied meat, for 6-8 hours, until the meat leaves the bone. About halfway through cooking, check the readiness of the turkey; you may need to remove it and continue cooking only the legs and bone of the turkey, removing the meat from it. At the same time, add peeled carrots, onions and salt to taste. Onions can be added in their skins to give the broth a golden color. Remove the finished meat from the broth, separate from the bones, disassemble into fibers, and place in molds or plates. Add finely crushed or chopped garlic and pepper. Strain the broth, add salt if necessary and pour it over the meat. Place the cooled turkey and pork jellied meat in the refrigerator and leave until completely set. Bon appetit! |
- JELLY EGGS

(photo: egg aspic)
This jellied meat recipe will allow you to diversify a traditional dish, surprise guests with original presentation and save a lot of time. Using the recipe for aspic in eggshells, it’s very easy to do!
Recipe for aspic in eggs, ingredients:
1. 8 egg shells,
2. Ham (ham, carbonate or sausage, etc.)
3. Green peas and corn,
4. Jellied broth or 1 chicken leg and 2 tbsp. spoons of gelatin;
5. Greens - to taste,
6. Salt.
View recipe
Preparation of jellied meat or aspic in eggs:The eggshells need to be thoroughly, carefully washed, and then soaked in warm water with the addition of soda for about half an hour. It is advisable to specially prepare the shells in advance, carefully beating off the “top” of the eggs, rather than breaking them in half. Cut the ham or other meat ingredients into strips, and place all the ingredients inside the egg in any order: corn, peas, herbs (dry them before this by placing them on paper towel). Cranberry looks good and adds a piquant taste. The shells are placed securely in a tray or other container so that they do not fall on their side, and filled with steep broth or with the addition of gelatin. For aspic, it is still better to use gelatin - the broth will be more transparent and will definitely harden as it should. To do this you need: 1. Pour 100 ml of chilled gelatin boiled water and leave to swell for at least 20 minutes, maybe an hour. 2. Boil chicken leg in salted water until done. Don't forget to remove the foam. You will need 1 cup of chicken broth. Along with the ham, you can add carrots and onions in their husks to make the broth golden and have a richer taste. 3. Dissolve the swollen gelatin in a glass of hot broth. Strain so that there are no lumps or protein flakes. That's it, the broth for aspic is ready. When the jellied eggs have completely hardened, remove them from the shell and place them upside down on a dish, decorating around with herbs, peas and corn. 5. Onions - 1 pc., View recipe
In fact, this is not jelly, but a festive aspic, a snack in jelly, and, if desired, even a salad in jelly. Meat and vegetables need to be laid out in layers, and if skill allows, you can lay out colorful patterns from them. Meat ingredients For festive aspic, chicken, veal meat, tongue or ham are usually used. A delicious and original aspic that can be prepared from fish and even crab sticks. All in all, this recipe can be modified to your liking and taste by adding and substituting ingredients. To make a festive aspic for 12 servings, you will need: 1. Pork boiled tongue– 250 gr., View recipe
Making jellied chicken from chicken is easy, and most importantly much faster than from pork or beef. This dish is easy to prepare on weekdays, without paying much attention and without spending money on expensive or gourmet meat. To prepare chicken jelly need to: 1. Chicken feet- 1 kg, View recipe
You can cook jellied meat not only from chicken and its meat, but also from giblets. But it turns out very tasty and not traditional. To prepare jellied giblets you will need: 1. chicken offal (legs, wings, heads, necks) – 1.5 kg, View recipe
And a little more about how to make jellied meat, video recipes for jellied meat:
To decorate beautifully– it must first be cooked correctly. After all, it often happens that they boiled jellied meat all day, but it either did not freeze, or if it did, it was opaque. We will try to solve this problem together. Jellied meat came to us from the distant past. Our Slavic ancestors took it with them hunting in birch bark bags. If a hunter stopped at a rest stop, but it was impossible to light a fire, he ate jellied meat in a frozen form. And when there was a fire, the jellied meat turned into a rich meat broth that could warm and satiate. ABOUT aspic transparency They hardly thought about it then. Yes and beautifully decorate jellied meat there was no point then. Now the housewife, when preparing jellied meat, cares not only about its taste. Aspic there must certainly be transparent And beautifully decorated. To the jellied meat was transparent the following rules must be followed:
To prepare jellied meat we will need (5-liter saucepan). Jellied meat is traditional decoration festive table Slavic cuisine. For many, this dish is an integral part of the New Year's celebration. There are many recipes and secrets for making jellied meat. There are jellied meats from different types meat and fish, with various additions to the filling, with different options submissions, etc. The main signs proper jellied meat are its transparency and how well it has frozen. The first rule that must be followed to obtain clear jellied meat, is meat selection and processing before starting cooking. Most often, jellied meat is prepared from pork or beef meat, poultry meat is also added. It is best to choose meat with veins and skin - for a thick, rich broth. How to cook clear jellied meatTo make the broth clear, you need to cook the meat before starting cooking. rinse thoroughly and soak in cold water for 3-5 hours, completely immersing the meat in water. After soaking, the meat must be rinsed again and the parts with skins scraped off. Soaked meat is cooked in large saucepan until it boils, after which the water must be drained and the meat rinsed again. Draining the first broth and changing the water is necessary to achieve transparency. The pan in which the first broth was cooked must be washed with running water to wash off all the remaining protein that has been released, or replaced. While cooking the second broth, it is necessary to constantly remove the noise (gray foam forming on the surface). The water in the pan should be 2-5 centimeters above the level of the meat. After boiling, reduce the heat to the lowest setting and simmer the broth with meat for 5-6 hours. Onions, carrots and celery root are added to the broth at the end of cooking and cooked with them for about another hour (also over low heat). Spices - salt, bay leaf and black peppercorns - are added half an hour before the end of cooking. The pepper in the jellied meat should be put in peas, not ground - another rule for transparency. After cooking, the meat should be set aside and finely chopped, and the broth should be strained several times through cheesecloth. Vegetables for decoration, garlic, chopped meat are placed in molds to harden and filled with broth. If the molds are deep, to ensure the homogeneity of the jellied meat, the mixture with meat and broth must be stirred, but do it very slowly and carefully so as not to cloud the broth. After this, the forms are placed in a cold place (best of all - the middle shelf of the refrigerator) for several hours until they completely harden. Delicious and transparent jellied meat is ready! There is also several ways to clarify broth if it turns out cloudy during the cooking process. The most common is next way: bring the resulting broth to a boil and pour into it a mixture of half a glass of cold water and two beaten egg whites - the coagulated egg white will attract flakes of foam and float to the surface, after which all excess can be removed from the surface of the broth with a slotted spoon. Also, to lighten the jellied meat, before boiling the second broth, you can add a pinch of citric acid to it. You might be interested: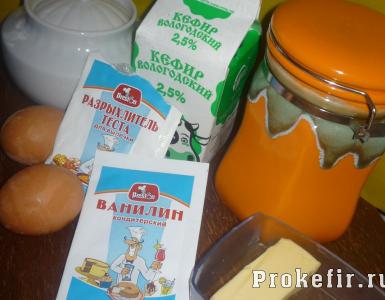
Latest articles


|


