Do-it-yourself mastic cake: photo, master class. How to decorate a cake with mastic: for children, wedding
Cake figures can be made from chocolate icing, various pastes. But, basically, the most convenient is sugar paste or mastic. If earlier you were sure that this is impossible, we suggest you start doing it right now.
Before making figurines and decorations, consider the recipe for making mastic with your own hands.
For this we need:
- Gelatin - 2 teaspoons;
- Water - 10 teaspoons;
- Powdered sugar - 450 gr.;
- Vegetable oil - 2 teaspoons;
- Egg - 1 protein;
- Lemon juice - ½ lemon;
Cooking gelatin
It swells long enough. It should be diluted with water in a ratio of 1:5. In order to soak the gelatin, you need cold water. Some people add warm water to make the gelatin dissolve faster. But, in no case should this be done, since gelatin can lose all its properties. The resulting mass should stand at room temperature for 30 minutes.
- Sift the powdered sugar through a sieve, in order for the mass to be very elastic and elastic for the mastic, the powdered sugar must be of high quality;
- We make a deepening and add vegetable oil, then 1 protein, lemon juice;
- After the gelatin has swollen, it is best to dissolve it in a water bath to a liquid state. Within one minute, gelatin turns into a liquid base;
- Melted gelatin is introduced into powdered sugar. We knead the mastic;
- As soon as we knead the mastic, add 1 tsp. vegetable oil. This will make it plastic, it will not tear when you roll it out;
- As soon as you knead it, wrap it in a film and leave it for 30 minutes to lie down, it will be much easier to make products from it;
- After she lies down, we proceed to rolling. The mastic should be elastic. If it turned out that it is torn, then it is best to knead it again;
- Roll out on a surface covered with powdered sugar and starch, very thinly. The thinner, the more accurate your work will look. Sculpting is a very exciting activity.
So, let's begin:
Figurines made of mastic perfectly complement the birthday cake. In order to make it look even better, we suggest covering it with mastic first. Therefore, for the cake, we roll out a thin layer of mastic and cover it.

In order to cover the cake with mastic, we need:
- A silicone mat that you can buy at a candy store. He is not afraid of not cold temperatures, not hot ones;
- Rolling pin. It must be perfectly flat. Traditional wood leaves notches on the coating;
- Roll out the mastic and cover the cake with it.
A covered cake should certainly be decorated with hand-made frills or roses. 

Preparatory stage:
- In order to cut frills for decoration, a glass is best. Use it to cut out circles.
- To ensure that the mastic does not dry out, and it dries very quickly. Put all the circles that you cut out in a pile, then they will not have time to dry out.
Fold the remaining mastic into a ball and put it in the refrigerator. Mastic can be stored in the refrigerator for one month.
Modeling shuttlecocks from mastic consists of the following steps:
- We take one circle, cut it with a glass, you should get a “crescent”.
- Then we take a pastry stick. If you do not have it, then take a stick with a diameter of 1 cm.
- Cut out the cone with a knife. And with such a cone we roll the mastic, you should press hard enough on the cone. The result should be a wavy line, “ruffle”.
- In order to give the shuttlecocks more volume, they need to be glued to each other.
- To do this, we lubricate the edge of the shuttlecock with water, and put the next one on it, press it. Let's do this process again. It turns out that one consists of three.
- Lightly grease the edges of the cake with water, and glue the shuttlecocks with wavy edges down.
- Using a stick, we fix the edges of the shuttlecocks on the cake, making holes. This will make the mastic shuttlecocks more airy.
Roses
What's a birthday cake without roses! Do you think that sculpting them is very difficult? But, it's not. We suggest you make them yourself, suitable even for beginners. 
Pestle
It is better to make a pestle for a mastic rose in advance with your own hands. It should be firm when you apply the petals to it. 
marbling
In order for the roses to be not just white, but marbled red:
- Let's add some red mastic;
- In order to make red putty, you need to add red dye;
- In the middle of the white mastic, put the red one (it should not be very much, 5-6 petals). Mix until marbling appears.
modeling
- We roll out a layer of mastic. The thinner you roll, the thinner you will get rose petals;
- Using a glass, cut out circles;
- We begin to impose petals;
- We take the first circle, rub the edges of half the circle with a tablespoon, do not touch the second;
- We take a leaf and put it on a bud, fix it;
- Now we take the second one, we put the next petal with a seam away from us;
- When you make a petal, it should be slightly higher than the previous one;
- First we turn on the right, then on the left. Do not forget from below, each time to give the shape of a bud.

So we need to make five petals. The more roses you make for the cake, the prettier it will be.
Bear from mastic

For beginners to work with mastic, you can safely take on the modeling of animal figurines.
To make a bear figurine from sugar mastic, we need a minimum of tools:
- skewer;
- set for modeling from a set of plasticine.
Modeling step by step:
- Roll out the mastic into a sausage;
- We divide the sausage into legs. Two equal small pieces. Cut off a piece for the body. And two identical pieces for the front paws. The main part of the head. A small piece for the muzzle and two ears;
- First of all, we make our bear's torso. We also roll it into a sausage and make it a little flattened.
- Legs. We roll balls. Then we roll them into sausages - droplets.
- We make the bear sit. We attach the legs to the sides of the body with a skewer. You can still make him soles with fingers using a tool.
- Head. The bear's head is round and slightly flattened.
- Muzzle. We make a ball and flatten slightly from the sides.
- We attach the muzzle to the head. On the muzzle we draw eyes with a toothpick, and a small nose. The spout can be made from a small ball molded from mastic. We attach the head to the body.
- Pens. Roll out circles. We recommend making handles in the form of a droplet. Stack also draw fingers;
- Ears. We roll up two circles, press them, we get “flat cakes”. Make dents in the middle of the ears;
- We attach the ears to the head.
We managed to make such an interesting figure of a bear with our own hands for the cake.
And now we suggest trying to make a figurine of a charming bunny with your own hands to decorate the cake.
It is important to know!
According to the Ministry of Health, diets today are the main methods weight loss. However, the number of obese people continues to grow! In this regard, "Bee Slim" appeared - drops for burning up to 80% fat.

To make a hare figure, we need:
- White mastic;
- Pink mastic;
Manufacturing process:
- Mash white mastic well;
- Roll up the sausage and mark on it where the head, torso, paws and ears of the hare will be;
- From a piece of pasta intended for the calf, first roll a ball, and then form a cone;
- We roll out a 1 cm thick layer of pink mastic. We recommend that you sprinkle the surface with potato starch in advance. Cut out the blank in the form of a drop. Glue it to the surface of the part. And then give it the shape of a "belly";
- From a piece of mastic intended for the head, first roll a ball, and then form a cone;
- Cheeks are very easy to make. From small pieces, form small blanks and attach them to the surface of the part, giving them the shape of cheeks. Using a modeling stick, make a mouth;
- Make a spout out of pink modeling sugar paste and attach it in the same way. Using a toothpick, connect the manufactured parts;
- From a piece of sugar paste intended for paws, first roll into balls, then form cones and flatten slightly. Using a knife, make cuts on the blanks, giving them the shape of fingers;
- Roll up the pink modeling paste, make oval blanks and attach them to the surface of the part where the recesses were previously made. Attach the legs to the body;
- From the pieces of sugar paste intended for other paws, first roll up sausages, then flatten slightly on one side and also attach to the body;
- From a piece of sugar paste intended for the ears, first roll up sausages, and then flatten slightly. Roll out the pink modeling paste on a starched surface with a rolling pin to a thickness of 1 mm. And cut out two identical blanks in the shape of a drop, and then attach them to the ears. Next, attach them to the head.
- We recommend sculpting eyes from black mastic, and teeth from white mastic in the shape of a rectangle.
These interesting figures can become a decoration for the cake! Kids will love this craft very much. Try and fantasize, make decorations from fondant for the cake with your own hands, you will definitely succeed!

It has been almost ten years since the cake has ceased to be just a delicious dessert that is served for dessert and is the logical conclusion of the holiday. Now different decor options with the help of mastic allow you to create a culinary masterpiece. There is an opinion that such a design is only possible for masters who have comprehended the secrets of culinary art. Each housewife can create such a culinary work independently, for this you will need minimal skills in baking, knowledge of the basics of working with mastic. Recipes for delicious cakes, creams for mastic, see below.
Which cake is suitable for mastic
In order to get a beautiful mouth-watering cake decorated with mastic, you must follow a few rules when choosing a baking recipe, cream and design option. The appearance of the product and the taste of the dessert depend on all these factors in combination. Experienced chefs, who have more than a dozen prepared original cakes decorated with mastic, are advised to adhere to the following rules when creating a masterpiece:
- Any cakes can be used for the cake, for example, biscuit, honey cake, shortbread or even soufflé.
- The cream between the cakes can be completely different from sour cream, yogurt, cottage cheese or condensed milk. But under mastic, such options cannot be used, since it can melt, lose its appearance.
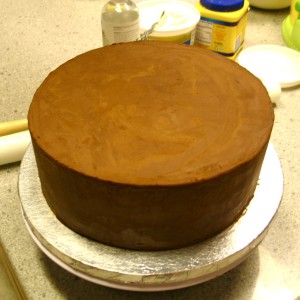
- The following cream can be used as a base for mastic: butter, ganache, with marzipan or condensed milk. However, before proceeding with the decor, the cake should be cooled until the top layer is completely hardened.
- Before decorating, it is necessary to carefully level the top layer so that the product looks as neat and beautiful as possible.
- The design theme of the finished product depends on who it is intended for: for a child - characters from fairy tales or cartoons; for a boy - cars, superheroes; a cake with a Barbie doll is suitable for girls; women will be happy with a dessert with flowers - roses, daisies; and for men, a decor in the form of a barrel of honey, on the theme of fishing, cars, is suitable.
Step-by-step master classes for making a cake for mastic
There are many recipes for cakes that can be decorated with mastic and can please not only taste, but also give true aesthetic pleasure. Different options for cakes, cream, decoration provide an opportunity for each hostess to create a culinary masterpiece to her liking. Below is a selection of delicious and simple baking recipes for mastic, which even novice cooks can easily handle.
sponge cake
The classic basis of any cake is biscuit cakes, for the preparation of which the most affordable and simple products are used. The recipe is based on a large number of eggs, which makes it possible to get lush, beautiful cakes without the use of baking powder, soda. Any mass can be used as a cream. Depending on individual preference.
Biscuit Ingredients:
- Eight eggs.
- 220 gr. granulated sugar.
- Wheat flour - 250 grams.
- 80 gr. butter.
Biscuit Instructions:
- Break the eggs into a deep bowl, add granulated sugar and beat with a mixer until a significant increase in mass.
- Sift wheat flour, add to egg mixture, mix well.
- Melt the butter, add to the dough - mix well.
- The dough, divided into two parts, bake in the oven.
- Assemble the cake, smearing it with the selected cream, and cover with mastic on top and decorate with figures from it.
chocolate cake recipe
Everyone will remember the taste of chocolate cake for a long time, and the pleasant aftertaste of chocolate will still remind you of the most delicious dessert that you have tried. Such pastries can be supplemented with icing and cream with chocolate, or any other type of filling can be used for these purposes, and mastic and various figures, edible decorative elements from it can be used as decoration.
Products for cooking:
- Cocoa - 30 grams.
- One and a half cups of flour.
- Baking powder - 1 teaspoon.
- Eggs - four pieces.
- One and a half cups of sugar.
- Butter - 225 grams.

Preparation of chocolate biscuit:
- Combine flour, baking powder and cocoa in one bowl, mix well.
- Add oil, eggs to dry ingredients and mix thoroughly.
- Pour two tablespoons of hot water, mix until all ingredients are completely combined.
- Divide the dough into several parts, bake the cakes in the oven.
- Smear the chocolate biscuits with cream to your liking, let it harden, after which you can start decorating the culinary masterpiece with mastic.
Cake with soufflé under mastic
For decorating with mastic, no-bake cakes are suitable, where one or more layers are occupied by a soufflé. The preparation of such a dessert has several rules that should be followed: there must be a biscuit on top and bottom of the jelly layer so that the culinary masterpiece keeps its shape; you should not allow the soufflé and mastic to come into contact, otherwise the latter will flow. There are many recipes for a delicious soufflé layer, with fruit, cottage cheese or the classic version - Bird's Milk. Consider one of the cooking options.
Biscuit Ingredients:
- Two hundred grams of wheat flour.
- Sugar - 160 grams.
- Chicken eggs - 5 pieces.
- Vanillin.
For the soufflé:
- Gelatin - 20 grams.
- Fruit yogurt - 400 ml.
- Cream - 20 ml.
- Fruits (peach, fresh or canned pineapple).

How to make a mastic soufflé cake step by step:
- To prepare a biscuit, you need to beat the eggs with the addition of vanillin and granulated sugar until white peaks form.
- Add wheat flour, gently mix with a spoon from the bottom up to retain air bubbles - this will give the biscuit splendor.
- Place parchment paper on the bottom of the mold, grease the container with oil and lay out the dough. Bake a biscuit at a temperature of 175-180 degrees for half an hour. Allow the workpiece to cool, then cut in half.
- To make a soufflé, you need to: soak the gelatin to swell. Add sugar to yogurt, add gelatin and mix well.
- Grind the berries, whip the cream into a foam.
- Pour cream into the cooled yogurt, mix well, add chopped fruit.
- Put a biscuit on the bottom of the mold, then pour it over and put another cake on top. Let the cake dry completely.
- Level the cake with butter cream, cover with mastic.
Honey Cake Recipe
The honey cake recipe is known to many and is passed down in the family from one generation to another. In the standard version, the culinary product is decorated with cake crumbs, but modern craftswomen began to decorate the dessert with mastic, which makes it possible to decorate your favorite cake with amazing taste in an original way, guided by your imagination or the wishes of the client.
To prepare the cakes, you will need the following ingredients:
- Fresh honey, liquid - 2 tablespoons.
- Two eggs.
- Sugar - 1 teaspoon.
- Two teaspoons of salt.
- Margarine - one hundred grams.
- Flour - 3 cups.
Components of sour cream for "Honey cake":
- Fatty sour cream - 800 grams.
- One glass of sugar sand.
- Butter - 250-350 grams (the amount depends on the fat content of sour cream).
Cream step by step:
- Mash the butter with a fork, add some sugar and mix thoroughly. Pour in the remaining granulated sugar gradually, kneading it well until the two components are completely combined.
- When the butter and sugar are completely combined, it is necessary to gradually introduce 1-2 tablespoons of sour cream, mixing all the components well.
- Sour cream for smearing cakes is ready.

Step by step cooking cakes:
- Put honey in a small container and melt over low heat. After boiling, add soda, mix thoroughly. Cook until caramel color appears.
- With a mixer, beat two eggs with a glass of sugar and pour into a container with caramelized honey. Add margarine to the resulting mixture, beat everything well with a mixer.
- Put the pan back on the fire, add 1/3 flour, beat with a mixer. When the dough begins to thicken, heat up, remove the container from the heat and continue the gradual introduction of flour, without stopping stirring.
- Cool the dough in the refrigerator or in a cool room, for example, on the balcony. Divide everything into several parts, roll out and bake cakes in the oven for five minutes at a temperature of 200 degrees.
- When all the cakes are baked, it is necessary to let them cool a little and smear them with sour cream (if an oil layer is used, the cakes must be soaked in sugar syrup).
- The cake for decorating with mastic is ready, the chef chooses the design option himself and it all depends on personal wishes.
A simple sour cream cake recipe
The Smetannik recipe is known to many housewives, and everyone remembers its taste from childhood, when food shortages stimulated women to invent delicious desserts based on what was available. Such a cake is well suited for mastic, the main thing is not to forget about the intermediate layer - a special cream, thanks to which the mastic will evenly and beautifully cover the culinary masterpiece.
Products for cooking:
- Eggs - 3 pieces.
- Kefir, sour cream - 1.5 cups.
- One and a half cups of sugar.
- Flour - 1.5 tbsp.
- Soda, vinegar for extinguishing.
- Vanillin.
- For the cream, you need sour cream and sugar.

Step by step cake preparation:
- Combine all ingredients for dough preparation in a deep bowl and mix well.
- Divide the resulting batter into 3 parts, into one of which add cocoa to give it a chocolate color and taste (2 tablespoons).
- Bake the cakes at an oven temperature of 200 degrees.
- For cream, it is good to whip cream or fat sour cream with granulated sugar.
- After cooling, cut the cakes in half, grease with cream, let it brew.
Milk Girl Cake Recipe
The light, airy cake got its beautiful name thanks to Milchmdchen condensed milk from Germany. Ease of preparation, exquisite taste and the ability to use various creams for cakes - all this was the main reason that many housewives fell in love with the dessert. In modern culinary art, the Milk Girl cake recipe is used to make a dessert decorated with mastic.
Cake recipe and required ingredients:
- Bank of condensed milk.
- Two chicken eggs.
- A glass of flour.
- Tablespoon baking powder.
For cream:
- Powdered sugar - 0.5 cups.
- Cream - 400 ml.

Cake preparation:
- Put the condensed milk into a deep container and break the eggs. Whip the ingredients until a homogeneous consistency is obtained.
- Gradually add baking powder, wheat flour - mix everything well.
- On parchment, draw the shape of the desired cake and pour a little dough. Bake in an oven preheated to 180 degrees - 5 minutes. Bake all the cakes, let them cool slightly.
- Whip cream with sugar for cream and smear cakes with it.
- The top of the culinary masterpiece should be covered with oil cream so that the mastic is evenly covered and holds well.
Cake "Pancho"
Many sweet tooths are familiar with the amazing taste of the original Pancho cake, and in the cookbook of almost every housewife there is a recipe for this dessert. Delicate taste, unusual design and the ability to make some adjustments to create new variations of the product. "Pancho" is ideal for decorating a mastic cake, for example, creating a dress for a Barbie doll.
Cake Ingredients:
- Chicken eggs - five pieces.
- Sugar - one and a half cups.
- Cocoa - 4 tablespoons.
- Baking powder - 1 hour. l.
- Flour - 1.5 cups.
- Lemon juice - 1 tsp
For cream:
- Sour cream or cream - 3 cups.
- Sugar - one glass.

Step by step preparation:
- Beat the whites until a stable white foam.
- Combine and grind the yolks with sugar and beat, add the whites, mix well, add flour and lemon juice.
- Add the remaining proteins, stir everything thoroughly until completely combined.
- Divide the finished dough into several parts, add cocoa to one of them. Arrange in two containers and bake the cakes in the oven.
- To prepare the cream, beat sour cream with sugar until thickened.
- Lay one cake on the bottom of the plate, cut the rest into small cubes, which are laid out in layers, carefully filling with cream until a small slide forms.
- To harden the cream, put the dessert in the refrigerator, then decorate with mastic.
The best cream base recipes for mastic cake
When creating a delicious cake, the right choice of cream plays an important role. Firstly, it should be ideally combined with cakes, complement them and create a harmonious flavor tandem; secondly, it is necessary that it fits the mastic, does not spread and keeps its shape well. To prepare a delicious dessert, a cake cream for mastic based on butter, condensed milk or marzipan is suitable. See recipes below.
Cream of boiled condensed milk
A simple but insanely delicious cream can be made from butter and boiled condensed milk. Despite the minimum number of ingredients and ease of preparation, the mass has an amazing taste and is ideal for a cake, which will later be decorated with mastic. To make a cream, you need condensed milk (1 can) and 30 grams of butter with a high percentage of fat content.

Step by step preparation:
- Beat softened butter until fluffy.
- Add boiled condensed milk to the container and beat at low speed with a mixer. Do not overdo it, it is necessary that the components are well connected.
- Place the mass in the refrigerator to cool and thicken.
- Cover the cake with cream, decorate with mastic - an amazing dessert is ready.
Butter cream on proteins
According to many chefs, the ideal option is to use butter cream for a mastic cake. This is due to some factors: it keeps its shape well, fits any cake layers for a layer or can participate in decorating a product, prevents the mastic from spreading, and prevents mixing colors. It is possible to prepare a protein-based oil cream at home on your own.
Cooking Ingredients:
- Protein - 4 pieces.
- Oil - 300 grams.
- Salt.
- Powdered sugar (sand) - 200 grams.

Cream step by step:
- Separate the whites from the yolks and place them in a deep container.
- Add sugar to the proteins, heat until dissolved in a water bath, then remove from heat, let cool.
- Whisk butter until fluffy.
- Whip the whites with clean, dry whisks, after adding a pinch of salt. Beat until a shiny, stable foam is formed, then gradually add the oil, without stopping the mixer.
- The cream is ready, it can be used for smearing cakes or used as a base for mastic.
Cream "Ganache"
Chocolate lovers will definitely like the ganache cream. An amazing cream-based dish can be used to prepare a variety of desserts, lubricate cakes when baking a cake, or decorate finished culinary products. In addition, ganache is perfect for mastic, helping to create a culinary masterpiece with amazing taste.
The ganache cream recipe includes the following ingredients:
- Black chocolate with a high percentage of cocoa content - 200 grams.
- Fatty cream - 125-200 ml (the exact amount is affected by what consistency you need to get).
- Powdered sugar - 2 tbsp. l.
- Butter - 50 grams.

Step by step cooking "ganache":
- Chop the chocolate into small pieces.
- Pour the cream into a deep container and put on a small fire. Constantly stirring, it is necessary to bring almost to a boil.
- Put the broken chocolate into the hot cream and let it melt for five minutes.
- Add powder or sugar if you want to get a sweet cream.
- Thoroughly mix all products until the components are completely combined.
- Allow the mass to cool slightly and gradually add the oil, stirring constantly.
- Stir the cream until smooth, after cooling, use to form the cake.
Cake with yogurt and fruit cream is ideal for creating a light dessert. To prepare, you will need a minimum of ingredients, time and effort, and the finished result will win the heart of every sweet lover. The advantage of such a cream is the possibility of using it in mastic cakes, the main thing is to constantly store it in a cool place.
According to the recipe for the preparation of the cream, the following ingredients will be required:
- Fruit yogurt - 500 grams.
- Whipped sour cream or cream - 200 gr.
- Gelatin - 15 grams (agar-agar can be used).
- Cold water - 50 ml.
- Fruit liqueur - 20 grams.
- Fresh fruits - to taste.

Step by step preparation:
- Soak gelatin in water until completely swollen.
- Add sugar to cream and beat.
- Beat yogurt at low speed with a mixer or whisk.
- Combine the cream with yogurt, mix the ingredients thoroughly until they are completely combined. Add chopped fruits (peaches, bananas, strawberries - optional) and gelatin, mix thoroughly.
- Cover the cake with cream, and after the filling has completely solidified, it is worth starting to assemble the dessert.
How to align a cake with fondant
In order for the cake decorated with mastic to look neat, appetizing and beautiful, it is necessary to level the cream before applying the final layer. Simple steps will help you create a delicious work of art from classic pastries. It will win the heart of not only the hero of the occasion, for whom the product was prepared, but also of everyone who happens to see and taste the dessert. For the alignment procedure you will need: a knife with a wide blade or a special culinary spatula, a small towel or paper napkins, hot water.
Leveling the cake for mastic:
- Put the finished cake, covered with cream under mastic, in the refrigerator until completely solidified.
- Take out the cooled dessert, moisten the knife or spatula in hot water, then wipe it dry so that not a single drop of water remains, but at the same time the temperature of the tool remains.
- Run a knife over the cream. Under the influence of a warm tool, the cream will begin to melt and take the form that the cook needs.
- After several manipulations, put the product back in a cool place and let the cream cool down. Repeat the procedure until the surface is perfectly even without bumps, dimples and uneven corners or transitions. Having obtained the desired result, proceed to decorate the cake with mastic.
Video: how to bake a mastic cake at home
On his birthday, I want to especially please the birthday man, relatives, surprise guests not only with a delicious dessert, but also with its original design. To prepare a culinary masterpiece, you will need several components: chocolate biscuit, cream based on whipped cream with the addition of curd dessert, berries for the layer, mastic and figurines from it for decoration. Decoration, decoration of the dessert depends on the individual preferences of the birthday person, inspiration and the capabilities of the master. An example of step-by-step preparation of a cake and its decoration with mastic, see the video:
For the cake:
- Flour - 1 cup;
- Sugar - ¾ cup;
- Soda - ½ teaspoon;
- Salt - a pinch;
- Eggs - 6 pieces;
- Vanillin - on the tip of a knife.
For cream:
- Condensed milk - 2 cans;
- Butter - 2 packs.
For filling:
- Kiwi - 1 piece;
- Fresh apricots (you can jam) - 4 pieces;
- Banana - 1 piece.
For milk mastic:
- Powdered sugar - 1 cup;
- Powdered milk (you can baby formula "Baby") - 1 cup;
- Food colorings;
- Condensed milk - 6 tablespoons.
For sugar paste:
- Sweets "Marshmallow" - 200 grams;
- Powdered sugar - 1.5 cups;
- Confectionery topping - to your taste.
Cooking process:
First of all, we need to prepare the very basis for the cake with mastic. It is better to bake a biscuit and smear it with cream a day before you start decorating with our mastic, or at least a day before, so that the cake has time to soak, become soft and settle. After all, if you immediately decorate with mastic, then it will also settle along with the cake, lose its shape and even be able to crack or break.
To prepare the biscuit, beat the eggs with sugar using a mixer. In order for the eggs to beat better, they must be chilled. Some housewives separate the whites from the yolks before whipping and put them in the freezer for a while to cool them. But if you do not want to mess around for a long time, then you can just beat them without separating them.
So, beat the eggs for eight minutes, then add soda and continue beating for two minutes until a fluffy mass is obtained.
Sift flour together with vanilla. Add to beaten eggs in small portions, and gently mix the dough itself with a spatula (not a mixer!). Vanillin needs to be added a little, otherwise the dough may be bitter.
The biscuit dough is ready, now you need to grease the form in which we will bake the cake with butter, pour the batter into it, smooth it with a spoon and send it to a well-heated oven to bake. We bake for about forty minutes at a temperature of 180 degrees. If you have a slow cooker, then it is even easier to cook a biscuit for a mastic cake in it. In the slow cooker, set the time to 65 minutes, and set the "Baking" mode. The cake will be ready if, when checking with a toothpick, it remains dry.
We have a wonderful biscuit cake. Now you can take it out of the mold, lay it on a plank and let it cool for at least an hour. When cooled, it cuts better, and we have time to prepare the fruit cream.
Cream for mastic cake
 The cream is made very quickly and easily. Condensed milk should be mixed with soft butter, mix well until smooth, and then beat lightly with a mixer. Thanks to this, the cream will not be liquid and heavy, it will thicken slightly, and it will be convenient to apply it on the cakes.
A layer of cake under mastic with cream and fruit
With fruits, everything is simple, they need to be washed and cut into small pieces, or as you like. Mix them, and spread this mass on the cake. I sometimes do this, and sometimes I cut the fruit into thin circles, and then I spread them on the cake in two layers. Both methods are good, choose which one you like better.
If you do not have fresh apricots, then apricots from jam are perfect, only they need to be selected from their jam, and allowed to drain excess liquid by placing them in a colander or sieve.
Our biscuit has cooled down, now it needs to be cut into three parts so that we get three cakes. This must be done carefully so that the cakes are of the same thickness. We divide the biscuit cake in any usual way: with a knife, fishing line or string.
The shells need to be turned over. The top of the biscuit will become the bottom cake, and the top will be the bottom, because of this, our cake will be even on top, which will allow it to be more evenly covered with mastic.
We generously lubricate the first cake with condensed milk cream, smear it without sparing it so that it has a good layer. Lay apricot slices on top. Gently put the second cake, gently press, and again grease with cream. Put banana and kiwi on top of this cake. We put the third cake on top, again lightly press and grease with the rest of the cream on top and sides. The biscuit cake is ready, now it needs to be put in the refrigerator for soaking overnight.
How to make fondant for a cake
The next day, we will deal directly with the mastic. If you bought it in a store, then you only need to give it the desired color. To do this, knead the mastic with food coloring and powdered sugar.
And if you make mastic yourself, then for sugar mastic you need chewing candy marshlallow. Melt them in the microwave or in a water bath. Then knead in powdered sugar, adding dye. Powder needs to be added as much as the mastic takes, it should become like plasticine, become elastic, and should not stick to your hands. That's all, our mastic is ready.
Prepared by mixing powdered sugar with condensed milk and milk powder. Powdered milk can be replaced with powdered infant formula. At the time of kneading, dye is added.
 Now you can decorate the cake. Before laying the mastic on the cake, it is necessary to level the cream on it. A hot knife will help us with this. The knife must be dipped in boiling water, quickly wipe it and level the cream. Mastic will look neater if the cream on the cake is even. After leveling the cream with a knife, it must be put in the refrigerator for 30 minutes.
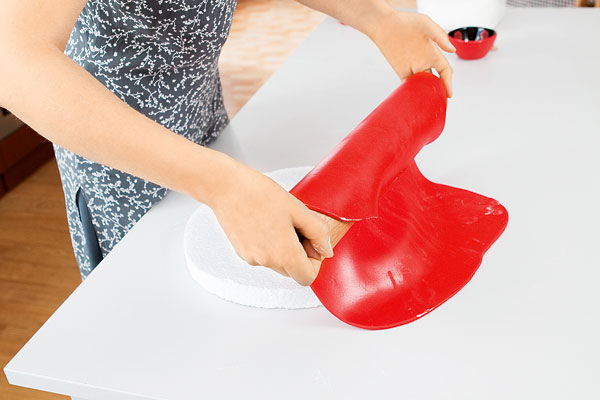
 Covering the cake with mastic. Sprinkle the table with powdered sugar, place the mastic on it and roll it out with a rolling pin like dough to the desired thickness. Having wound the layer on a rolling pin, carefully place the mastic on the cake, covering it from above.
 Lightly press the mastic with your hands, and tuck the excess edges under the cake or cut with a knife.
 Now the cake can be decorated with any ready-made figurines that you can buy in the store. Or cut the mastic out of the layer with cookie cutters or fashion something with your own hands together with your children.
 And in order for the figures to stick well, the mastic must be greased with cold boiled water. They attach well, you do not need to press down, so as not to wrinkle.
 To make the edge of the mastic beautiful, it can be cut with a curly knife.
 We decorate the side of the cake in the form of a bouquet wrapper.
 From the rest of the mastic we roll small balls and decorate the bottom of the cake with them. Wet the brush with cold boiled water and pass it over the entire surface of the mastic to give the mastic cake a beautiful glossy look.
 On my cake, I made lilacs using the same cream, I just added red and blue dye. And squeezed out of a syringe with nozzles. If you have time, then lilacs can be molded from mastic using special tools in the form of stencils.
 Once you have finished decorating the cake, you need to give it shine and remove excess powder. If necessary, gently grease the cake with a brush of cold boiled water. On the sides we make strips in the form of a grid and press the sugar peas.
Our cake is ready! It's big, beautiful and shiny!
As you can see, there is nothing complicated in making mastic at home, decorating it with your own hands is a pleasure! And the cake turns out to be very elegant, with such it is not a shame to go on a visit and invite guests to your place. And the cake itself is prepared quickly, and tastes very good. And if you cook mastic with children, they will also enjoy the process of sculpting figures, which they will then eat with pleasure along with the cake.
Cake with mastic specially for the site Notebook was prepared by Yulia Kostyukovich.
Bake cakes at home with our website and give your piece of warmth to loved ones.
Anyuta wishes you pleasant creativity and a sweet life!
Not so long ago, mastic figurines began to be used to decorate cakes. But ordering a cake from a professional confectioner is not always affordable, and there is no way to control the quality of the ingredients used in the process of baking and assembling the dessert. In this case, the output will be a hand-made decor.
A detailed description of all stages of work, from choosing the necessary tool and making mastic at home to the algorithm for sculpting individual characters, will help master the sweet sculpture even for those who last sculpted at school in fine arts.
Every mother wants to please her child with a beautiful and tasty cake. One way to decorate it is with mastic figures.
The manufacturing process includes the following steps:
- Preparation of sugar mass for modeling.
- Direct modeling of figurines.
- Drying the finished decor and installing it on the cake.
What tools and materials will be required to create sweet sculptures will be discussed in more detail below.
If there are doubts about whether it will be possible to make a mastic decor on your own, you can always pre-train on plasticine, and when you achieve the desired result, start sculpting from mastic.
What tools are needed for sculpting
In confectionery stores, your eyes simply run wide from a wide range of all kinds of devices for working with mastic, therefore, in order not to buy too much, it is better to familiarize yourself in advance with what certain tools are needed.
Mastic confectioners use for such purposes:
- covering the finished cake to give the surface smoothness or a certain texture (wood, leather, etc.);
- to create flower arrangements (sugar floristry);
- creation of miniature sculptures (people, animals, fairy-tale and cartoon characters).
Each type of mastic decor uses its own tools.
So, in order to cover the finished cake with sugar mass, you need to have:
- rolling pin for mastic (regular or textured);
- silicone rolling mat;
- and iron to smooth out the coating to avoid creases.
In sugar floristry are used:
- cuttings or plungers of flowers or their petals;
- silicone veiners to give the blanks a more natural look;
- soft mat for thinning the edges of leaves and petals;
- fixtures (tables) for drying blanks,
- food wire and artificial stamens;
- brushes with artificial bristles.
To sculpt figures from mastic, you need to purchase a set of special stack tools:
- Dresden stick for depicting facial expressions;
- stack-cone (rounded, even), which will allow you to make non-through cone-shaped recesses;
- shell tool for sculpting animal paws, shells, human hands and feet;
- stack-bone will help create frills on clothes or wavy edges
- a tool with balls at the ends is used to form eye sockets or other round indentations;
- stack-arc to create smiles on the faces of figures of mastic people.
In addition to these tools, you will need food coloring for coloring the mastic, brushes (required with artificial bristles) and food glue for gluing the details of the figure.
We prepare mastic for modeling with our own hands
Before you make figures for the cake, you need to prepare the sugar mass for modeling.

Putty for creating flowers and figures should be pliable so that it is easy to work with, and dry quickly so as not to spend a lot of time drying the figures.
These properties are possessed by mastic prepared from:
- 1 ½ teaspoons instant gelatin;
- 40 ml of water;
- 3 teaspoons of liquid honey or syrup (invert, glucose or any other);
- 2 teaspoons butter or any other solid fat (margarine, coconut oil);
- 1 teaspoon of liquor (can be replaced with other alcohol);
- 500 g of powdered sugar;
- 25 g corn or potato starch.
Cooking technology:
- Soak gelatin for the time indicated in the instructions for its use.
- Combine syrup, oil and liqueur in a saucepan and heat until smooth. Then add the swollen gelatin and heat until it is completely dissolved.
- Sift the powder with starch in a slide, in the center of which make a funnel. Pour the liquid component into the recess and knead the mass, like a regular yeast dough.
- Put the finished mass into a tight bag, lubricated from the inside with butter, expel all the air as much as possible and leave the mastic to lie down for a day at room temperature. After that, you can start sculpting.
The simplest mastic figures for beginners
Simple figurines of animals that do not pretend to be sculptural similarities are molded using one technology:
- Roll up a ball for the body and shape it into a teardrop shape.
- The head is just a slightly smaller ball that is connected to the body with a toothpick.
- The front and hind legs are molded from mastic flagella, which are glued with food glue or raw protein.
- Next, ears are molded: for a bunny - from two wide flagella-stripes, for a cat or a tiger (lion) - pointed triangles, for a bear, a monkey - two circles with a recess in the center.
- Also from the flagellum, but thinner, form a tail. If necessary, they sculpt a hairstyle, for example, a mischievous forelock for a monkey or a mane for a lion.
- They finish sculpting the animal figurine with the design of the muzzle - nose, mouth, eyes.
It is easy to make various cars out of mastic that will be appropriate on a boy's cake.
The easiest option is from a single piece of mastic:
- Shape the body of the car into a single rectangular piece of mastic of the corresponding color.
- From four balls, blind wheel-washers and glue them into place.
- From thinly rolled white or pale blue mastic, cut out glass (front, rear and side) and also attach them where necessary.
- From small balls of yellow mastic, make headlights.
- Make the necessary additions, for example, inscriptions or eyes, and the machine is ready.
Master class on how to sculpt children's mastic figures
Children's figurines made of mastic are usually the heroes of their favorite cartoons. Among the huge number of fairies, little animals, robots and cars, the heroes of the cartoon "Smeshariki" will be ideal for a novice sculptor. Their modeling is carried out according to a principle similar to that already described.

First, the mastic is dyed in the desired color (or colors), then a ball-body is rolled out of it, and then they act as follows:
- Bunny Krosh. For the arms and legs, roll up two bundles, cut each of them in half and use a stack or a regular toothpick to separate the fingers. Form ears from two wide strips. Then it remains only to shape the face by gluing eyes from white mastic, and eyebrows from blue mastic, draw pupils and a smile.
- Barash. Roll up thin flagella, form curls from them and glue them with food glue or egg white. Shape the arms and legs in the same way as Krosh's paws, but make hooves at the ends. From flagella of darker mastic, fashion horns. Shape the face.
- Hedgehog. Roll up small balls of blue mastic, give them the shape of needle cones and glue them onto a spherical body. Sculpt arms and legs, as for a bunny. Add glasses, eyebrows, nose, ears, smile and the Hedgehog is ready.
- Nyusha. First you need to draw heart-cheeks and mold paws with hooves, as for Barash. From a small ball, form a nose-piglet by making two indentations in it with a toothpick. Weave and glue a pigtail hairstyle, shape the face.
How to dry figures from mastic
Sculpting mastic figures is only half the battle. They also need to dry properly. When the figures dry unevenly, they can crack, and if the drying temperature is too high, they melt, and nothing can save the result of long work. All the subtleties of this process and ways to speed it up will be discussed below.
The simplest and most correct, but also the longest drying method is self-drying at room temperature. Depending on their size, the figurines can take up to several days to dry.
Large figures, consisting of several parts, are usually dried unassembled, and then all the elements are glued together using confectionery glue, raw egg white or vodka. During drying, the figurines or their parts must be covered with napkins so that they do not fall with dust. Also, the wipes will absorb some of the moisture.
If time permits, then the figures should be dried only at room temperature.
And if you urgently need to make a decoration from mastic, then you can speed up the drying in one of the following ways:
- Fen. Dry the mastic decor much faster by blowing it at a considerable distance with a hair dryer operating in the “Cold air” mode. In this way, you can dry the figures in just a few hours.
- Oven. Using an oven, you can quickly dry flat mastic decorations (for example, letters), but the drying temperature should not exceed 80 - 85 degrees, and its duration should not exceed 5 minutes.
- Microwave. The principle of drying is the same as in the oven. Figures heated in a microwave oven harden after cooling. But due to the different power of the devices, the drying time will have to be selected empirically on a small piece of mastic mass.
How much and how such jewelry is stored
Cake fondant figurines can be made ahead of time before baking and assembling the dessert, but to keep them soft enough on the inside and edible, they need to be stored properly. Storage conditions for this decor: sealed container, placed in a cool place away from direct sunlight. The shelf life of the decor, subject to these rules, will be within 1 - 2 months.

After eating dessert, sweet sugar sculptures can be left as a memory of the solemn event. In this case, the storage conditions are not so harsh: the figurines can simply be placed on a shelf that is not exposed to direct sunlight so that their colors stay bright longer. But eating them after that is not recommended.
Content
Decorating cakes with mastic is a whole art, just like the creation of the confectionery paste itself. We have already described the recipes for making mastic dough, but we will talk about how to work with it and how to decorate the cake with mastic without any problems in this article.
Mastic is used in different cases - pies are covered with it, various figures, decorations and various auxiliary details are made from it.
How to easily wrap a cake
If you follow fairly simple rules and requirements, then this process will not only bring pleasure, but also an excellent result. Decorating confectionery with mastic does not take much time, and we need the following for this:
- actually the cake itself;
- mastic;
- powdered sugar;
- cream for mastic paste;
- rolling pin;
- knife;
- confectionery spatula.
It is better to choose a biscuit cake, its cakes need to be soaked in syrup, spread with cream and put in the refrigerator so that the cream has time to harden. You can do this several times: once smear with cream under the mastic and send it to the cold, then take it out and carry out the manipulations again.
Now we take ready-made purchased mastic or prepared in advance with our own hands, knead well.

Now you need to measure the cake in order to understand what size to roll out the mastic dough. Remember that pastry dough is rolled out on a table, which is first sprinkled with starch or powdered sugar. The thickness of the dough should not be less than 3-4 mm, otherwise it will tear. You need to roll out a good beautiful canvas so that it completely covers the cake and its sides too.

The next point is to carefully take the mastic, you can wind it on a rolling pin, and transfer it to the cake, smooth it and fix it, but we do it very carefully.

To cut off excess dough, put the cake on a stand, so it will be more convenient to work with it.
For the following steps, we need a pastry spatula, with its help we will finally level and smooth.

Carefully correct the bottom of the cake with a knife and our handsome man is ready. It remains only to decorate it with mastic figures, flower arrangements or an inscription.

That's what a handsome man can come out of if you master decorating cakes with mastic.
By the way, the material with which we cover the cake can be embossed and even openwork. To do this, you will need various tools, embossed rolling pins, stencils and wheels, with which you can make such beauty as in the photo. The textured cover adds even more charm to the cake.

Highlights at work
The first time working with this confectionery material will be quite difficult, but this is only the first time. And if you arm yourself with a few useful tips, then the first pancake may well turn out not lumpy:
- mastic is not covered with a wet confectionery product, as well as on cream, richly soaked, too wet cakes, etc.;
- water or egg white is used to glue parts;
- if the mastic is left in the open air for a long time, it will dry out, so it is better to make decorations in advance;
- mastic cake decoration is best installed immediately before serving. Otherwise, if the cake is in the refrigerator along with decorations, they will absorb moisture and fall off;
- leftovers can be stored in the refrigerator for up to two weeks, in the freezer - up to two months, first it must be tightly wrapped with a film;
- the mastic should not be rolled out too thin, otherwise it will be difficult to work with it: it will tear, and even under a thin layer all the flaws of the cake are better visible;
- to make the products shine, cover them with a solution of honey and vodka after you decorate your cake;
- use powdered sugar of the finest grinding, if grains come across in the mastic, it will inevitably tear;
- use special paints for coloring mastic or natural dyes;
- it is better to create figures from mastic using silicone molds, they are easier to work with;
- for sculpting, you will also need stacks - these are the tools that are used when sculpting from plasticine.

At the same time, the question: how to decorate a cake with mastic at home combines a lot of other equally important issues. Let's try to understand each of them.
Is any cake suitable for covering with fondant? Almost any cakes are suitable: biscuit, shortbread, honey. But, for example, cakes made from tender soufflé, bird's milk will not be able to withstand the weight of the mastic, so it is better not to use them for these purposes.
Do I need to somehow prepare the cake for wrapping? It should be as perfectly level as possible. The instruction is as follows: for this, the cake must first be coated with a thin layer of cream and put in the refrigerator. This will remove excess crumbs from the surface. Then you can already apply a thick layer and then put it back in the refrigerator. And the final stage is to smooth out all the bumps with a hot knife and again in the refrigerator.
What cream is suitable for mastic? It is necessary to choose such a cream and impregnation, from which the mastic paste would not flow. It is not worth and not recommended to use a cream based on yogurt, whipped cream, sour cream and others. Mastic loves cream based on butter and condensed milk.

Features of working with mastic when sculpting figurines and other decorations
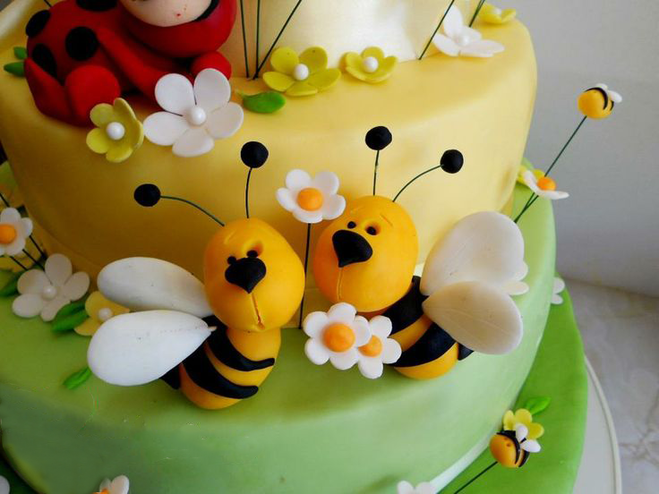
Very often, various figures are made to decorate a children's cake - these are all kinds of cartoon characters, favorite soft toys and not only soft ones. Often, to create such decorations from mastic, special tools and skills are not required, but it would be nice to have various confectionery tools in your arsenal, similar to those used when sculpting from plasticine, then silicone molds and other gadgets will not even interfere.
So, let's figure out how to decorate a children's cake? The most ideal thing is to build on the preferences of the birthday man. Children often order a cake in the form of "wheelbarrows", "Luntik", "Shrek", "Angry Birds", "Little Pony", "Masha", "Pokemon" and other heroes. But if there are no special preferences, then dream up yourself or choose something that will not be difficult to create. For example, these may not be voluminous, but flat figures that you simply lay out on the cake. Use different cookie cutters or templates. And you can immediately lay out the whole picture on the cake with the help of paste. This is an option for decorating a cake with mastic for beginners.

Of course, the item is more complicated - these are voluminous figures made of mastic paste, but even here you should not be afraid of anything. Especially if you have silicone molds, but if there are none, then imagine that the mastic is ordinary plasticine. Sculpt to your health! You can even follow the instructions for sculpting plasticine figures, the processes are almost the same.


