A simple Napoleon recipe, or the most beloved family recipe cake.
Description
Napoleon is a legend of Soviet cuisine, a taste of our childhood. He is as popular as . The most delicate puff cake soaked in custard is still very popular and loved by many! There are a lot of recipes for this cake, and probably every housewife will have in her arsenal the most beloved one, passed down from generation to generation. My recipe for this cake is a classic custard based recipe taken from a Soviet cookbook. It is very simple and very tasty. Therefore, if you are a novice cook, then this recipe is a great start to acquaintance with the Napoleon cake.
Ingredients:
For test:
For cream:
Instruction:
A simple Napoleon cake recipe at home with a photo step by step
1. First, let's prepare the custard, because it will need time to cool. As for the cream, I want to say that if you don’t really like milk custard, then it’s better to cook it - as they say, it’s not for everyone! So, put half a liter of milk on the stove to warm up. In the meantime, beat the sugar, eggs, flour, vanilla and remaining milk until smooth. 
2. As soon as the milk begins to boil, pour the whipped mixture into it in a thin stream. Cook the cream over medium heat, stirring constantly until thick (boils for 1-2 minutes). At first it will be liquid, then it will begin to thicken. 
3. The cream needs to be cooled to room temperature, and while it cools, take care of the cakes. 
4. Grate the butter and grind it with flour until crumbs form. Then add cold water and knead the dough. See how easy it is! But before you start working with the dough, you need to cover it with cling film and send it to the refrigerator for 20-30 minutes. 
5. Roll out the dough into a thick sausage and divide into 8 equal parts. I divide first in half, then each half in half again - you get quarters. And then in half again - that's 8 parts. 
6. Take baking paper and roll out one piece of dough very thinly. Don't forget to dust with flour as you roll out. Send the first cake to bake and in the meantime roll out the second one, so things will move very quickly (bake at a temperature of 200 degrees for about 5-6 minutes). 
7. Hot cake should be cut off immediately. You can use a lid or plate as a template. It's okay if the cake breaks, it will not be noticeable when assembling the cake. 
8. Fold the finished cakes in a pile and make a crumb out of the trimming - it will go for decoration. 

Hooray! It is found - the easiest Napoleon cake recipe! Products - a minimum, labor - too, but there are no difficulties at all! According to this recipe, even a novice hostess can easily bake a delicious homemade Napoleon. Checked repeatedly - by my friends and by me personally!
I love Napoleon cake!! This is my favorite cake since childhood, and when I was little (and not so little, up to 20 years old for sure!) - I always asked my mother to cook this particular cake for my birthday! And now I delight my family with my favorite treat. Everyone in our family loves Napoleon, and I think that many readers agree that this is the most delicious cake in the world!

Only one moment - Napoleon seemed to me also one of the most difficult recipes. I tried several of them: starting from the classic, from homemade puff pastry, continuing with a simplified shortbread version - also tasty, but easier; and finishing with a quick puff pastry cake - with strawberries or cherries. All of these options are delicious and good in their own way. But once I was treated to a delicious, delicate cake, soaked in fragrant cream, sprinkled with delicate crumbs, and the cakes melted in my mouth!

And how I was surprised by the recipe for the simplest Napoleon with its minimalism. It turns out that the pinnacle of culinary skills and the crown of gourmet fantasies can be baked quickly and easily! I suggest you try it too! The cake is very big and delicious.

The volume of the glass is 200 ml, flour = 130g, sugar = 200g.

Ingredients:
For cakes:
- 3 cups flour (390-400 g);
- 250 g butter;
- 100 ml of water.
For custard:
- 1 liter of milk;
- 2 eggs;
- 300 g sugar (1.5 cups);
- 2 sachets of vanilla sugar or a couple of pinches of vanillin;
- 2 heaping tablespoons of flour.
How to bake:
Knead the dough for the cakes: after sifting the flour into a bowl, grate cold butter on a coarse grater.

Grind with hands into crumbs and pour in cold water.

We quickly knead the dough with our hands and blind it into a lump - well, let it be heterogeneous, the main thing is that it is stuck together! You don’t need to add a lot of flour, for example, you can put a lot of flour in excess of the norm, but flour can be different; at first it seems that the dough is sticky, but then you will realize that the dry and liquid ingredients are just in balance.

Having rolled a bun from the dough, put it in the refrigerator for 30 minutes. That's how simple! Much lighter than puff pastry.
In the meantime, the dough is cooling, prepare two sheets of parchment, a rolling pin, a baking sheet, a knife and what you will use as a template for cutting cakes: a lid from a large saucepan, a plate or cardboard. The cake can be given a round, square or rectangular shape.
Take out the dough, roll it into a plump sausage and cut into 8 parts. To make them equal, it is convenient to do this: cut in half, then each half again in half - into quarters; and cut them in half again - into eighths.

Turn on the oven, let it warm up to 200C.
We put a sheet of parchment on the table, sprinkle with flour. We put one piece of dough on the paper, also sprinkle with flour and roll it out, dusting with flour and turning it over, into a thin cake. The thinner, the better - so that it directly “shines”! Just try to roll it evenly, otherwise it may bake unevenly: in thin places it is already fried, and in plump places it is still underbaked. So we roll out evenly and thinly, 2 millimeters. And we prick with a fork so that it does not swell during baking. It is even more convenient to roll out the cake between two sheets of parchment.


We transfer the cake directly with parchment to a baking sheet and put it in the oven.

Thin cakes are baked very quickly: 5 minutes at 200C, and you're done! It is not necessary to overdry, because they will become brittle. Golded - and enough!
In the meantime, one cake is in the oven, on the second sheet of parchment we roll out the next one, as when baking a honey cake - thanks to such a “conveyor”, things are going cheerfully and cheerfully.

Having taken out the cake, immediately, hot, we apply the template and cut it into shape. If you hesitate, it can crumble. But that's okay, broken cakes can be placed in the middle of the cake. For now, put the scraps in a bowl - they will be needed for the crumbs. And carefully stack the cakes in a pile on a dish.

Here are all the cakes ready! You can make custard. I usually make a special “Napoleonic” cream for this cake, here the recipe is a little different, but I liked it for its simplicity.
So, we divide a liter of milk in half. We put one half on the fire with a non-stick saucepan, let it warm up.

In the second half-liter of milk, add sugar, eggs, vanillin, flour and beat everything with a mixer or whisk, so that no lumps remain.


When the milk begins to boil on the stove, pour the whipped mixture into the boiling milk in a thin stream. Stir before pouring if the sugar has had time to settle to the bottom of the bowl after beating.

And cook the cream, stirring all the time, until thickened. I cooked for 5-6 minutes over medium heat and, after boiling, for a minute or two on a light less than average.

At first, the cream is liquid, but don’t let that worry you: in the end, it will turn out to be the desired density. At first it pours like milk; then, starting to boil, it becomes thicker, gurgling like semolina. The finished hot cream may still seem watery - but as it cools, it becomes even thicker. Room temperature cream is just the right consistency to spread and soak the cakes well.

We coat the cakes, stacking them on top of each other. Handle the cakes with care - they are very fragile.

We also grease the top cake and sides of the cake with cream. We crumble the trimmings into small crumbs with our hands and sprinkle the cake on top and sides.

And now a little patience ... lick on the cake and wait for it to soak.

Ideally, until the morning, but if you really want to, you can taste it in a couple of hours.

But it is better to cultivate willpower, since the soaked cake is much tastier!

This is exactly the "same", familiar from childhood, the taste of the real "Napoleon"! And I am very glad that it turned out to be so easy to prepare your favorite cake. I am happy to share with you; It's great if your family loves the recipe!
Hi all. Today I will share with you the recipe for the legendary Napoleon cake. I think for many this dessert is associated with childhood, and also with the New Year. Because, most often, it was on this holiday that our mothers and grandmothers spoiled us with this masterpiece.
There are two camps of people who are divided according to the type of finished product into a “wet” version and a “dry” version, or, more precisely, into soaked and crispy. I prefer the “wet” version of Napoleon. With lots of . Recently, I began to prepare a light version of the cream -. In addition to these classic options, you can cook with and with, it's insanely delicious. With these creams, the cake just melts in your mouth.
Well, if you are a crunchy lover, then just replace the custard with butter, and you will be happy. For example, or
What is a Napoleon cake anyway? This is a puff pastry. I will tell you in detail how to cook this most puff pastry at home. Of course, you can also buy ready-made puff pastry. But, as you know, the taste will be completely different.
I won’t write about the preparation of custard here, I just give links to two creams, the choice is yours - and. Well, for those who like to crunch -.
So, how to cook Napoleon cake at home. By the way, I want to note that the weight of the cake according to my recipe is 2-2.5 kg. If you want a smaller size, feel free to halve the ingredients.
Napoleon cake recipe step by step with photos.
Ingredients:
- 450 gr. flour
- 250 gr. butter 82.5%
- 1 egg
- 150 ml. ice water
- 1 st. l. vinegar 6% (I have white wine)
- 1 tsp salt (no slide)
Cooking:
We send the butter and a glass of water to the freezer for 30 minutes. I usually put the butter in the chamber in the evening, and in the morning I start cooking.
Sift flour into a bowl.

We rub our well-chilled butter on a coarse grater there, mixing the butter with flour all the time.

Quickly rub the grated butter with flour with your hands, spend no more than 2-3 minutes on it.

Add the egg, salt and vinegar to the chilled water.

Mix with a fork. Vinegar can be any, but not more than 6%. In my case it is white wine.

Pour this liquid into the butter-flour mixture and collect the dough into a ball. There is no need to knead the dough for a long time until smooth. It is ideally obtained with large pieces of unmelted butter.

We divide our dough into 13-15 parts. This time I had a diameter of 19 cm. 15 cakes came out, before that the diameter was 22 cm. 12-13 cakes came out. We remove the dough in a container sprinkled with flour, either in the refrigerator for 3-4 hours, or in the freezer for an hour.

During this time, prepare the cream. I have recipes for two types of cream on my site that are ideal for the layer of this cake. and its light version - . You can choose the cream of your choice. In these articles, the amount of ingredients is calculated specifically for this recipe.
After our dough has cooled, we proceed to rolling. If the dough was in the freezer, then we shift it to the refrigerator. Each time we take the balls out of the refrigerator one at a time, do not take out the rest of the dough so that it does not melt prematurely.
I used my miracle purchase - a silicone mat, it has markings with different diameters. In one of the articles, I already told you about its benefits, then I cooked.
Here is my silicone mat. If you didn’t find one in your city, then you can order it in the Bakerstore store using this link - Silicone mat.

If you don’t have this device, then I suggest rolling out the dough on parchment, where you draw a circle of the diameter you need in advance (just remember to turn the parchment over to the other side before rolling, so as not to eat the dough with pencil particles later). So, you at least roughly understand what to strive for.
The dough should be rolled out as thinly as possible, constantly sprinkling flour on the rolling pin. Of the indicated number of cakes, the thickness will be just the minimum. It is necessary to roll out the dough a little more than the outlined circle. Firstly, the dough will shrink during baking, well, and secondly, we will make the top coat of our cake from the scraps.

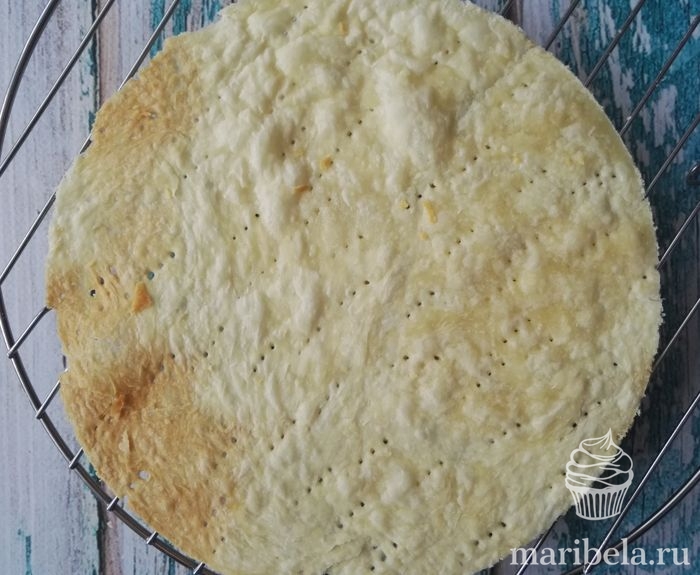
After you have rolled out the dough, prick it with a fork. So the cake will not rise much when baking.

I baked the cakes directly on the rug, if it is not there, then transfer the rolled cakes to a baking sheet covered with parchment and bake at 200 ° for 5-7 minutes until golden brown. Try to fit 2 cakes on the baking sheet at once, so the baking time will be significantly reduced.

As soon as the cake is ready, you must immediately cut it! This is a very important point, since the cakes from the oven are still pliable, but as they cool, they become brittle and will simply crumble. We cut it in the same way, focusing on the saucer, carefully with a knife. And even easier - cut with the help of a cover, you just need to scroll it left and right half a turn, and no knife is needed, and the circle turns out perfect. Unfortunately, I did not have a lid of the diameter I needed, and I used a plate.

Transfer the sliced cake to a wire rack and let it cool.
We do this with each cake.
During baking, our cream will just cool down and be ready to go.
We collect the cake.
We spread a couple of spoons of cream on the dish so that the cake does not slip.

Place the crust on top.

Lubricate it with cream. Do not spare the cream, according to my recipe, a sufficient amount comes out (2-3 tablespoons can be safely taken). So we do with all the cakes. At your request, you can put some filling in the layer, my mother always puts walnuts, you can add jam or curd, boiled condensed milk. This time I missed every 3 cakes, I just had a jar left after cooking. And you can not add anything, our dessert already tastes great.

After we have collected the whole cake, we press it a little with our hand on top and send it to the refrigerator for a couple of hours. During this time, the cakes will be slightly soaked with cream and the cake will settle. You can put a load on top of the cakes for 30 minutes, so the cakes will become even softer.


We send the cake to the refrigerator for half an hour, so that the cream grabs.

At this time, we put our trimmings of the cakes in a blender and grind them. I don’t like to chop much into crumbs, it seems to me that this is more suitable for. But you can choose a different size for yourself. By the way, you can grind it simply with your hands or with a rolling pin if there is no blender in everyday life.

Sprinkle these scraps on our cake.

We put it in the refrigerator to soak. Best for overnight. From above, you can decorate with berries, or you can not decorate and leave it like that.

Here's what a handsome man turns out. A large number of cakes and cream make this cake a truly royal dessert. The recipe for this cake was borrowed from Victoria Melnik, for which many thanks to her.
And, following such a delicate and feminine cake, I will soon tell you the recipe for a real masculine, brutal handsome man - dark beer cakes, chocolate cream and ganache ... And all this splendor of taste will be gathered in. Your men should appreciate it. Do not miss!
Enjoy your meal.
I have been baking "Napoleon" according to this recipe for 10 years and this cake has become my signature dish!!! Napoleon cake is always a holiday in our family! If someone has a different opinion regarding this famous dessert, I can say with full confidence that you have not tried the real Napoleon. All quick options from ready-made puff pastry are not even close to it. Delicious, but not the same.
Unfortunately, in our time, the store-bought analogue is not much like the classic Napoleon cake, so the only option to try the real, most delicious puff cake with delicate custard will be self-cooking at home. Troublesome, but worth it!
I hope my step-by-step photo recipe is useful to you.
For cooking, you will need very simple and affordable products:
Ingredients:
For test:
- Wheat flour (highest grade) - 6 cups,
- Margarine or butter - 2 packs (200 grams each),
- Chicken eggs - 2 pieces,
- Salt - 1 teaspoon,
- Water - 450 ml.
For custard:
- Chicken eggs - 4 pieces,
- Sugar sand - 0.5 kg,
- Butter - 0.5 kg,
- Wheat flour - 4 tbsp. spoons,
- Cow's milk - 1 liter.
Cooking cakes:
Please note that the dough for the cake must be kneaded with a knife. So the cold butter will not melt from the heat of your hands and will take the amount of flour that is needed. Otherwise, by overdoing it with flour, you risk getting a very tough dough. Whereas, ideally, thin cakes should be crispy and at the same time tender. 
Lightly freeze margarine or butter, so it will be easier to work with. Sift flour onto a work surface. In flour, you need to finely chop the frozen butter with a knife, sprinkling it from the edge to the center. As a result, you should get a dry crumb. 
Now we take a half-liter jar and break two chicken eggs into it, fill the rest of the jar with water. Shake the contents thoroughly with a fork, adding salt there. 
From the resulting flour crumbs, we form a slide, make a recess in it and begin to add liquid from the jar. 
Again, everything will need to be “chopped” with a large knife, 
Those. You don't even have to get your hands dirty in the dough. 
Pour the liquid mixture in parts until it runs out and work with a knife all the time. 
Before our eyes, the sand crumb turns into a homogeneous dough. 
As a result of this work, you should get a homogeneous lump. 
The finished dough for the Napoleon cake should be divided into 16 equal lumps, laid on a board, wrapped with cling film or a bag, sent to the refrigerator for 20 - 30 minutes. Or lightly freeze in the freezer. 
Then we take the dough out of the refrigerator, and roll each lump into a thin cake, using the minimum amount of flour to sprinkle the table. 
The cake should be as thin as possible, literally translucent. Any form. It is easier to roll out rectangles to the size of the baking sheet. With round cakes it’s a little more difficult, they need to be cut in raw or finished form, and their number will turn out to be greater. 
The dough is quite elastic, do not be afraid to tear it when transferring to a baking sheet. Even if this happens, there is nothing terrible in it. Cakes can be pricked with a fork in several places so that they swell less. 
We send the baking sheet to the oven, which needs to be heated to 180 - 200 degrees. We bake the base until a beautiful golden color. While one cake is baking, roll out the next one. 
As a result, you should get 16 ruddy puff cakes of a rectangular shape or a little more round. 
Custard preparation:
Look no further for a better recipe, I assure you, this one is perfect! 
To prepare it, you need to beat chicken eggs and wheat flour in a deep cup until smooth. It's easier to use a blender. 
In a separate tall saucepan with a thick bottom, heat the milk and dissolve the granulated sugar in it. There is a lot of cream, the dishes should be capacious. And in no case do not use an enameled or aluminum saucepan. In the first it will burn, in the second it will color the cream gray when whipped with butter. 
Pour the egg mass into the hot milk with sugar in a thin stream. In the meantime, stir constantly. Cook the custard on a quiet fire with constant stirring. 
Cook until puree. Cool the custard mixture to room temperature. Stir several times while cooling to prevent a crust from forming. 
Butter must be taken out of the refrigerator in advance so that it becomes soft. Before you combine with the cream, the butter must be beaten until smooth. 
Only then, in small portions, add the cooled cream to the oil. Not vice versa! 
Beat with a mixer until smooth. 
It remains only to collect our gorgeous cake.
Assembly:
I'll show you how to make sure that the cake plate remains clean during assembly. A sheet of baking paper - this little detail is a little secret of your accuracy. We line the bottom of the dish or tray with parchment or paper. 
Lubricate the first cake with custard, cover with the second and press to make the cake denser. 
Repeat until all layers are laid. Don't forget to tamp. Napoleon must be tight! 
It's time to remove the sheet of paper, hold the cake with one hand, pull out the sheet with the other. 
From scraps or one cake you need to make a crumb. You can crumble them with your fingers, or you can put them in a bag and roll it with a rolling pin. Sprinkle the top and sides of the cake with crumbs. My sides are not sprinkled with anything. In this crumb, you can already add chopped walnuts or chocolate grated into crumbs to your liking, this will not make the cake worse.
We leave the finished cake in the refrigerator for impregnation and solidification of the cream, it can take at least 3 hours, it is better to wait overnight. 
I think I convinced you that cooking Napoleon at home is quite simple and affordable, the main thing is that there is a desire! 
In the Guinness Book of Records, sweet Napoleon is mentioned, the largest cake weighing 1.5 tons, it was baked by culinary specialists from the city of Zelenograd.
This layer cake can be found in many cuisines of the world, but it will be called differently. For example, in England you will be served a vanilla slice, but in Italy and France you can order at any Millefeuille cafe and they will bring you a piece of airy multi-layered cake, known to you as Napoleon, by the way, in translation millefeuille means "thousand layers". But the Americans, like us, know this puff cake called "Napoleon".
There are a great many stories of the creation of this famous dessert, but I would like to tell one of the most unusual and, in my opinion, the most piquant. As you know, Bonaparte was a big fan of hitting on pretty girls. So one day, flirting with another cute lady-in-waiting, his wife found him. And in order to get out of this very piquant situation, Napoleon told her about how he whispered in the ear of a beautiful girl about his newly invented recipe for a delicious cake, that, it turns out, from which the girl blushed so much! The wife pretended to believe her missus, but demanded proof. Bonaparte hastily dictated the cake recipe, a complete improvisation. Of course, Bonaparte's chef made some adjustments to the recipe. As a result, for breakfast, the spouses had an extraordinary cake on the table, which got its name - Napoleon, in honor of its author.
Well, if we talk about the plausible story of the creation of a cake loved by many, then it was baked for the first time in 1912 by Moscow confectioners for the 100th anniversary of the victory over the French and gave it the name Napoleon.
You just have to defeat your "Frenchman" in the kitchen, the step-by-step photo recipe presented today will help you. Perhaps this cake will become your signature sweet dish, like mine. I have been baking it for over 10 years, and I thank Natalia Pyatkova for the recipe.
Today we will cook the most delicious cake "Napoleon". Delicate, melting in your mouth, fragrant homemade cake "Napoleon" is rightfully the king among homemade cakes. Nothing compares to homemade baked goods made with love. And it’s not necessary to cook cakes only on holidays: after all, a simple homemade Napoleon recipe allows you to bake a yummy at least every day. Let's not waste time, but go to the kitchen and prepare the Napoleon cake.
Ingredients:
- 1 chicken egg;
- 1 pinch of salt;
- 250 grams of creamy margarine or butter;
- 200 milliliters of water;
- 700 grams of flour.
To prepare the cream:
- 420-450 grams of sugar;
- 8 grams (sachet) of vanillin;
- 1 tablespoon of starch;
- 6 pieces of chicken eggs;
- 1 liter of milk;
- 200-250 butter;
- 4 tablespoons of flour.
The most delicious cake "Napoleon". Step by step recipe
- For the dough, we need a large bowl with high sides. Sift flour into it through a sieve.
- Creamy margarine or butter, any of the products can be used in the recipe, put in the freezer in advance, for 15-20 minutes, so that they freeze and become hard.
- We rub cold margarine or butter on a coarse grater. You can do this right in the bowl into which we sifted the flour.
- Mix the grated margarine and flour until smooth. The result should be an oily flour, ground into a homogeneous crumb.
- We drive one chicken egg into a cup or glass, do not separate the yolk from the protein. Add salt and beat lightly with a fork or spoon.
- Add cold water to the egg with salt, mix. Please note that for the preparation of this cake, the water must be cold.
- Make a well in the middle of the flour and pour the egg and water into it.
- Now we start kneading the dough. First we do this with a spoon, then with our hands. The dough shouldn't be tough, but it shouldn't stick to your hands either.
- When the dough becomes smooth and homogeneous, we shift it from the bowl to the table and continue to knead.
- We wrap the finished dough in cling film or simply transfer it to a plastic bag. We send the dough to the refrigerator for half an hour.
- When 30 minutes have passed, take the dough out of the refrigerator and divide it into 16 parts. Sprinkle the table with flour first.
- Pieces may turn out to be smaller: it depends on the diameter of the mold in which you will bake the cakes. We leave a few pieces of dough on the table, send the rest back to the refrigerator.
- Roll out each piece of dough on a table sprinkled with flour into a thin circle.
- We cut out a square from parchment, a little larger than the diameter of our dough. We transfer the rolled dough to paper, this is done very easily, due to a large amount of butter or margarine. When the dough is shifted, we prick it in several places with a fork so that it does not bubble during baking.
- Preheat the oven to 220 degrees. As soon as it warms up, we send the dough into it, literally for 5-6 minutes. Bake until golden and remove from oven immediately.
- In the same way, we roll out and bake all the other cakes, then let them cool completely.
- Cut the baked cake evenly according to the pattern. Do not throw away the edges that crumble easily, but leave them to decorate the cake.
- While the cakes are cooling, let's prepare the cream. Pour milk into a saucepan and put on fire so that it warms up, but does not boil. Be sure to watch him, because milk tends to "run away."
- Pour sugar into a separate pan or bowl, beat in eggs and add vanilla. Mix everything with a spoon or whisk until smooth.
- Combine flour and starch, pour over eggs and sugar, mix again.
- Pour one ladle of warm milk into the pan with eggs, mix. So, gradually, we add it all.
- We put the pan on the fire and, stirring all the time, bring the mass to a boil. It should become smooth and thick.
- Let the cream cool slightly and put softened butter in it, which you need to get out of the refrigerator a couple of hours before cooking. Mix well. Cream for our cake is ready.
- With a warm, not yet cooled cream, we grease all the cakes. Be sure to put a little cream on the bottom of the dish in which you will serve the cake: this way the bottom cake will also soak well.
- Each cake that you put on top of the other, lightly press down. Do not forget to grease the sides of the cake with cream.
- We knead the scraps that we have left with our hands into crumbs: sprinkle the top and sides of the cake.
- We send the cake to the refrigerator for impregnation. This will take approximately four hours.
So you learned how to make a homemade Napoleon cake. Cut off a piece of cake: you will notice how tender, fragrant, very well soaked in cream. So it asks: "Eat me!". Well, now we just have to brew black or green tea, you can have coffee, cut the cake into portions and call your relatives for a tea party. Tasty? Yes, this cake is a decoration of any table. Cook with our site "Very tasty" - and your family will always be fed the most incredibly delicious dishes. Bon appetit!


