Crafts from salt dough in kindergarten. How to store mass for modeling
Salt dough is an affordable and ecological material, and modeling from it will not leave you or your child indifferent. The pleasure delivered by the achieved result and the process itself cannot be compared with anything, and that is why we invite you to get acquainted with the ideas for creativity in this section and please your baby with a new exciting activity.
Contained in sections:
Showing publications 1-10 of 825 .
All sections | Salt dough crafts. Classes, master classes
I want to bring to your attention my master classroom for educators. The basic principle master class -"I know how to do it and I will teach you!" The goal is to arouse in children and parents an interest in modeling from salt dough. Tasks - to master elementary skills, develop small ...
 modeling: "Diplodocus". Software content. Continue to teach children how to sculpt a dinosaur figure using a constructive sculpting method. To consolidate the skills of working with sculptural clay. Improve previously acquired skills in modeling (rolling, stretching, twisting, ...
Salt dough crafts. Classes, master classes - Short-term project in the second group of early age "Magic Dough"
Publication "Short-term project in the second group of early childhood "Magic ..." Relevance of the topic of the project. Nowadays, interest in various folk crafts, often almost forgotten, is being revived. Now the art of modeling from salt dough is attracting more and more attention. Salt dough modeling has a long history. It is known that in ancient times...
 MAAM Pictures Library
 The purpose of the lesson: To introduce the test; teach to knead the dough with fingers and palms of both hands; to form their interest in working with the test; develop fine motor skills. Tasks: teaching a variety of methods of action with plastic materials: kneading, pinching, flattening and ...
 Experimental - experimental activity in the senior group "Dough and its properties" Purpose: - To acquaint with the dough, its preparation. Invite the children to work with him: knead with the fingers and palms of both hands; roll out; roll, shaping. - Arouse their interest in the work...
Summary of the master class on testoplasty "Dough is easy" for parents on the topic: SOUVENIR-CHARM "Horseshoe for happiness" Purpose: Participants: parents and children. Purpose: to teach how to use the possibilities of salt dough - testoplasty in the joint work of parents and children. Introduce ...
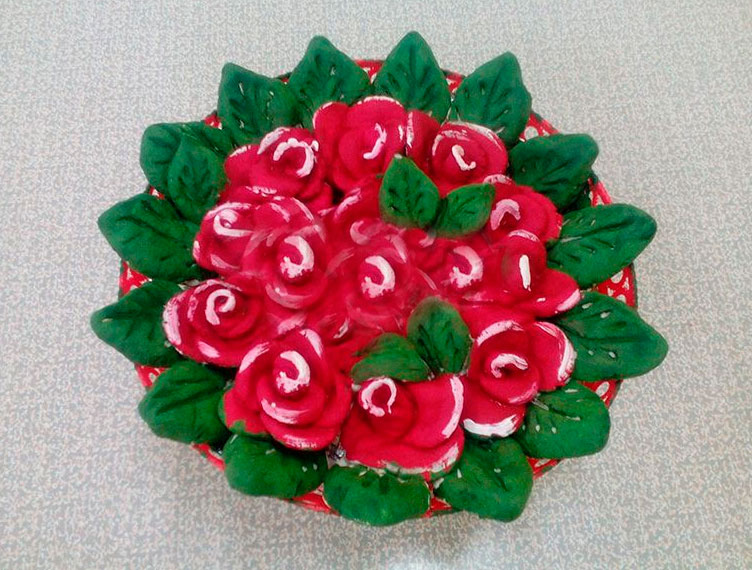
Salt dough crafts. Classes, master classes - Testoplasty master class for parents and children of older combined groups "Roses on a plate for Mother's Day"
Purpose: creation of a social situation of development in the process of artistic and aesthetic activity "Roses on a Plate for Mother's Day" Tasks: - creation of conditions for acquaintance with the history of salt dough, the technological capabilities of this material; - Creation...
Master class "Decorating a cutting board using the testoplasty technique" MASTER CLASS "Decorating a cutting board using the testoplasty technique" Pomogaeva O.O. Teacher of additional education Purpose: Transfer of pedagogical experience in making a composition from salt dough. Tasks: teach the phased production of volumetric ...
Project for the development of fine motor skills in children of senior preschool age with mental retardation through testoplasty Project for the development of fine motor skills in older preschool children with mental retardation through testoplasty Type of project: Research and creative Group Medium-term Place of implementation of the project: MBDOU CRR Kindergarten "Solovushka" Project participants: children of the compensatory group ...
The program of additional education "Sculpt, mold the dough" (senior, preparatory group for school) 1. Target section 1.1. Explanatory note The educational program of the preschool educational institution "Sculpt, mold the dough" was developed in accordance with the federal state educational standard for preschool education and taking into account the exemplary basic general educational program of preschool ...
Salty dough
Have you ever heard of salt dough modeling? No? Then you have come to the right place. After all, it is here that we can tell you a lot of interesting things and explain exactly how this is done. When you look at the final result, it seems that doing all this is very easy, but in fact this process is not so simple. It, like any other type of needlework, has its own secrets and little tricks.
First, it's dough. You can learn how to do it correctly from our materials. Secondly, the dough is not the only item that we need when sculpting, we also need to stock up on a rolling pin, a pointed stick or pencil, scissors and a knife. Thirdly, in order for the product not to deform and look beautiful, it must be properly dried, painted with paints, and then varnished on top.
When embarking on a creative process with a child, any parent strives to use only safe material. This is dough mixed with salt. Its plasticity allows you to show your imagination, and joint creativity always brings variety and joy to life for a little person. Making crafts from salt dough with your own hands is an exciting pastime!
With absolute safety and plasticity, such a dough can be turned into anything. You can make either a regular figurine or a cast, or make a real episode from your favorite fairy tale. First of all, you need to know the process of preparing plastic dough and the hardening time of the material.
There are two ways to make dough for crafts, each of which is a material for creating your own masterpieces with which to decorate the interior.
First recipe:
- Wheat flour of the highest grade (2 cups);
- Running water without heating (1 glass);
- Extra table salt (4 tablespoons).
 For children, the result will be an absolutely safe material that can be tasted without harm to health. The consistency of the dough should be moderately soft and elastic, which will allow you to sculpt any shapes and crafts.
The second recipe is more stable to physical impact, however, you need to use it if the child is more than 4 years old. The composition of the dough for durable modeling includes:
- Premium flour (it should be white crumbly);
- Running water;
- PVA glue stationery.
It is the glue for paper in this composition that will make it impeccably durable, and subsequently a figurine or other product from this mass it will be more evenly covered with paint. At the same time, the adhesive composition allows you to make changes already in the finished work, since PVA does not allow the surface to dry immediately.
Salt dough drying process
 In order for the product not to lose its original appearance and not become covered with cracks over time, it is thoroughly dried. At the same time, the figurine can be a great addition to the interior for a long period.
To dry the figurine in natural conditions, you will need patience. To make the process go faster, the figurine is placed in the oven. At the same time, drying in open sunlight is contraindicated, since unexpected flaws in the form of bubbles and chips may appear.
The heating temperature of the oven can vary from 75 to 150 degrees, in the first case, the figure must be kept for 1 hour until the material dries completely, in the second, 40 minutes are enough to make the dough strong.
Also, the drying time directly depends on the size of the figurine or pann: the larger they are, the longer they should be kept under the influence of temperature. It is best to spread all the resulting products on a baking sheet, previously covered with food foil for baking. So the dough will not stick to the bottom and warms up evenly from all sides, without burning during the drying process.
 Sometimes the craft is put on the battery so that it warms up faster. However, the mass will keep its shape only if it receives heating from all sides. If the figurine is mounted on a battery, the hot air will affect only one of the sides, which will lead to rapid deformation.
The microwave oven is also not at all suitable for the art of creating paintings from salt mass. There may not only not be enough space for the arrangement of all elements, but the whole work may irrevocably change its shape.
If the figurine has additional decorative elements in the form of glass beads, rhinestones and beads, then the maximum possible drying temperature is no more than 120 degrees. When the product is drying, do not forget to turn it over so that each side is well dried.
Coloring dough for modeling
White figurines and salt dough panels look monotonous and without much mood. But one has only to give a shade to one of the fragments - a toy or a picture is immediately transformed. To color the dough, two types of paint are mainly used:
- acrylic paint;
- Gouache.
 The painting process may also differ. For example, if you need to paint most of the craft in one color, then you need to add the dye to the workpiece and knead the dough well. And if you plan to make a multi-color figure, then you need to divide the mass from the prepared dough into several parts and mix each color individually.
In order for the color not to fade, the picture from the dough must be covered with a transparent varnish. A beautiful reflection of varnish gives the effect of glaze on the product. It is not recommended to leave a picture or panel in open sunlight - the properties of the plastic material may change.
Simple and complex crafts for kids
Being engaged in regular hand modeling, you can master the techniques and techniques and create a real masterpiece. However, children of the younger preschool group only need to learn how to sculpt the simplest figures in order to easily move for more complex products.. When sculpting, attention is concentrated, you can choose and mold to make the figure that you like. A step-by-step instruction for sculpting salt dough for children can effectively teach a child any technique.
What to blind a baby 2-3 years old
This is new material for the baby, so first give him a small amount of dough in his hands. The child will be interested in everything: tactile sensations, smell, and maybe even taste. But it is necessary to explain and show in an accessible way that the mass is inedible and is intended for another no less interesting business.
Required tools for sculpting:
- rolling pin;
- Small molds for baking;
- Various beads, buttons, prints with interesting patterns.
 Elementary figures can consist of balls, sausages, layers. Ask the crumbs what exactly he likes, and develop imagination, helping to bring all ideas to life. The simplest figure can be a snowman, roll one ball or invite the child to roll it up on their own, then make two more balls, but smaller. Learn to make an ellipse, square, triangle.
Roll out a small layer of dough with a rolling pin and press objects into it. Whether it's a button or beads - all this will perfectly develop the fine motor skills of the child. Figures can also be cut from the layer, using cookie cutters. Modeling is an amazing country of the unknown, but insanely interesting.
Ideas for a child aged 4-6
 The child's fantasy is already well developed at the age of four, and he can independently reproduce simple ideas. Offer to draw a picture on paper and help to apply fragments of testoplastic on it step by step. It turns out a very original decoration interior decoration or a great gift idea.
At the age of six, a child can please his parents with a beautiful figurine of rather complex execution. It may contain many small elements that require perseverance. Children at this age are already thinking seriously, trying to surprise their parents. An example of crafts can be the painting "Animal World". It is during this period that you need to learn special techniques and methods of interaction with the salty consistency.
Step by step modeling for beginners
The first level for mastering the technique of working with salted dough is the creation of flower arrangements. Hard work will be rewarded with an abundance of smiles and admiration.
decorative red rose
To create a beautiful rose for a chic bouquet, you need to have the following tools on hand:
- rolling pin;
- Knife for plasticine;
- Round shape, small size.
 Take a medium-sized ball of salty mass. With a rolling pin, turn it into a layer, the thickness of which does not exceed 1.5 cm. With a round shape (you can use a table glass), make several circles. Now slightly bend each petal and put the rest of the circles. Then it remains only to squeeze them into a bud and gently unfold the puff top petals. Only the dough does not need to be pressed hard so that the petals do not stick together, otherwise the volume will disappear.
After the bud is ready , make a stem and decorate with a scattering of small leaves. On the flower, you can make decorations from mother-of-pearl beads and opaque glass beads. A beautiful and neat rose is ready.
Original Christmas decorations
 To give a New Year's mood, it is not necessary to spend a lot of money on a gift. It is enough to present a home-made set of Christmas decorations made from a mass that is pleasant to the hands. To do this, you need a plastic mass, wire and acrylic paints.
The simplest figurine is the bell. All toys will look neat if you follow the instructions step by step.
First make the basis for the bell - a neat and voluminous skirt, and attach a small stick to the center - she will play the role of tongue. Decorate the surface with multi-colored beads or glass beads, use Christmas colors for decoration - bright red and green. A hole must be made on top of the bell so that it is possible to attach the toy to the spruce branch. Thread a colored ribbon and tie a beautiful bow.
New Year's cookies on pendants are very easy to make, they will bring home comfort and joy. Make round cutouts from the finished dough. It is better to make a through hole closer to the edge so that there is a neat appearance. After that, decorate the cookies with a scattering of New Year's beads: snowflakes, stars, tiny donuts. After the Christmas tree toy has dried, thread a thick thread or multi-colored lace through the hole.

How to make salt dough for modeling.
We take: 1 cup of premium flour, 1/2 cup of fine salt (not iodized!), ¼ cup of very cold water. Mix flour and salt in a bowl. Pour water in small parts, kneading the dough well each time. The amount of water can be different, it depends on the properties of the flour, so water should be poured in small portions. Knead until the dough crumbles and sticks to your hands. It will turn out very similar to plasticine. Store the dough in a closed container or bag so that it does not dry out in the refrigerator. Shelf life is three days. To keep the dough longer, you can add 2 tablespoons of citric acid during kneading. (UPD- It looks like citric acid somehow interacts with varnish for children's creativity, the first time I did it without it and the varnish was transparent, but now it's kind of whitish.)
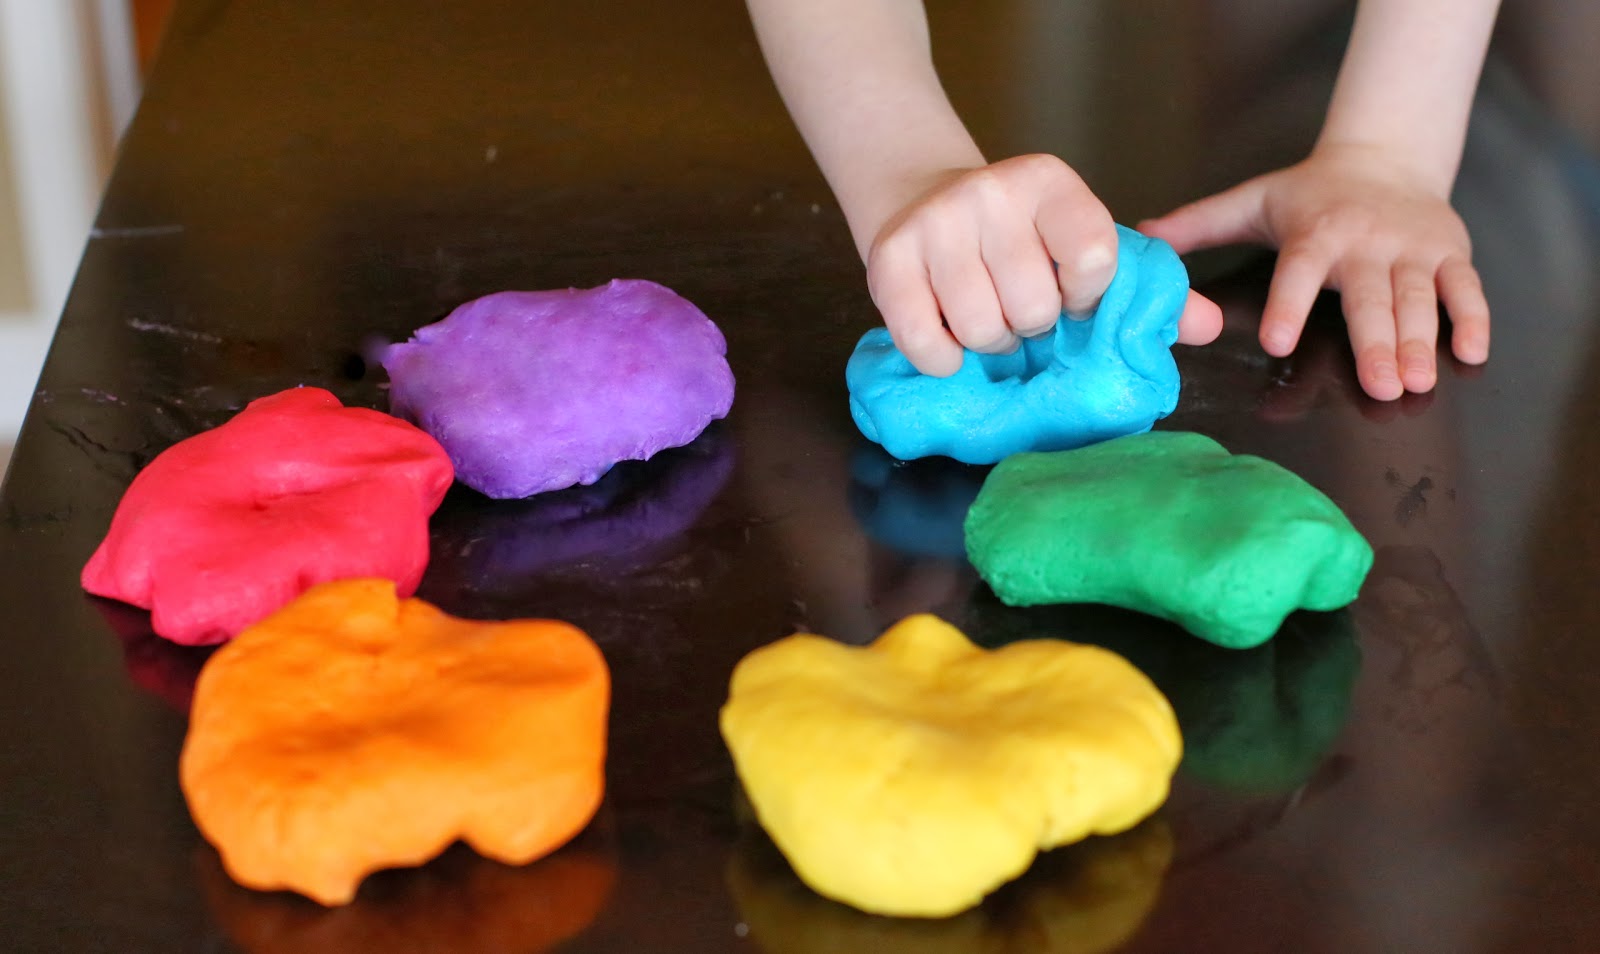
How to color the dough.
You need to take a small piece of dough, make a cake and put a little gouache in it. Knead this piece until the dough is evenly colored. You can first mix the color on the palette, and then color the dough. But it is much more convenient to color the dough with the main colors, and then mix the already colored pieces until the desired new colors are obtained. For sculpting food, it is very important to repeat the color of what we are sculpting as accurately as possible.
For example - sausage color = pink + a little brown
pink = lots of white + little red
To sculpt food, you will need the following colors - white (a lot), pink, sand, brown, yellow, orange, green, red. And be sure to leave part of the test unpainted.

We sculpt almost like from plasticine. We take out the dough from the container in small pieces so that it does not dry out. If the dough is still dry, add a few drops of water. If wet, add a little flour. You can also dust your hands with flour. To glue individual pieces of dough, moisten the junction with water using a brush. We use improvised materials for modeling - a garlic press, a strainer, toothpicks and more.
How to blind:

Broccoli
Let's see what broccoli looks like. Mixing three green shades. From a piece of the lightest shade we sculpt a sausage, divide it into small segments - these are broccoli legs.
We squeeze our dough through a kitchen metal strainer, we get an interesting texture. We moisten the leg with water and “glue” on it what was pushed through the strainer.


Sausage
We make a thin cake of sausage color. We lay thin strips of white dough on it. We turn the cake, roll it a little in our hands and put it in the refrigerator for a while. When it has cooled, cut the sausage into slices. We saw, but do not squeeze the dough.


Ice cream
We make a sand-colored cake, a ball and a cone of white. On the cake, with the back of the knife, we squeeze the cells, like a waffle. Let it lie down a little, dry a little - a piece that is too soft cannot be wrapped like a waffle. We make ice cream from white parts and wrap it in a waffle.

Cheese
Cheesy color = yellow + a little orange.
We make a cake, cut off the excess to make a triangular slice of cheese. With the rod from the handle we make holes, large holes with the back, small holes with the nose of the rod.

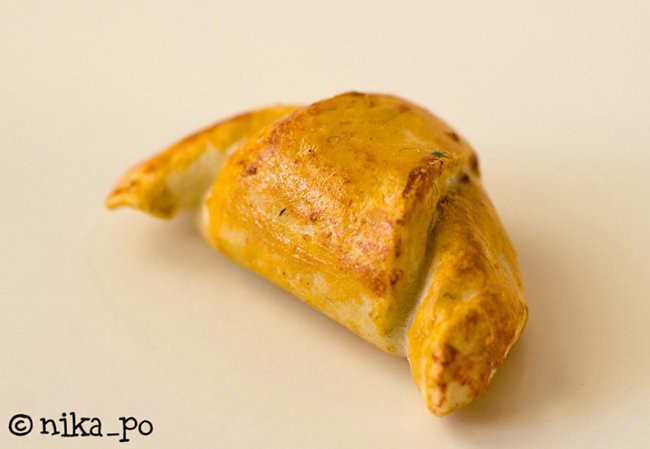
Bread and other dough products
We sculpt pieces of bread from uncolored dough, pies can be sculpted from uncolored dough or from sand-colored dough. We tint already completely dried products with crayons of oil pastels for children's creativity - we make a golden crust.


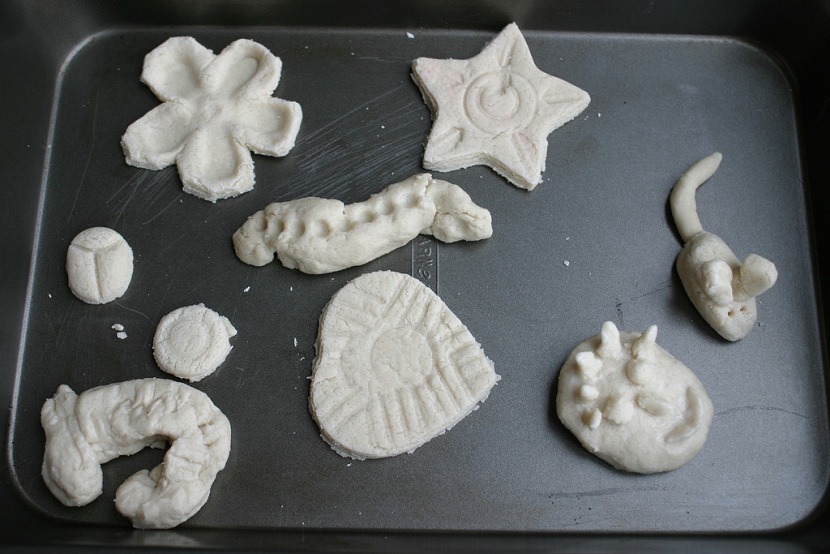
It is better to dry finished products simply in the air, on a smooth surface - for example, on a plastic file or oilcloth. When the top dries, turn over to dry the bottom.
When drying, the products turn a little pale, they must be covered with any varnish. It is better for children to use a special water-based varnish for children's creativity - it has no smell.

More
You can make a completely liquid dough (add water) and spread it. So you can depict butter on a sandwich or chocolate icing.

In order not to confuse with the sizes, it is good to try on while sculpting to the plate from which the toys will then be eaten.


We got to dessert.


Bon appetit:)
If you have a small child, then you just need to master salt dough crafts. However, who said that creativity is alien to adults? From this plastic material you can sculpt wonderful figurines and paintings to decorate the interior.
Our site is pleased to offer you a lot of workshops on making - there are “make-ups” for both the smallest and older children, there are descriptions of step-by-step manufacturing of various products for adults, which are accompanied by colorful photo of salt dough crafts.
Salt dough crafts the relevance is extremely high, because they are used for the development of children. The benefits of modeling for the development of fine motor skills are very great, in addition, during this exciting activity, the zones responsible for the development of speech and attention will be activated at the fingertips. Modeling is a creative activity that will require the manifestation of all his imagination from the child. In addition, it is not enough to blind a product made from salt dough - it must be decorated after drying, and this will also positively influence the development of artistic abilities and aesthetic perception.
Children like this kind of creativity very much, because the dough is a “living” and plastic material, but mothers do not worry that the child will accidentally pull the material into their mouth or stain things with it. Of course, in the case of working with the test of a small child, PVA glue should not be added to the material.
We note right away that making crafts from salt dough is quite simple - first you need to prepare the source material from flour, water and salt (on our website there is salt dough crafts photo illustrating the dough preparation process). Well, then you can start the creative process. If you are modeling with a small child, then master the modeling of the most fruits and letters (by the way, you can also learn the alphabet along the way). Crafts for older children will be more difficult - with them you can make pictures from dough, and New Year's toys, and animal figures, by the way, you will find master classes on making all this splendor with us.
Kids will also love making a variety of fridge magnets. Adults can create their own panels with attractive images, as well as master the manufacture of a colorful fruit basket, which will be an excellent decoration for the kitchen interior. After the craft is made, it will need to be dried in the oven or in the open air, then painted with gouache, watercolor or acrylic paints.
An attractive appearance can be given to the product using glazing or varnishing procedures.
Crafts from salted dough video will clearly demonstrate the entire process of making such a "machinery" - from kneading the dough to making a figurine, from baking it in the oven to coloring. With site website you definitely will not have any difficulties if you decide to master this interesting kind of applied art.
You can make a huge number of crafts from salt dough, for example: flowers, animals, various figures, inscriptions, numbers, toys, paintings and whatever you want! Modeling from salt dough is called bioceramics. The advantage of salt dough is that it is convenient to work with, this material is absolutely harmless and crafts made from it will delight you for several years. In this article, we will look at how to make crafts from salt dough with your own hands.
You will need: a glass of wheat flour, a glass of extra salt, half a glass of cold water, a bowl.

Recipe

The finished salt dough should not stick to your hands or crumble. It should be cool and comfortable to sculpt. I recommend watching the video master class!
There are two most common ways to dry salt dough. The first way: the finished craft will dry itself. The main thing is that direct sunlight does not fall on it, otherwise it will crack. The craft can be put on a flat surface and wait a few days. The second way: the finished craft is dried in the oven for 3 to 6 hours (depending on the size of the craft). Drying takes place intermittently. One approach is 1-2 hours. For quick drying in one go, set 75-100 degrees in the oven, and then the craft will dry in an hour. At a temperature of 120 degrees, the craft will dry in 30 minutes, but it is better to dry it naturally.
There are two most common ways to color salt dough. The first way: after drying, the finished craft is painted with acrylic paints or gouache using a brush. The second way: food coloring is diluted in water, then added during the preparation of the dough. When the craft is completely painted and dried, it must be covered with a transparent manicure or furniture varnish in 2-3 layers. Each layer must dry before applying the next. In this way, the craft will last for a long time.

You will need: dyed salt dough, stack, clear nail polish, toothpick.
Master Class

Salt dough asterisk is ready!
Salt dough caterpillar

You will need: dyed dough, knife, pva glue, toothpick, pendant, transparent nail polish.
Master Class
- Roll out the sausage.
- Cut it into 6 equal parts.
- Roll up the balls.
- Glue 5 balls together.
- Glue the head.
- Blind the nose and eyes, then glue them.
- Use a toothpick to pierce the hanging spot.
- Dry the craft.
- Attach the hanger.
Salt dough caterpillar is ready!
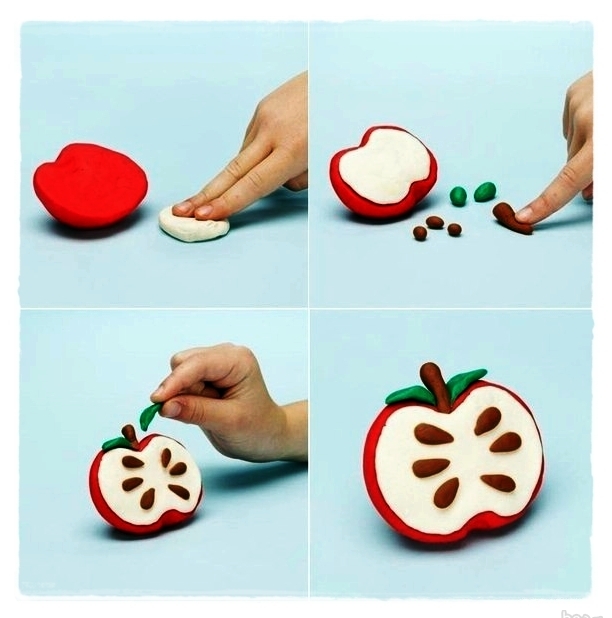
salt dough apple
You will need:
Master Class
- Blind half an apple, make the inside flat, pressing it to a flat surface.
- Blind a thin flat center and glue to the main part.
- Roll up 6 seeds and a stick, then glue to the apple.
- Blind the leaves, then glue them.
- Dry the craft.
- Cover with varnish and wait until completely dry.
Salt dough apple is ready!
Salt dough elephant

You will need: dyed salt dough, pva glue, clear nail polish.
Master Class
- Blind the elephant's body by rolling an elongated ball.
- Blind 4 legs in the shape of plump sausages.
- Blind the proboscis.
- Blind the ears of an elephant in this way: roll up 2 flat cakes, glue cakes of the same shape of a smaller size in a different color to them.
- Blind a small ponytail.
- Blind your eyes.
- Assemble the elephant in the following sequence: glue the legs to the body, then glue the proboscis, then the ears, eyes and tail.
- Dry the craft.
- Cover with varnish and wait until completely dry.
Salt dough elephant is ready!
You will need: salt dough, foil, a vase for sweets or a similar plastic container, gouache, a brush, a transparent nail polish, a modeling board, a knife or a stack.
Master Class


You will need: salt dough, nail scissors, pva glue, acrylic paints or gouache, nail polish brush.
Master Class

Salt dough hedgehog is ready!
Owl (eagle owl) from salt dough
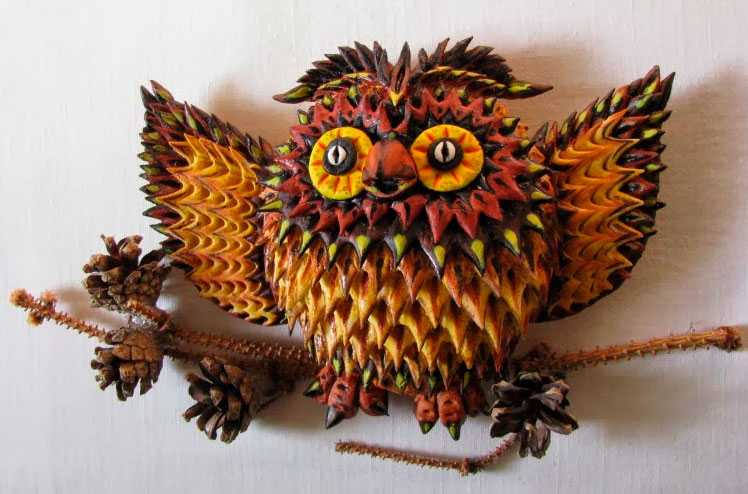
You will need: salt dough, pva glue, nail file, nail scissors, acrylic paints or gouache, brush, wooden board with pendant, transparent nail polish.
Master Class

Salt dough owl is ready!

You will need: salt dough, the base on which the craft will be attached, for example, a plank or plate, a stack or a knife, a sheet of paper, a simple pencil, a garlic crusher, a rolling pin, pva glue, acrylic paints or gouache, a brush, a transparent nail polish, a carnation.
Master Class

Salt dough fruit basket is ready! I recommend watching the video master class!

You will need: salt dough, a knife, a rolling pin, a simple pencil, a sheet of paper, sandpaper, acrylic paints or gouache, a brush, a transparent nail polish, a glue gun or pva, a base for crafts, for example: a board with a frame, a transparent nail polish.
Master Class

Salt dough pencil

You will need: water, flour, extra salt, a cardboard jar for the frame, PVA glue, scissors, a piece of decorative cord or corrugated paper, gouache, a brush, a button, stacks, acrylic varnish for crafts, a toothbrush.
Master Class
- Knead the salty dough in this way: pour a glass of flour, a glass of salt, add water, then knead to the desired consistency of modeling. Separate part of the dough, add beige gouache, then knead.
- Roll out the cake with a thickness of 10-15 mm.

- Apply PVA glue to the outer rim of the jar and wrap with dough. Cut off the excess with a stack, and smooth the joints with a damp brush.
- Create a small dotted texture with a toothbrush on the surface of the dough.
- Knead the brown dough, roll it into a cake 10-15mm thick.

- Cut a 2" wide strip of brown dough and glue it to the bottom of the jar.
- Make 2 large bases for owl eyes from white dough, then glue them.
- Make a beak from brown dough and glue it.
- Blind eyes from turquoise dough and glue them.
- Roll up 8 strips of pink dough, twist 4 flagella from them and make a bow, then leave it to dry for 2 hours.
- Form owl wings with brown dough drops, then glue them on.

- Weave bundles of beige dough and glue on the neck of the jar.
- Roll up a sausage from white dough, draw a lace texture with a stack and glue it as a collar under the beak.
- Put the craft in a warm place for a day.
- Paint the lower part and wings with brown gouache and decorate with white dots.

- Draw pupils and eyelashes with black gouache, wait until the paint dries, then draw white highlights on the eyes.
- Glue a pink bow over the wing.
- glue a button with a bow from a corrugated strip onto the lace.
- Cover the craft with varnish and wait until it dries completely.
Salt dough pencil is ready!
Dachshund from salt dough

You will need: salt dough, simple pencil, scissors, cardboard, paints, brush, rope, toothpick, foam sponge, clear varnish, PVA glue.
Master Class

Salt dough dachshund is ready!
Mushroom mushroom from salt dough

You will need: salt dough, light bulb, paints, brush, foil, cardboard, masking tape, superglue, PVA glue, paper napkins, clear varnish, stack.
Master Class

Mushroom mushroom from salt dough is ready! I recommend watching this video!
Funny pigs from salt dough

You will need: salt dough, paints, brush, foam sponge, stack, thin string, toothpick, black helium pen, PVA glue.
Master Class

Funny pigs from salt dough are ready! I recommend watching this video!

You will need: salt dough, baking sheet, rolling pin, knife, sheet of paper, acrylic paints, brush, ribbon, water, shoehorn, pencil, sandpaper, clear nail polish.
Master Class


