New Year's crafts from salt dough. #2 Christmas tree toy from the Christmas tree dough for children
Oksana Seifert
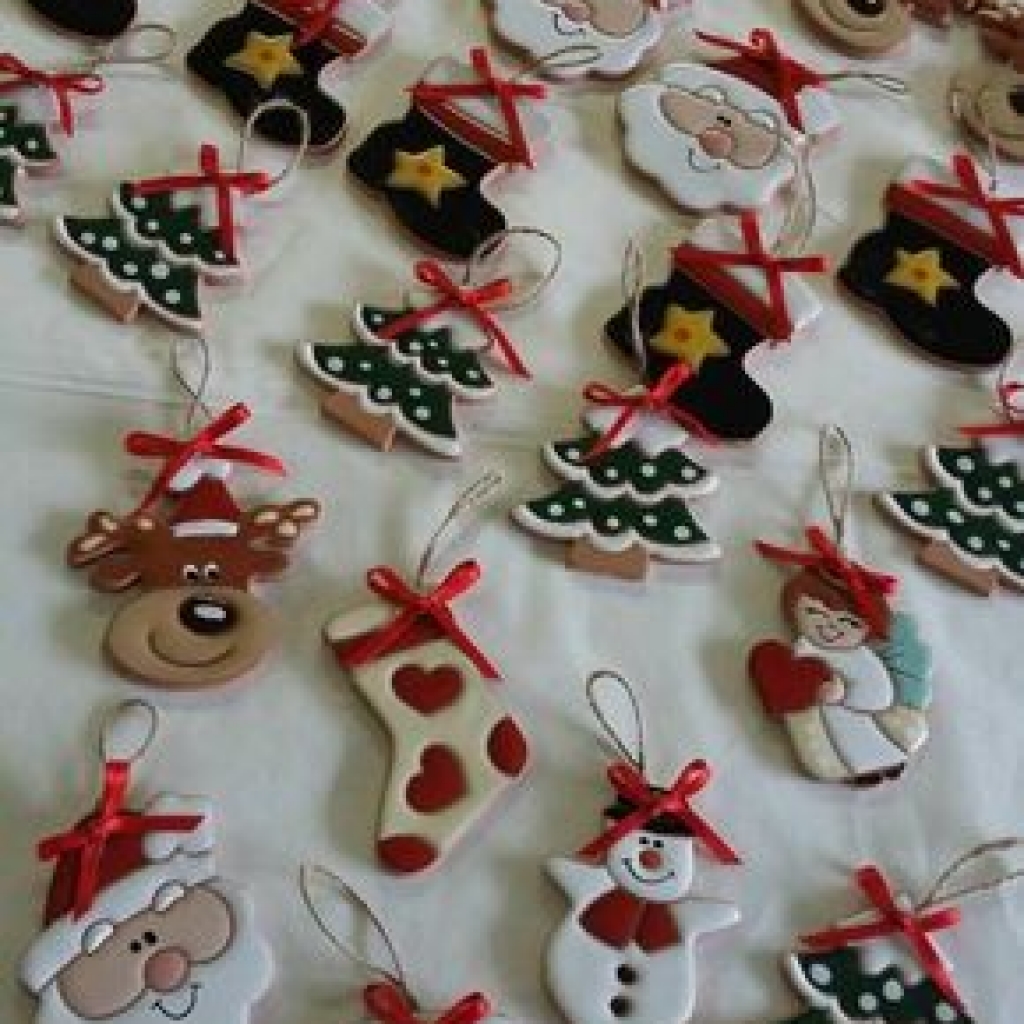
Good afternoon, dear colleagues! Winter has come into its own and very soon a cheerful and joyful holiday will come - the New Year! And as always, by tradition, we decorate Christmas tree, forest beauty purchased toys: colorful balls, icicles, snowmen, snowflakes, tinsel, etc. Well, what if we decorate herringbone toys made by hand. After all, such toys made with love, carry warmth and positive emotions of the one who made. Today I propose master class on making Christmas decorations(balls) from handmade salt dough. Such toys can be done together with children, since working with test develops fine motor skills of children's fingers. For making New Year's balls to us need: 1 cup flour, 1 cup fine salt, a little water, a cap of felt-tip pens, gouache paints, brush, non-spill glass, glue "Moment", or glue "Titanium", green, blue, silver sequins, star-shaped sequins, satin ribbons. Mix flour, salt and a little water in a small bowl and knead dough. It must be firm and thick so that it can be molded. Dough Roll out to a thickness of about 1 cm, and use a glass to cut out circles. With a cap from felt-tip pens cut a hole for threading the tape. Then our balls must dry. To do this, you can bake them in the oven, or you can leave them on a piece of paper for several days. After the balls have dried, you can proceed to the most interesting thing - their design. Here you can show all your imagination. Can be colorized gouache paint toys, draw patterns, glue multi-colored sequins using any available glue. Pass a satin ribbon through the hole and tie a bow. Our Christmas ball is ready! Can be decorated Christmas tree! Thank you for your attention! I wish you all good luck and creative success!


Related publications:
 The New Year will come only in a month, but we are preparing for the holiday now. By tradition, the guys from the senior group and I decided to do it.
 When the Golden Autumn exhibition was announced in the garden, I thought for a long time what we could do with our 3-year-old (almost) daughter. For her to participate.
Educator: Boeva Irina Yuryevna MBDOU kindergarten No. 34 Tasks: - To promote the development of fine motor skills of hands, imagination, observation.
Master Class. Purpose: to form an idea of the type of arts and crafts-testoplasty. Objectives: Level up.
 Good evening dear teachers. Today I want to share again my creativity from salt dough. And I made from the usual half a liter.
Easter is a big and bright holiday in the life of every Orthodox person. This year, a charity event was timed to coincide with this holiday.
 MASTER CLASS "BRIGHT COLORS OF AUTUMN" (AUTUMN TREES FROM SALT DOUGH) Autumn forest, playing with colors, Weaves wreaths from the crown of the trees, Its own.
Salt dough is the easiest, most environmentally friendly and affordable material for children's crafts. Today we will tell you from such a test and what else you can do with your child.
The long-awaited one is coming soon. Preparations for this wonderful holiday always begin about a month before it, or even earlier. Children especially love the preparations for the New Year holidays. They are happy to take part in the manufacture. So that you don't have to worry about the safety of materials for children's crafts, prepare salt dough and let the child make his own Christmas toys.
Children can become not only a wonderful decoration of the apartment for the holiday, but also a nice gift for relatives and friends.
How to make salt dough: recipe
Incredibly simple, the main thing is to keep the proportions and mix well. You'll need:
- 1 cup flour
- 0.5 cup salt (not iodized)
- 125 ml water
You need to mix water into the dough gradually, achieving a uniform smooth mass. For large and bulky crafts, it is better to take 2 cups of salt, while not changing the amount of flour and water. You can store the finished salt dough in the refrigerator, be sure to wrap it in a bag.
Master class on how to make a snowman from salt dough for the New Year
From salt dough, which a child can make with his own hands with only a little help from you, it will become a wonderful Christmas decoration, a gift for the holiday or a favorite toy.
For children's crafts for the New Year "Snowman" you will need:
- blue gouache
- spadeweed
- toothpick
- acrylic lacquer
1. Prepare salty dough from water, flour and salt. Divide the dough for modeling into two parts: a larger one and a smaller one. The smaller part of the dough needs to be dyed blue with gouache.
2. Now you can start: from white dough you need to make two cakes of different sizes for the torso and head of the snowman. As soon as the head is sculpted, immediately form a mouth, eyes with a toothpick. Now attach the arms and legs.

3. From blue dough, mold a hat of the desired shape, you can apply a pattern with a toothpick. Next, roll out a rectangle of blue dough - this will be a scarf, make the desired pattern on it. Next, make the buttons.

4. Insert a toothpick into the snowman's hand - this is the base of the broom. Squeeze out a little blue dough through the spadefoot, form a broom out of it, let it dry a little, and then put it on a toothpick.

Photo: www.millionpodarkov.ru
5. The finished snowman needs to be dried well and covered with acrylic varnish - this will give brightness to the children's crafts from salt dough!
Crafts from salt dough for the New Year: the best photo ideas for children
In order not to be limited only to a snowman, we have collected more that can be molded from salt dough. Such New Year's toys will be beautiful or home decor.


And if you add a little cinnamon and cocoa to the salt dough for modeling, you will get not only beautiful, but also good-smelling toys that will fill the house with an incredible aroma of the holidays.


Your children will definitely like to sculpt such New Year's crafts from salt dough. Yes, and you can try to create something original with your own hands. If you do not want to encroach on your child's modeling material, these can be repeated. Connect your imagination and have fun preparing for the New Year 2019!
The most magical holiday of the year is coming, which everyone from young to old is waiting for, and I want to please relatives and friends with unexpected gifts and surprises. To do this, it is not necessary to go to shopping centers and markets, you can make a charming gift with your own hands from improvised materials. Today, in the editorial review of the site, we will deal with special creativity, namely, New Year's crafts and Christmas tree decorations from salt dough. All the ingredients for work are in every home, and additional decorations will give souvenirs a unique identity and exclusivity.
Working with salt dough is not difficult at all - the elastic mass lends itself well to modeling, you can make decorations of any complexity and configuration.

salt dough recipe
For work, several recipes for making dough are used, it is better for beginners to start with the simplest.

It is necessary to take one glass of dry ingredients, mix in a suitable bowl, then, gradually adding half a glass of water, knead the dough well. The finished mixture should be elastic, not sticky to the hands, but not too tight.
If after work the material remains, it can be stored in a hermetically sealed plastic bag.


For more details on the process of making salt dough, see the video:
How to make flat decorations from salt dough
Let's start our acquaintance with salt dough by making simple flat figures that can be used as Christmas tree decorations or interior Christmas decor.
Let's get to work.
- Roll out the dough with a rolling pin.
- Press the figures with a mold.
- Dry your jewelry.
- Paint crafts.
- After the paint has dried, cover with colorless nail polish.
- Fasten the ribbon.

How to dry blanks and paint
There are two ways to dry jewelry.
- Natural - the figures simply dry out indoors. The drying time depends on the thickness: it will take a day to completely dry 1 mm of ordinary salty mass, for cold porcelain - up to 12 hours.
- Drying in the oven. To begin with, it is heated to the maximum temperature, turned off and put inside a baking sheet with crafts on parchment paper. The cabinet is not opened until it has completely cooled down.

Painting crafts from salt dough
After drying, they begin to paint the products, for this, different types of paints, markers and felt-tip pens are suitable. Another coloring option: the pigment is added to the water before the dough is made, the dye dissolved in advance will be evenly distributed in the mass. Such crafts are bright and colorful. You can additionally pigment the composition with food coloring.
After all the manipulations, the figures are ready for the final decoration. Ribbons, braid, beads and rhinestones, sequins are used for New Year's decorations - nothing holds back the imagination here.

Workshops for beginners on modeling salt dough jewelry
We got acquainted with the main features of making New Year's crafts, it's time to move on to practice. For work, you will need a variety of molds, curly knives, shovels and nozzles.

Salt dough crafts
An unusual Christmas tree can be made from several layers of dough; for it you will need a decorative flagellum and beads.
Christmas tree making step by step.
- Roll out the dough and cut it into stars of different sizes using paper molds or templates.
- Make a hole in the middle of each piece.
- Dry the blanks.
- String the elements on the flagellum, insert decorative beads between them. You can pre-sprinkle them with glitter or paint.
- Tie knots.

How to make a pig - a symbol of 2019
Since the pig is the symbol of the upcoming 2019, let's make a good-natured animal with our own hands.
For work we need:
- mass of pink and green;
- for the eyes - a piece of unpainted mass;
- toothpick;
- water and brush;
- stack.
Step-by-step master class on making a pig.
| Illustration | Action Description |
 | Roll out the ball, make it in the shape of a pear. |
 | For the legs, take a small piece of dough, divide it into 2 identical parts, roll a ball out of each. Make an icicle out of it, flatten the wide part and cut in the middle. Cut the hooves by hand. |
 | Moisten the place where the legs are attached with a brush, attach the blanks to the body and press. |
 | Handles are formed in a similar way, only their size is slightly larger. |
 | Moisten a toothpick with water and insert into the center of the body, a small tip should remain, we will fix the head on it. |
 | Roll up a small piece of green dough with a sausage, flatten it, use a stack to apply an texture in the form of stripes in different directions and cut a fringe along the edges. |
 | Wrap a scarf around the pig's neck, after moistening all the joints with water. |
 | For the head, form a ball, flatten it, coat the body and scarf with water and insert the workpiece onto a toothpick. |
 | For the piglet, form a small ball, flatten it with a cake and stick it on the pig with water, make nostrils. |
 | For ears, divide a piece of dough into 2 parts, roll into balls, then droplets in the form of carrots, make cakes and flatten the place of gluing. Moisten the head with water, glue the ear and bend. |
 | Tail: form a sausage, roll it in a spiral and glue it to the body. |
 | From the unpainted dough, form eyes and draw pupils with a black felt-tip pen. |
Related article:
: how to crochet, make in the origami technique, appliqué with pigs, from plasticine, pastries with the symbols of the New Year 2019 - in our publication.
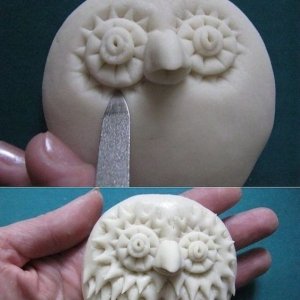
We complicate the work: an owlet with openwork curls
Openwork volumetric crafts made from salt dough are very unusual and elegant. Today we will make a panel with a New Year's owlet.
Step by step master class.
- Take a small piece of uncolored dough, form an oval from it in the form of a droplet.
- Make holes for the eyes.
- Form eyes from two small pieces, moisten the recesses with water and glue them into the eye socket.
- Make notches around the eyes with a stack.
- Form a beak from the sausage and glue it to the head.
- Use scissors to make notches-feathers all over the body of the owlet.
- Blind paws, apply stripes and glue them to the body.
- You need to dry the jewelry in the oven at a temperature of 100 ° for about 3 hours.
- Color the owl.

Simple crafts for the New Year from salt dough for a preschooler
Modeling from salt dough is similar to working with plasticine and is very useful for kids. It improves fine motor skills and helps the early creative development of the child.
How to make a simple salt dough snowman
It will not be difficult for kids to make a simple snowman with their own hands, and parents will help in the manufacture of small and complex parts. For work, we need unpainted dough, a mass of blue, a toothpick and a garlic press.
Let's get to work.
- Form 2 balls of different sizes, flatten them and place one on top of the other.
- Draw a mouth with a toothpick, push a place for the eye and draw rays around them.
- Form small balls-eyes, moisten the place of their connection and glue them to the head.
- Form tiny balls from the blue dough, flatten them and glue them with water in the eyes. These will be the pupils.
- Form sausages from the blue dough - these will be the eyebrows. Glue them over the eyes.
- Form an icicle spout and glue it with water over the mouth.

- Form sausage handles with a thickening at the bottom, glue with water to the body.
- Form 2 elongated drops-legs, flatten a little and glue to the body.
- For a hat made of blue dough, mold a pancake in the form of a cone, glue it to the head. Blind the sausage, flatten it and attach it to the hat - this will be a lapel. With a toothpick, make punctures in a hat with a lapel.
- The scarf consists of two rectangles, first make holes and a fringe with a toothpick.

- For a panicle, take a toothpick, cut off the sharp end, squeeze the dough out of the garlic press and place the toothpick in it. Tie the panicle with a flagellum.

Related article:
: master classes. How to make a snowman from snow, from tires and plastic bottles, from paper, fabric or felt, from socks, from cotton balls - in our publication.
Panel in the form of Santa Claus from salt dough
You can make a small pann in the form of Santa Claus.
Let's consider the whole process in more detail.
- Roll out 2 balls from the salty mass. Form a face from one, a cap from the other.
- Roll up a small pom-pom. Connect all parts with water.
- Push a piece of dough through a garlic press and form a beard and hair with openwork stripes.
- With a toothpick, push through the eyes and a hole in the upper part, so that later you can stretch the ribbon through it.
- Form a nose and mustache and glue them on the head.


Decorate the Christmas tree with salt dough crafts
Simple, but at the same time beautiful toys can be made with your own hands with your child. We offer a simple master class on making Christmas tree figurines from salt dough.
| Illustration | Action Description |
 | Roll out the dough and cut out Christmas figures with cookie cutters. |
 | Make holes with an awl and leave to dry. |
 | After complete drying, paint the blanks on both sides with white acrylic paint, then with silver and gold paint. |
 | Pass the rope, fasten the bead and tie a knot. |
In more detail, the master class can be viewed on the video:
Creative crafts for the New Year from salt dough for schoolchildren
Older children will be interested in more complex New Year's compositions, to decorate which you can use wicker elements and multi-layer formation of crafts.
Braided heart from salt dough
You can surprise friends and relatives with a wicker heart, for the manufacture of which you will need a shape or template, a thinly rolled base and intertwined flagella.


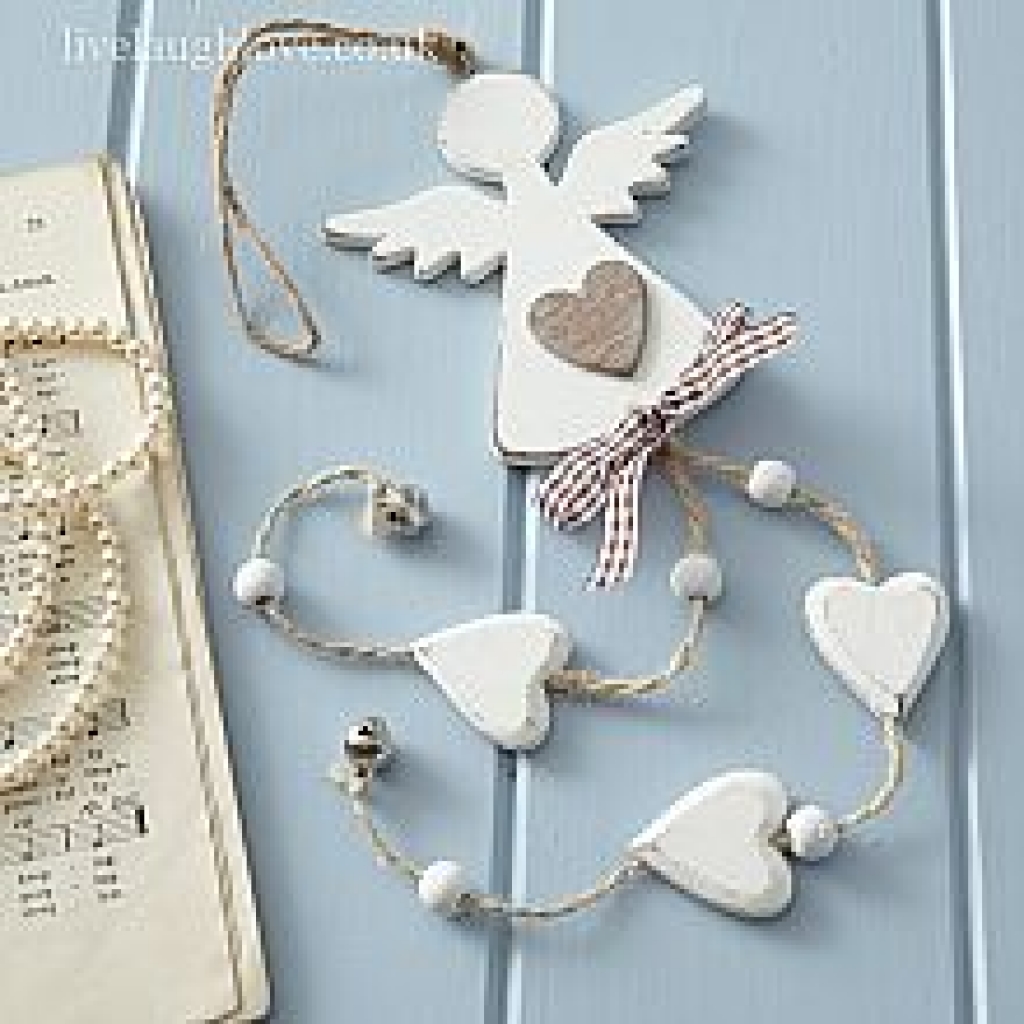
How to make salt dough angels
There are a lot of options for making Christmas angels, today we will show how to make two interesting figures.
Let's get to work.
| Illustration | Action Description |
 | 1st angel: roll out the dough and cut out an angel figure and a heart in it using a cookie cutter. Draw folds on the skirt, make dots around the perimeter and make a hole with an awl. |
 | 2nd angel: roll out the dough in the form of a sausage 5 mm thick, 10 mm long, fold in the form of a droplet. Form a dress, glue the edges, pre-wetting with water, then press a little with your hand. |
 | Form the second row of the dress and handles from smaller sausages. Cut off the edge at the neck with a round cutter. |
 | Roll out a small strip with a rolling pin, fold it like an accordion and form a frill collar. |
 | Form a ball, glue it to the body, make a loop out of a paper clip and stick it into the angel's head. |
 | Draw a smile and eyes, glue the nose and cheeks. |
 | Put the cake in a strainer and push through the holes, glue the resulting slurry to the head with water. |
 | Decorate the little angel with a bow on the dress and pleated polka dots. |
Salt Dough Christmas Candlestick
It is difficult to imagine a New Year's holiday without the magical glow of candles, so schoolchildren should like the craft of an unusual candlestick.
| Illustration | Action Description | |
 | Shape the dough into a ball, then make another one of the same size. | Insert 3 decorative candles into the base at an equal distance from each other. |
 | Decorate the candlestick with snowflakes, sequins and coffee beans. | |
 | After drying, you can cover the candlestick with a colorless varnish. |
You can watch the video in more detail about the whole process:
Article
Friends, are you ready for the new year? And the holiday is just around the corner. And this is an occasion to work fruitfully with your little ones. What do I suggest? Today we will talk about how and what to make New Year's crafts from salt dough. A prerequisite is that we will create with our kids. We use them in as many processes as possible. In fact, the material is safe and it is easy to wash, and therefore we will allow the crumbs to dirty the hands to the fullest.


Do you know what will add value to these activities? The fact that the child will feel that all this is a very important thing! He will try when he finds out that his crafts will decorate the Christmas tree: as toys (we will hang some of them on the tree) or become part of the festive composition.
Let's decide. Remember? We have a main focus - New Year's theme. There is a basic material - salt dough. And in the kitchen, any housewife has the necessary tools. And our children have a good helper - we! All that was left was to get down to business.


Ingredients and Tools We'll Need
All we need is:
- Salt;
- Flour;
- Water;
- A little vegetable oil.
Of course, I want the figures to be bright. Therefore, we use any dyes to choose from:
- Food colors;
- Building eco-friendly;
- felt-tip pens;
- Gouache;
- Nail polish (if you need to use very little).
And in order to make dough with your own hands, and then products from dough, you need tools. Prepare in advance:
- bowl;
- rolling pin;
- Cup;
- Scissors;
- Pen/felt pen.
We will need additional tools. We will talk about this in the next topic, when we consider different ideas for creativity.
Variety of decorating ideas

And a sea of ideas! And also flawless! But do not forget, it is worth considering 2 points:
- Abilities and opportunities crumbs;
- Crafts should relate to the theme of the New Year 2018. So, if not the symbol of the year itself, the Dog, we should succeed, then at least try to make golden colors dominate in our products.
And a lot will depend on what tools we have at hand. In principle, absolutely anything can be a tool! And already on what we own, the decorations of the works, and even their shape, will depend.
Now I intend to call what you can use as a handy tool in the manufacture of crafts, and how the work will depend on it.
Lace. They will give delicacy to the work. One has only to attach them to the dough and hold with a rolling pin.
Buttons. For children, it will be simple and interesting to press buttons into finished products to make an unusual texture.
Beads. They can simply sprinkle the finished work, and everything will immediately shine.
cocktail straw- this is an excellent "hole maker", which turns ordinary crafts into lace ones.
Marker. They can draw any patterns.
Arms, legs, paws. Attach the handle of your little one and make a palm print, the same can be done with the leg if you have a baby - a baby. If your dog does not mind, then the prints of its paws will also look symbolic.
Master Class
And now I will share what I and my crumbs did. And at the same time I will conduct a small master class.
Let's start with our video. In it, we show how to knead the dough, how to sculpt a big owl on the Christmas tree, how to decorate the window in the form of a Christmas tree with dough toys.
And now, as the photo lesson promised: how to make a slightly different owl, hedgehog and snowman.
Do you remember the recipe:
- Flour - 1 tbsp.;
- Salt - 1 tbsp.;
- Water.
Salt is better to take fine. It is cleaner, and it mixes better with flour and water. But I specifically took a large one, because I intend to basically bake all the products. And when baked, coarse salt gives an unusual golden color. As for the water. I didn't say how much you need. It took me half a cup. But it is better to focus on how much the dough will “take”, so that it is not liquid.
I will try to attach a photo for each step.
So the ingredients are:

The dough is tough but very flexible. I divide it into 3 parts.

Of the two, I intend to make figures of a Snowman and a Hedgehog. And I’ll divide the third part in half, and the baby and I roll out the mass and twist two circles with a glass.
I am eager to try how flat owls are made.
And the second part is a Christmas tree toy.

Now I will talk about each craft separately.
Snowman
1. I am making the basis for the snowman. I cut out a circle and decorate it by squeezing out a relief with the tip of a knife.

I divide the remaining mass into 3 parts so that one is large, the second is medium, the third is small.
I twist the largest piece in my palms into a ball. I make a small hole in the middle.

I do the same with the second one. So the whole structure will stand firmly without much fastening.
I stick a thin branch into the middle ball. These are the hands of the Snowman. I put a walnut shell on top. It turns out such a hat.
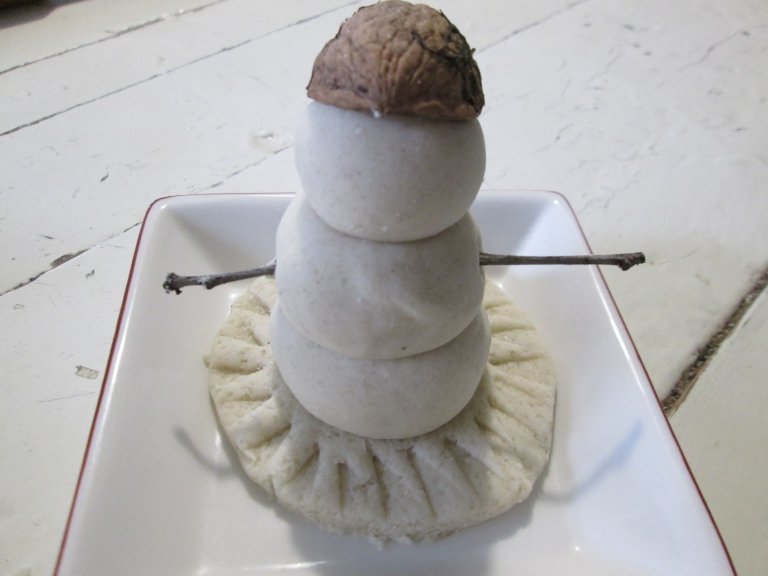
I make a nose from the tip of a toothpick.

How to paint a snowman I won't put it in the oven. Just wait for the dough to stick to the top with a crust. I have matching nail gels. I use them for painting.

The details remained: mouth, eyes, snowflakes according to the Snowman.
And here's what I got.

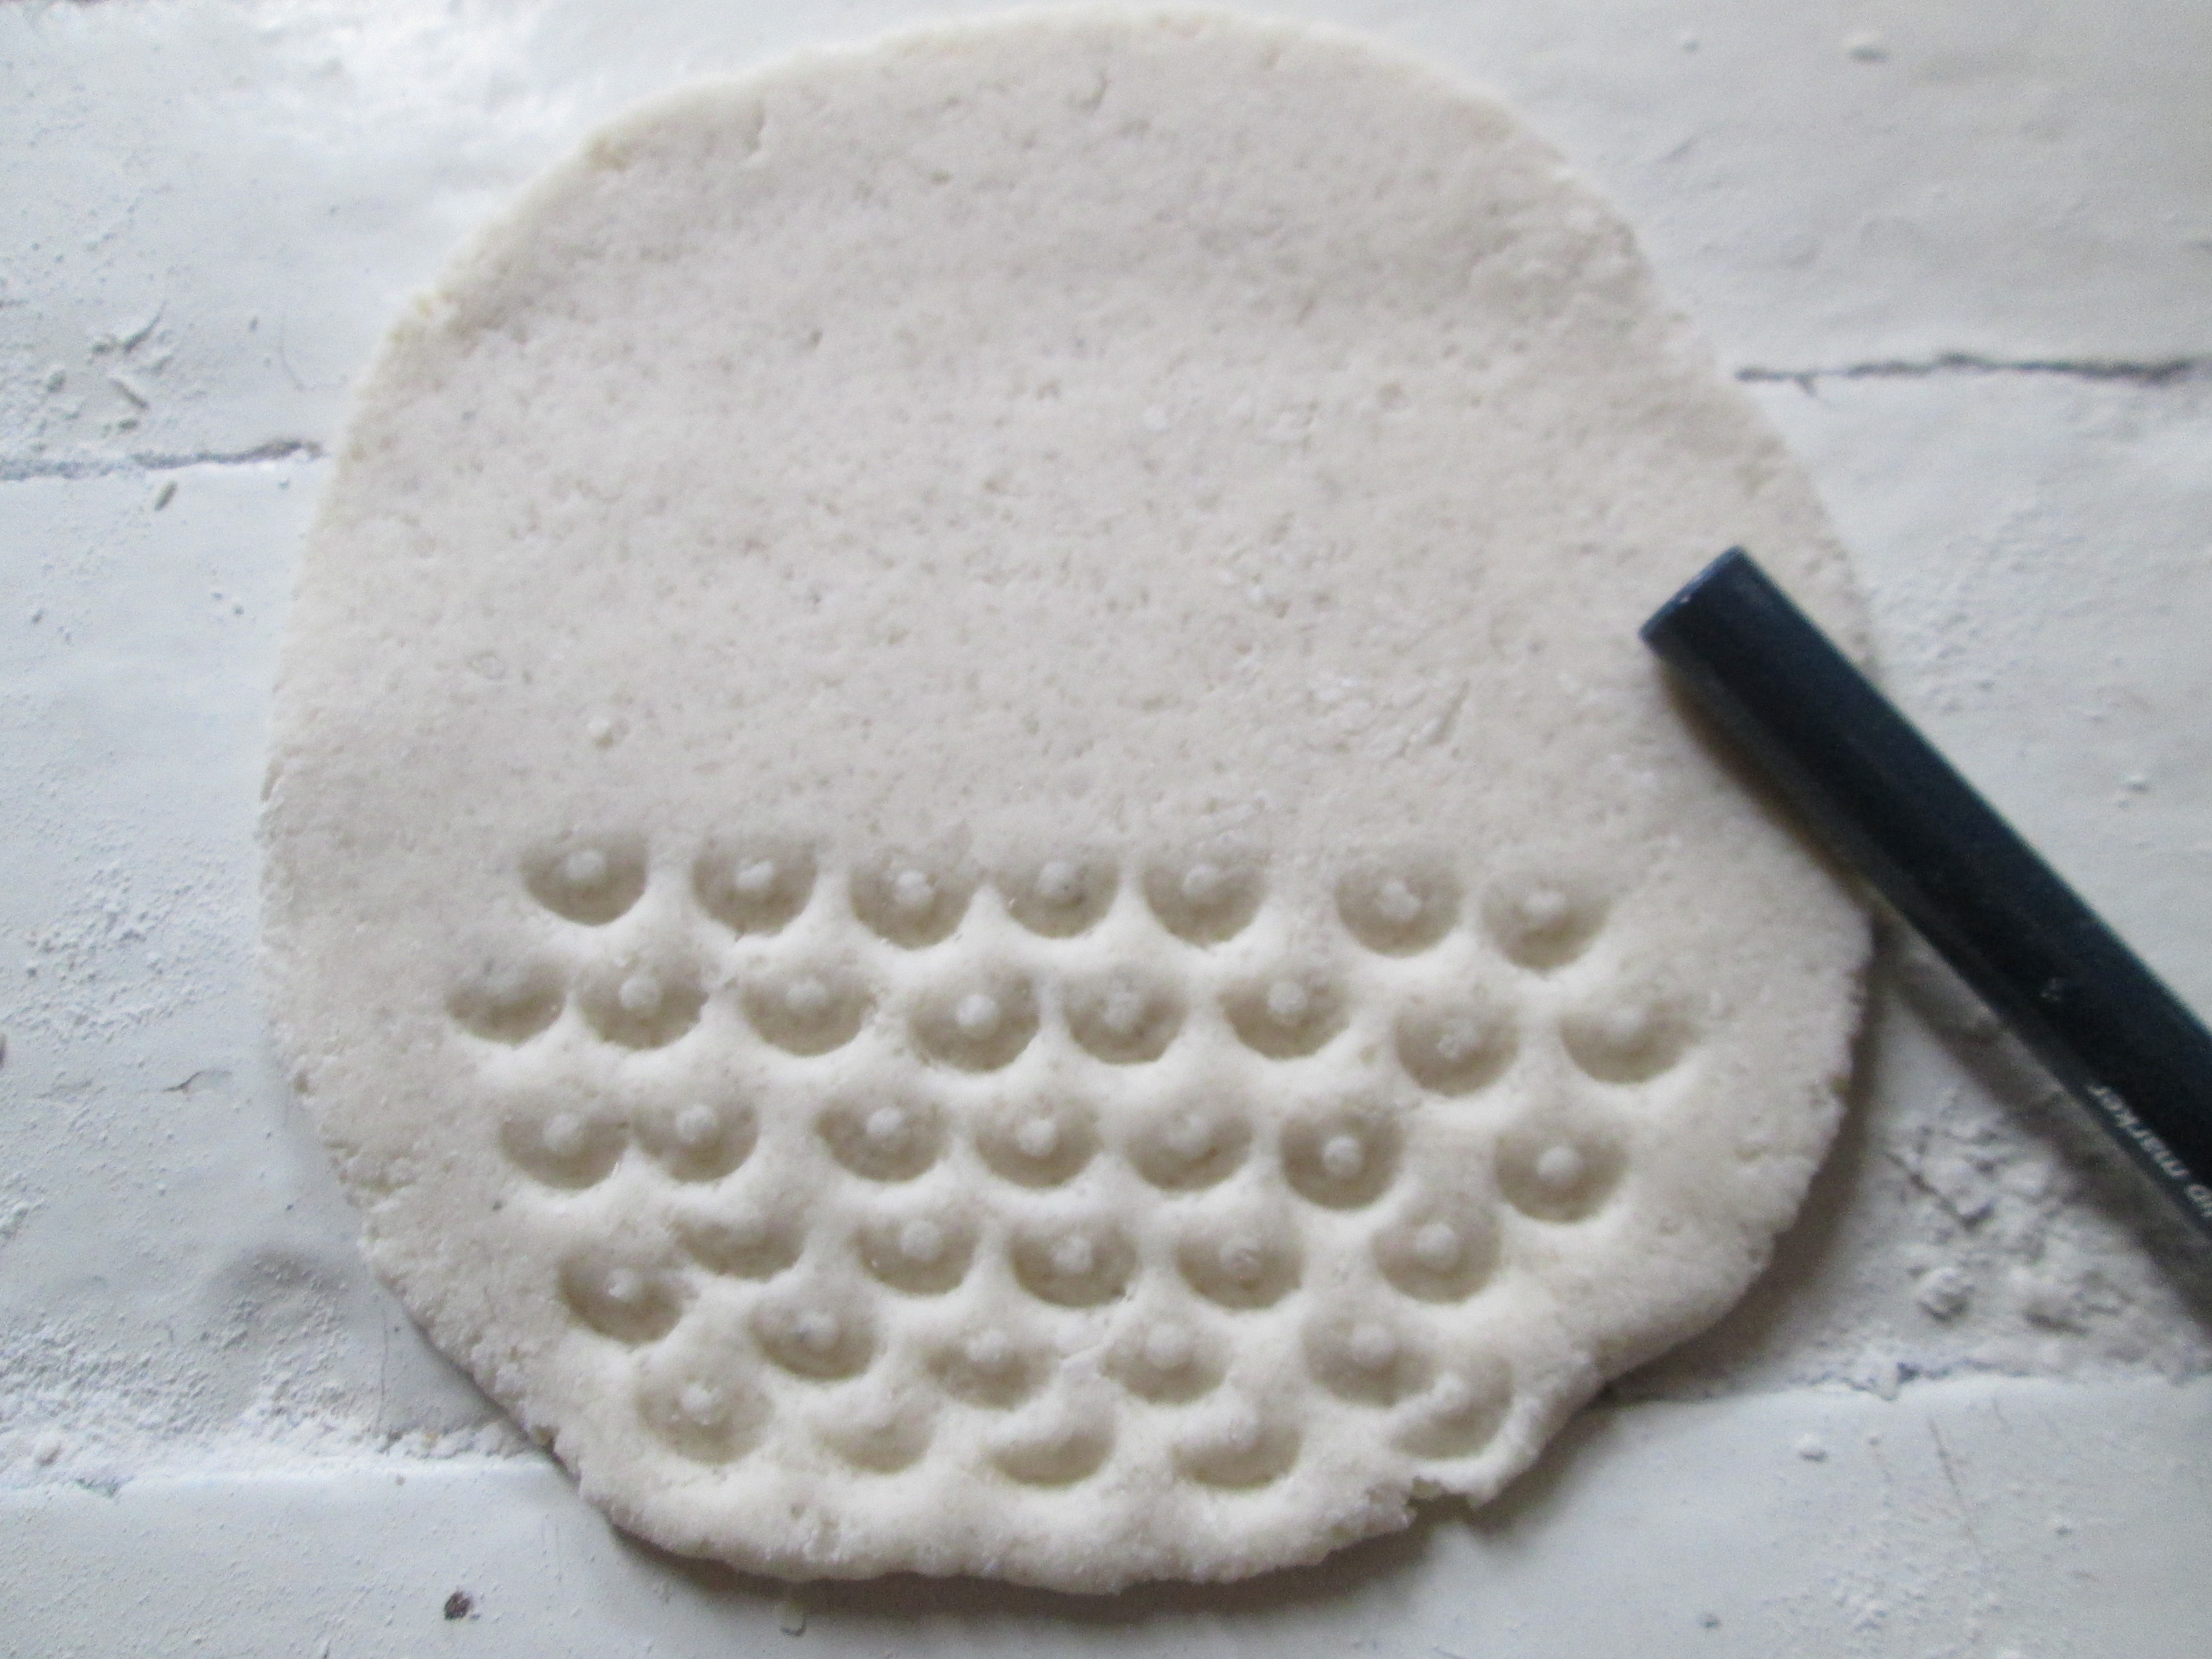
Owl
I squeeze the lower half of the circle with a cap from the pen. It turns out a pattern under the feathers.
I fold the edges on the sides so that they touch each other.
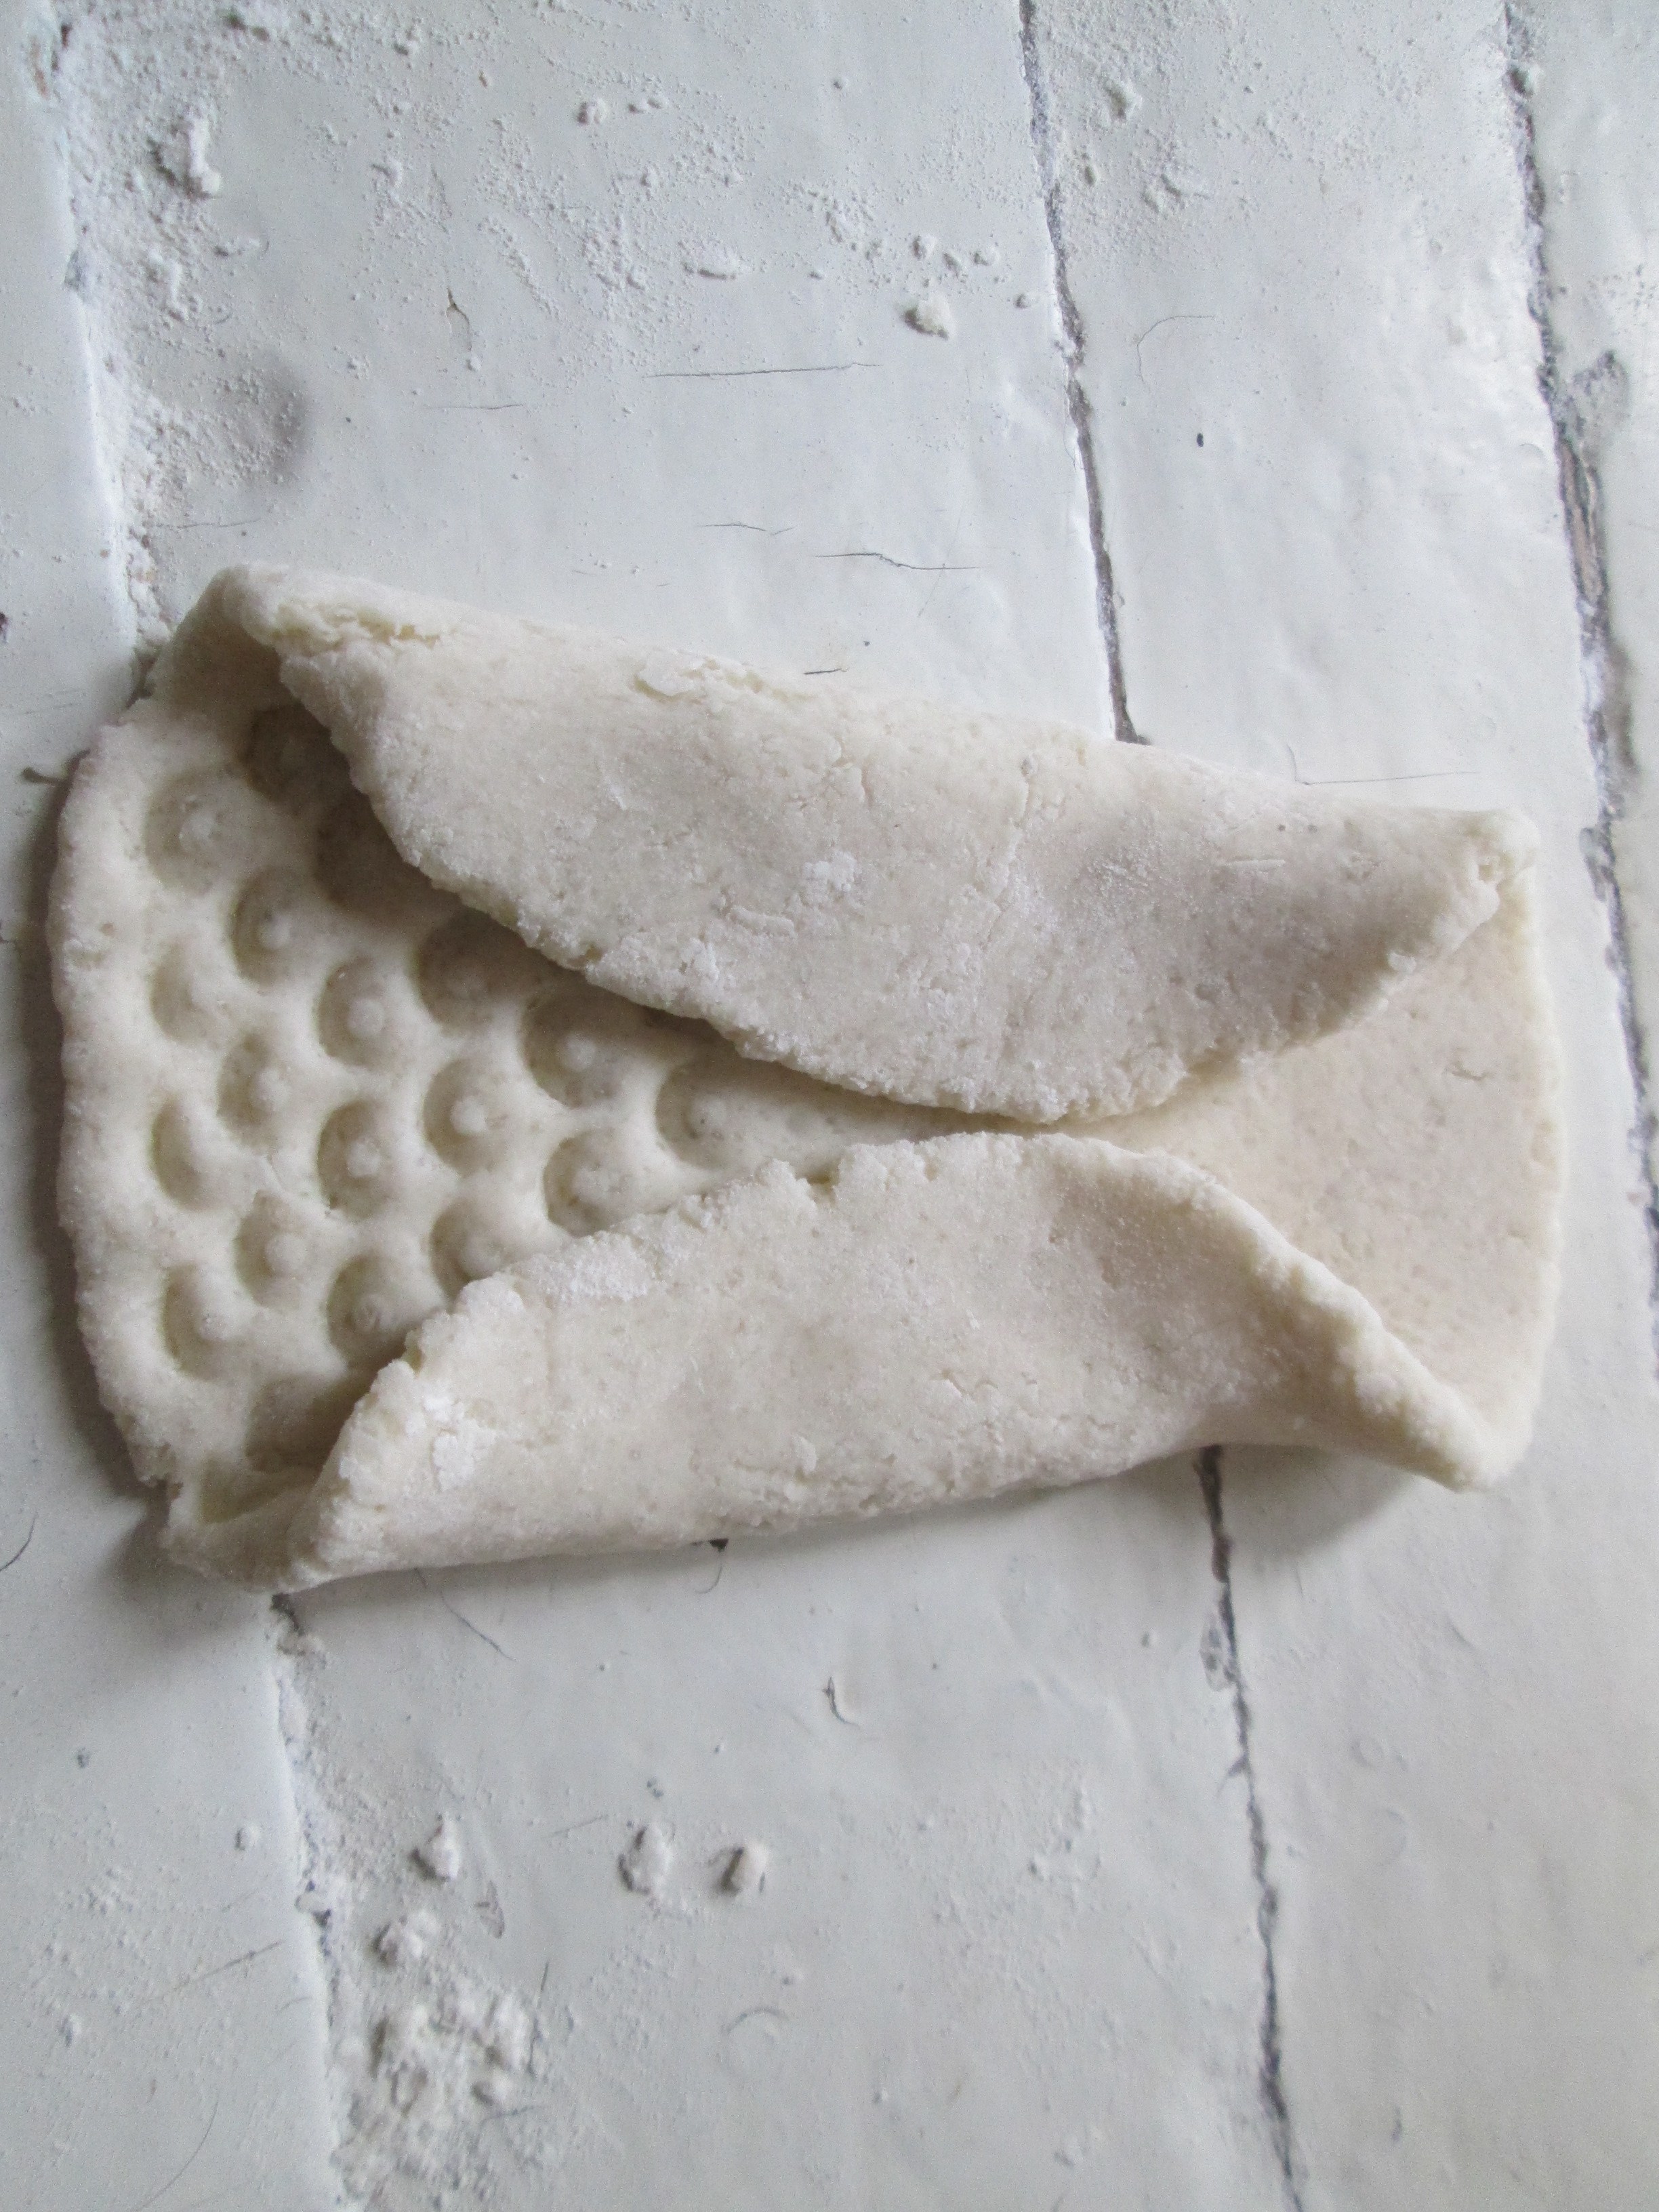
I fold the top half of the base in half and bend a little on top.
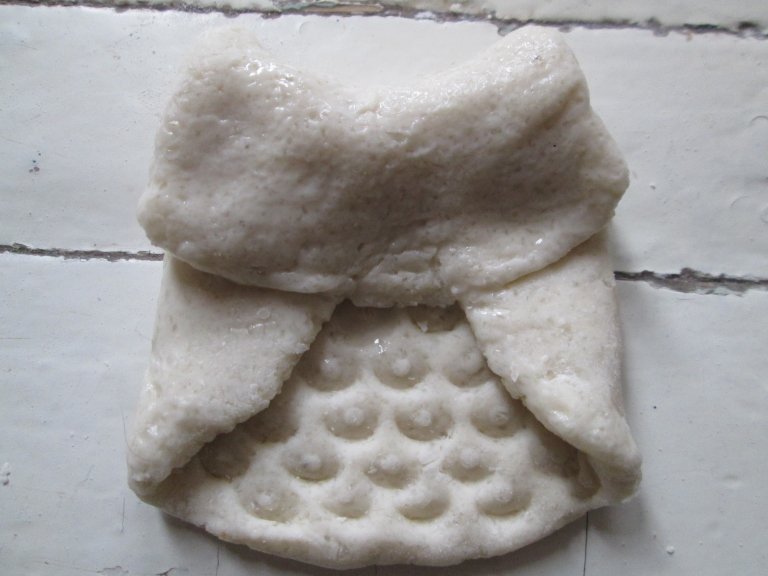
On the upper part I squeeze out round eyes with a cap and draw a beak.
Round the corners at the bottom. I make the "ears" sharper.

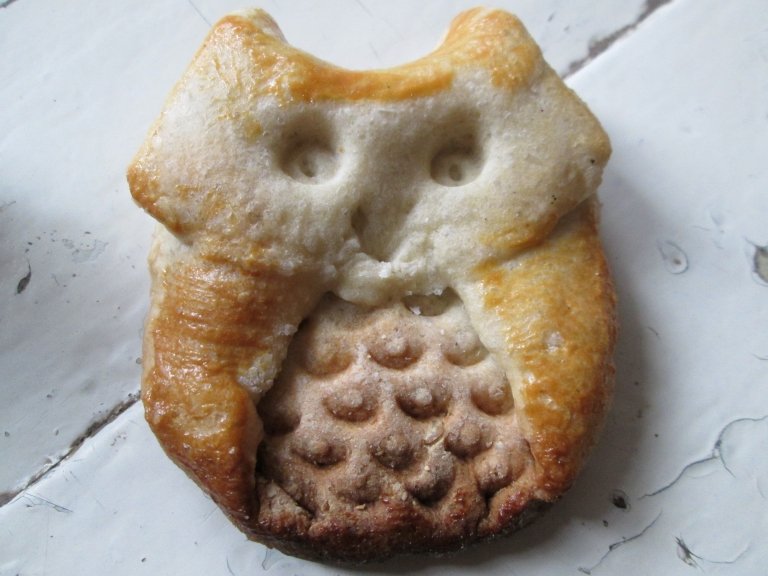
I put it to bake, after lubricating the wings and ears with yolk.

Here is such a golden owl after baking for 7 minutes at 180 degrees.
What else can you make owls?

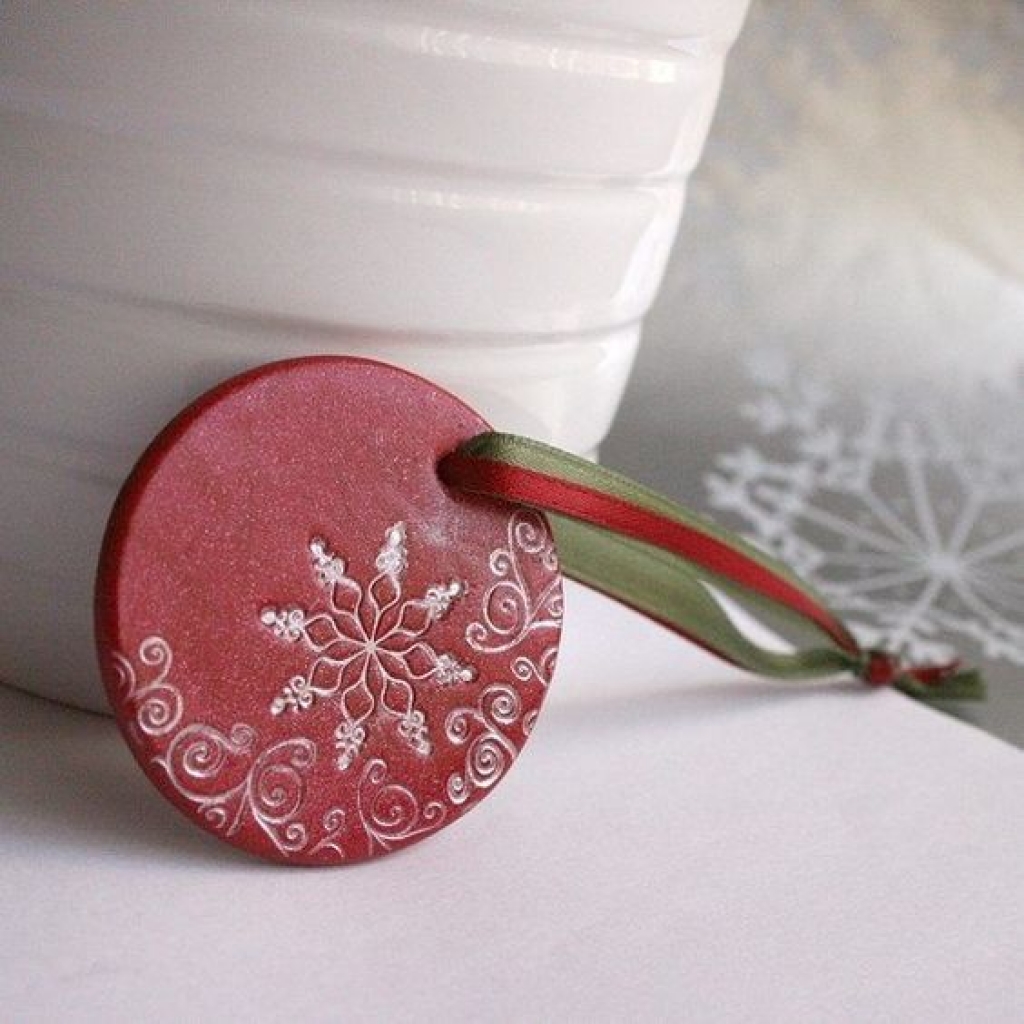
Toy
I pierce the second round blank from above with a cap through and through. And below I make prints with the same cap.
I put the toy to bake.

After baking, I put a little red varnish on all the circles, and draw leaves above them. This is mistletoe. It remains to thread a ribbon into the hole and you can decorate the Christmas tree with a toy.

Hedgehog
A small barrel-cylinder rolls down, in which the nose of the future hedgehog is slightly lengthened.

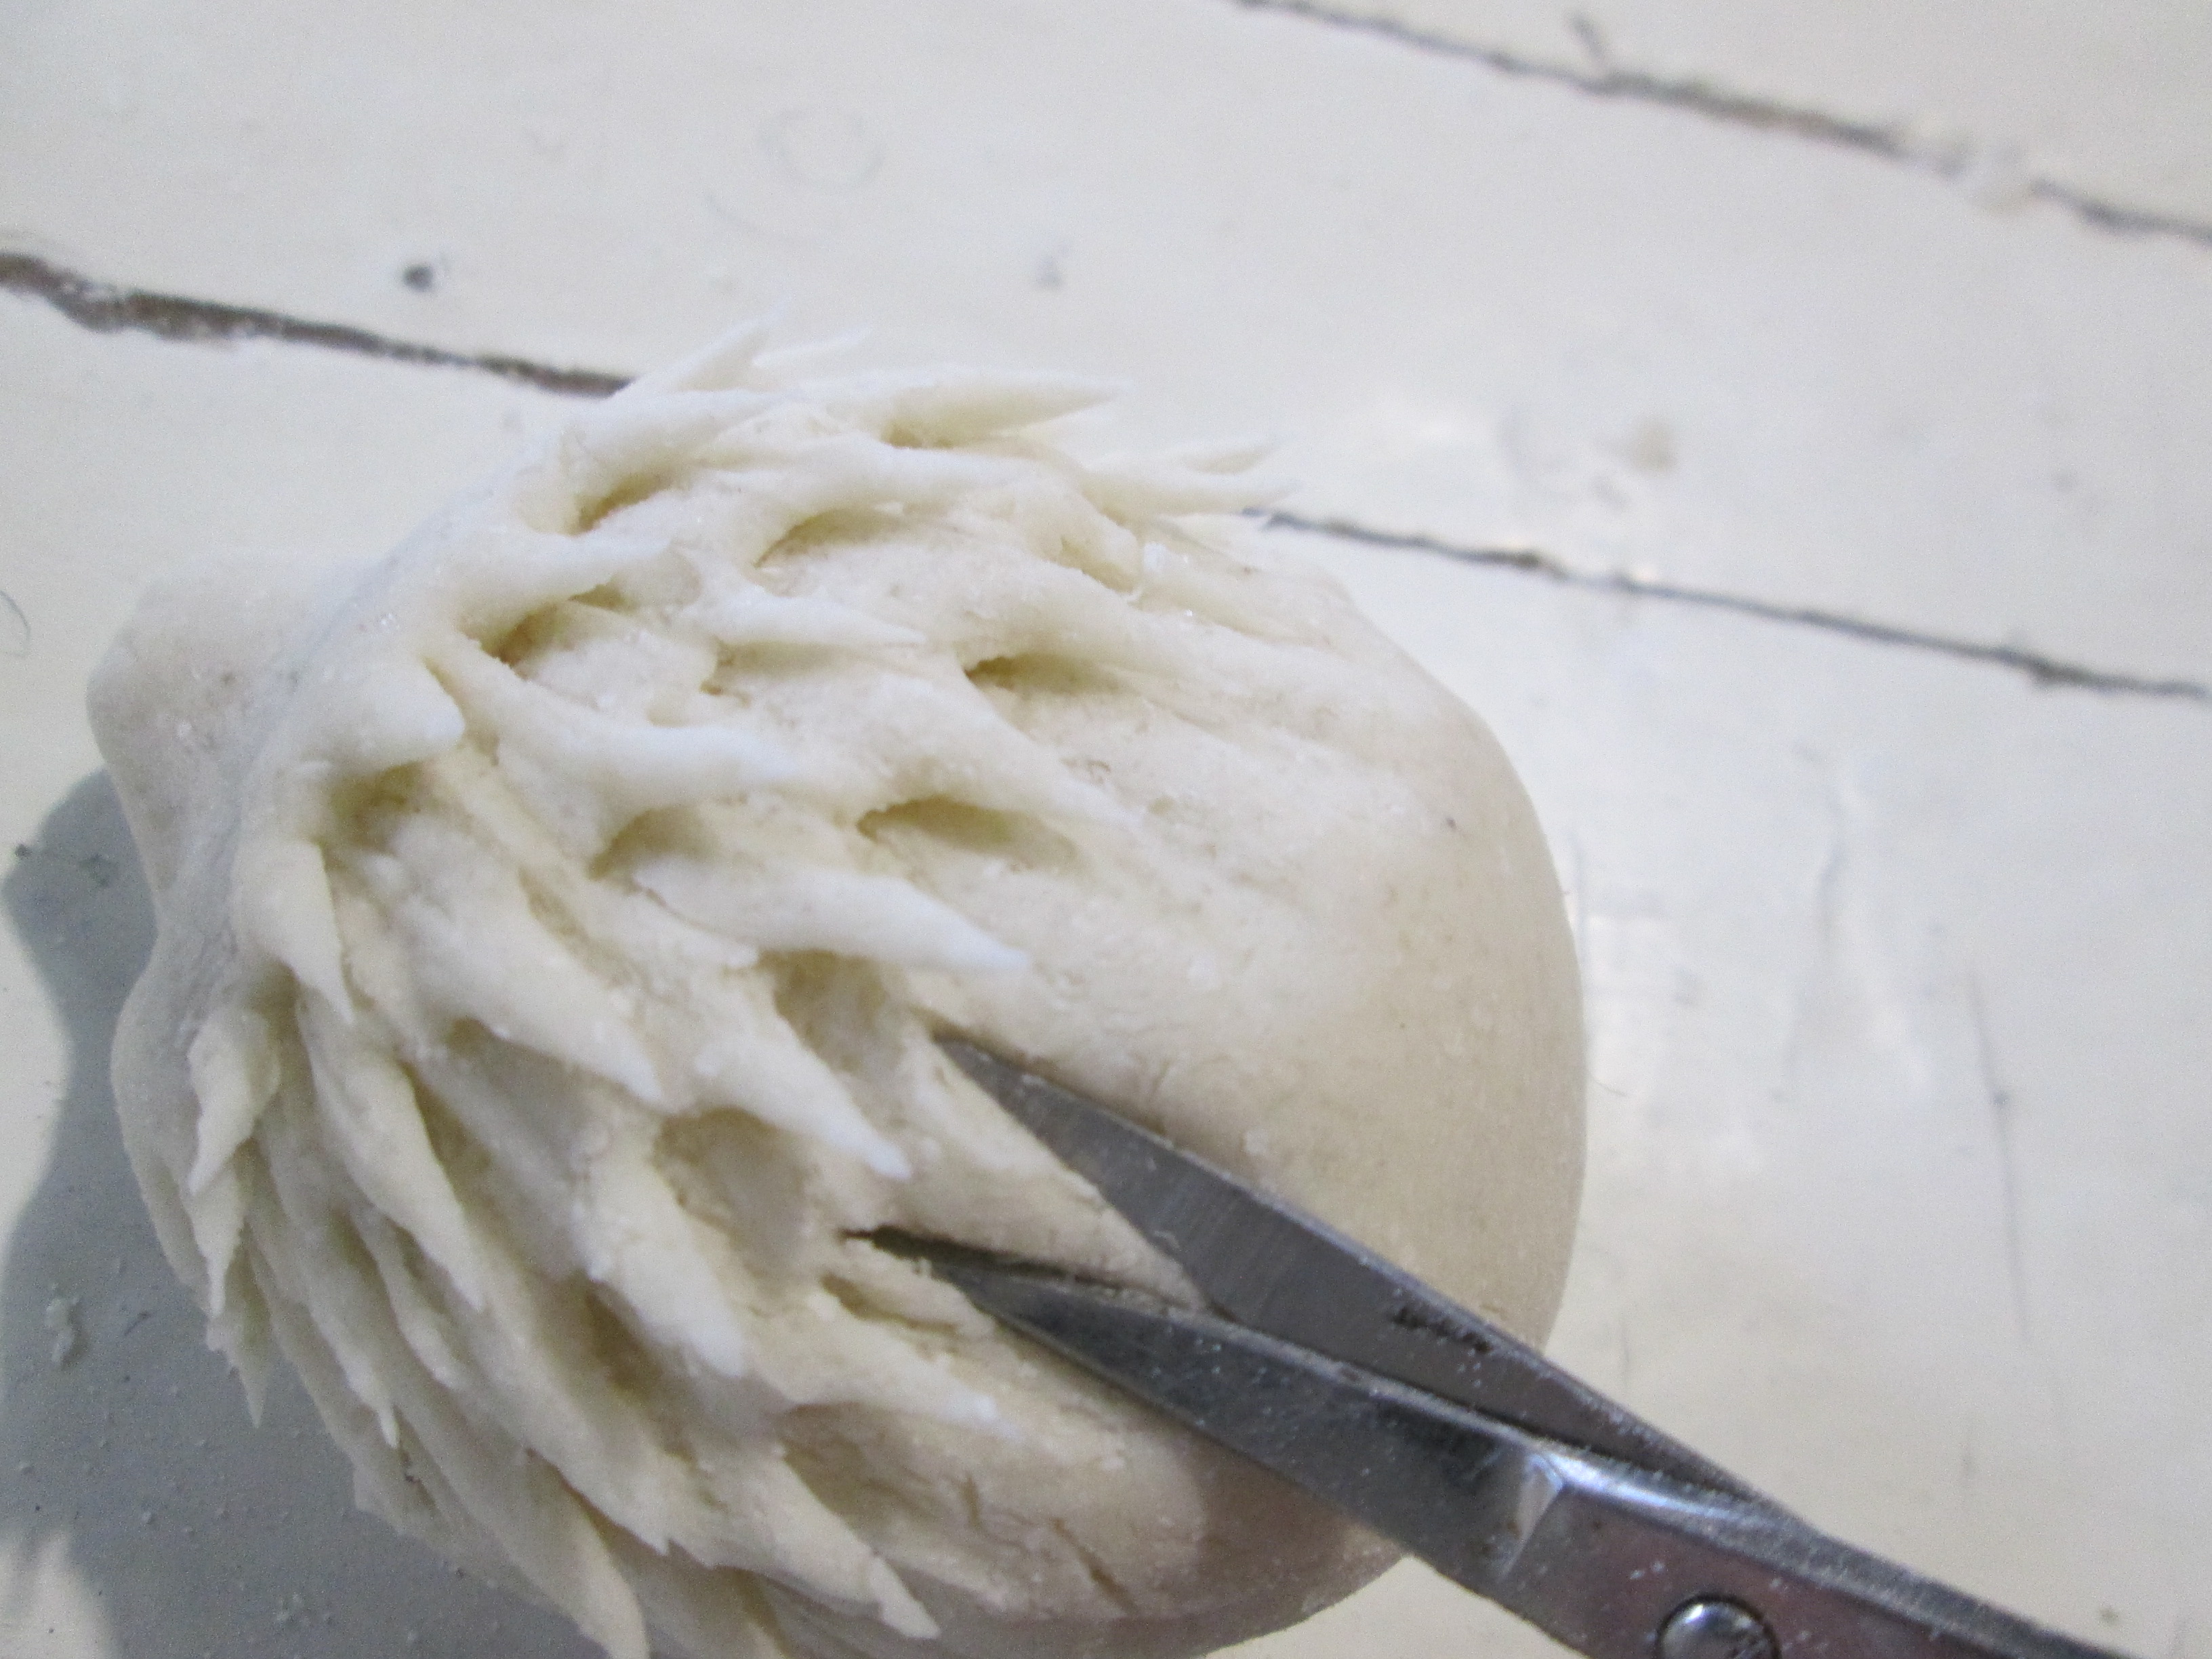
Needles are cut across the body. To do this, you need nail scissors with curved edges.
First, the edges of the scissors are slightly pressed into the dough, then the “needle” is cut.
By the same principle, a Christmas tree is made from salt dough: its branches are cut with scissors.
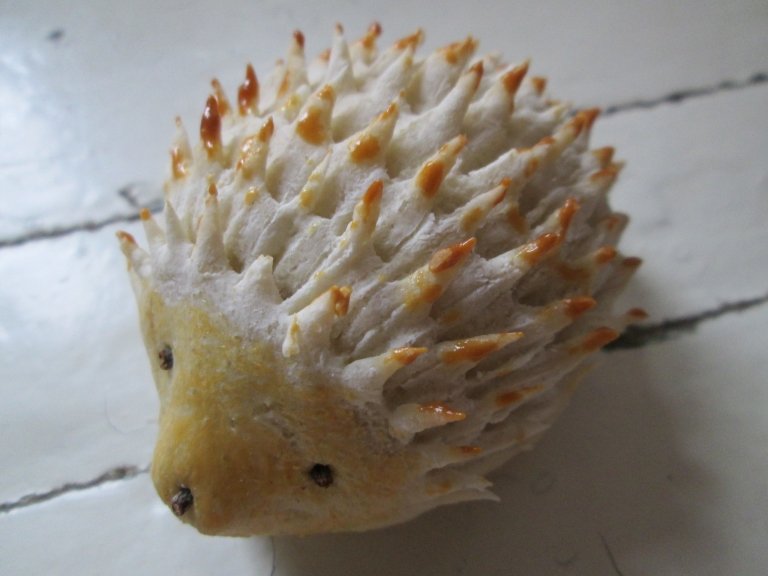
Now go over the muzzle and each edge of the needle with a brush with yolk, and you can send the product to the oven.
After baking, make a nose and eyes by pressing a piece of a twig, and the Hedgehog with golden needles is ready!
That's how it turned out to make 4 toys with the baby!

Vmdeo master classes
Very! I really want you to show off your work! Send the results of your work, share your successes, so that we can rejoice for you! And that's all for today! I remind you about the subscription and please don't forget to bring your friends: it's more fun together! All! Bye bye!
Salt dough for modeling is a safe material for children's crafts. You can make cool Christmas decorations of any shape from it. Let's see a few master classes prepared by designers.
salt dough recipe
For crafts from the dough, take:
- 1 glass of salt;
- 1 glass of flour;
- water;
- colored gouache.
This is the easiest salt dough recipe ever. To improve it, add 5 tablespoons of sunflower oil.
IDEA! Paint can be replaced with juice (cherry or beetroot). If a child eats a piece of dough during modeling, he definitely will not be poisoned. The dough can be colored already at the end.
How to cook dough at home? Step by step:
- Throw all the components into a deep plate. First dry, then only water and oil.
- Mix everything so that the dough turns out like dumplings. It shouldn't be oak.
- To make the mass faster, turn on the mixer.

IDEA! If the toys are small or you need to make small parts, make the dough separately with PVA or starch. Perhaps there was some glue left after wallpapering. Use it instead of PVA.


How to make DIY salt dough crafts
Salt dough, the recipe of which will be easy even for children to master, is a very flexible material, but in terms of composition it is absolutely safe. Add food coloring or generally natural (fruit or vegetable juices) to it. Even if you leave the child alone for modeling, nothing will happen to him.

Sculpting tools:
- rolling pin;
- working flat surface;
- ball pen;
- brush for drawing;
- cup;
- threads;
- medium size needle;
- silicone baking molds;
- any stencils for patterns;
- paint (acrylic or gouache);
To prevent gouache from cracking, add glue to it.


We cover the figurine with paint and varnish

The dye is added not only at the stage of kneading the dough, but also during modeling. Just divide the dough into several parts (1 part = 1 color), make a well in the center and add the dye. When sculpting, it will be distributed evenly throughout the piece.
 With a regular brush, you need to paint the grooves from the paw
 When the figurine is ready, cover it with varnish, so the paint will definitely not roll and brighten. The aerosol form will facilitate the coating process.

If the varnish is liquid, cover the toy in several layers. Thick cover in one layer. It can also be matte.
IMPORTANT! If you properly dry the toy, you can do without varnish. It is needed if you are not quite sure that you did everything right.

What can go wrong?
- Cracks or bubbles appear after drying. So, you dried the figurine incorrectly. Most likely, the temperature is high when the oven door is closed. Try sanding these areas with sandpaper.
- Cracks may appear after painting. Let the craft dry completely and only then paint. Dry the figurine in natural conditions, sand the cracks with sandpaper and paint again.
- If any part of the figure broke off, glue it with PVA.
- Store figurines in a dry place at normal room temperature. They can be folded into any cardboard box, then nothing will definitely happen to them by the next holiday.
Simple salt dough Christmas decorations for beginners
Let's see a few step-by-step master classes and figure out how to make simple but interesting Christmas tree dough toys.

Idea 1. Gingerbread men
Try making gingerbread men with the kids. It will be a lot of fun. Do the most difficult stages of work, and let the dough be kneaded by yourself. Show what kind of face the little man will have, let them try to repeat.


Idea 2. Flat multi-colored figures
 We will need: flour, salt, water - for the dough; blender; dyes for its color; molds in the form of circles and hearts; rolling pin; ribbons, twine or thread, a sharp object for holes and decorating figures; baking parchment


Idea 3. Snowflakes with patterns
How to save on holiday packaging and make it yourself look in the article
What else can be molded from salt dough to decorate the Christmas tree? Let's try to make snowflakes.
 Take the same composition for the dough, acrylic paint in three colors (we have white, black and blue). Of the tools - a ballpoint pen, a stationery knife and a round object for extrusion. Useful for markers

Idea 4. Shiny figurines
Plus products from salt dough in their weight - the toys are very light. The branches will not bend.


 You can make a lot of toys and thickly decorate the Christmas tree with them. It will be very beautiful
Option 5. Circles with flowers


Idea 6. Silver stars
 Let's try to make shiny stars for the Christmas tree


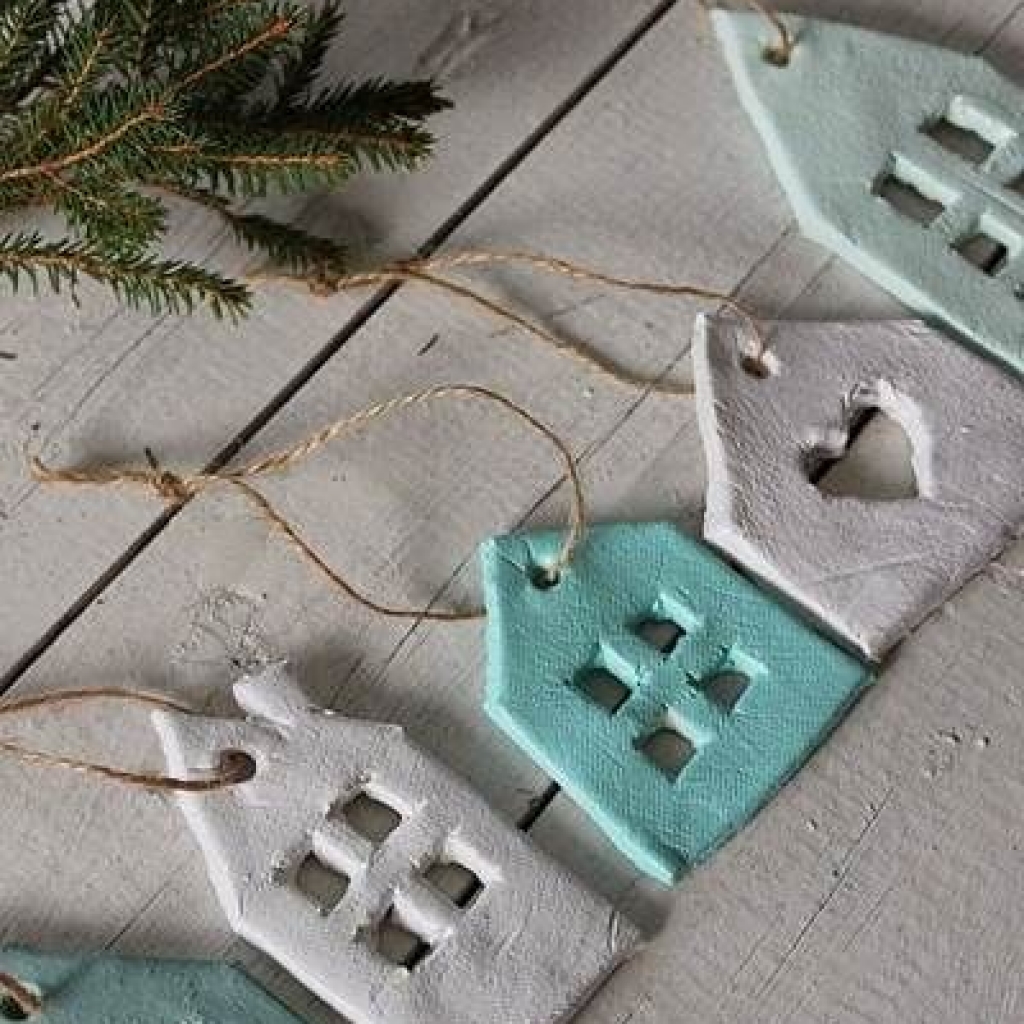
Idea 7. Name tags for gifts
Labels can be not only in the form of hearts, flowers or rectangles. For a New Year's gift, try making a house or a snowflake.
IMPORTANT! What to give to relatives and friends for the New Year and Christmas 2018, read the article
Idea 8. Lace plates Children are very interested in making voluminous figures. You can start with simple vegetables. To make segments on the pumpkin, use faux string


