Beautiful Christmas decorations from salt dough. #5 Delicate New Year wreath made of dough, decorated with roses
Salt dough is the easiest, most environmentally friendly and affordable material for children's crafts. Today we will tell you how to make a snowman from such a dough and what other New Year's crafts from salt dough you can make with your child.
The long-awaited New Year is coming soon. Preparations for this wonderful holiday always begin about a month before it, or even earlier. Children especially love the preparations for the New Year holidays. They are happy to take part in the manufacture of Christmas decorations for the house. So that you don't have to worry about the safety of materials for children's crafts, prepare salt dough and let the child make his own Christmas toys.
Children's crafts for the New Year from salt dough can be not only a wonderful decoration of an apartment for the holiday, but also a nice gift for relatives and friends.
How to make salt dough: recipe
The recipe for salt dough for modeling is incredibly simple, the main thing is to keep the proportions and knead well. You'll need:
- 1 cup flour
- 0.5 cup salt (not iodized)
- 125 ml water
You need to mix water into the dough gradually, achieving a uniform smooth mass. For large and bulky crafts, it is better to take 2 cups of salt, while not changing the amount of flour and water. You can store the finished salt dough in the refrigerator, be sure to wrap it in a bag.
Master class on how to make a snowman from salt dough for the New Year
A Christmas snowman made of salt dough, which a child can make with his own hands with only a little help from you, will be a wonderful Christmas tree decoration, a gift for the holiday or a favorite toy.
For children's crafts for the New Year "Snowman" you will need:
- blue gouache
- spadeweed
- toothpick
- acrylic lacquer
1. Prepare salty dough from water, flour and salt. Divide the dough for modeling into two parts: a larger one and a smaller one. The smaller part of the dough needs to be dyed blue with gouache.
2. Now you can start making a snowman with your own hands: from white dough you need to make two cakes of different sizes for the body and head of the snowman. As soon as the head is sculpted, immediately form a mouth, eyes with a toothpick. Now attach the arms and legs.

3. From blue dough, mold a hat of the desired shape, you can apply a pattern with a toothpick. Next, roll out a rectangle of blue dough - this will be a scarf, make the desired pattern on it. Next, make the buttons.

4. Insert a toothpick into the snowman's hand - this is the basis of the broom. Squeeze out a little blue dough through the spadefoot, form a broom out of it, let it dry a little, and then put it on a toothpick.

Friends, are you ready for the new year? And the holiday is just around the corner. And this is an occasion to work fruitfully with your little ones. What do I suggest? Today we will talk about how and what to make New Year's crafts from salt dough. A prerequisite is that we will create with our kids. We use them in as many processes as possible. In fact, the material is safe and it is easy to wash, and therefore we will allow the crumbs to dirty the hands to the fullest.


Do you know what will add value to these activities? The fact that the child will feel that all this is a very important thing! He will try when he finds out that his crafts will decorate the Christmas tree: as toys (we will hang some of them on the tree) or become part of the festive composition.
Let's decide. Remember? We have a main focus - New Year's theme. There is a basic material - salt dough. And in the kitchen, any housewife has the necessary tools. And our children have a good helper - we! All that was left was to get down to business.


Ingredients and Tools We'll Need
All we need is:
- Salt;
- Flour;
- Water;
- A little vegetable oil.
Of course, I want the figures to be bright. Therefore, we use any dyes to choose from:
- Food colors;
- Building eco-friendly;
- felt-tip pens;
- Gouache;
- Nail polish (if you need to use very little).
And in order to make dough with your own hands, and then products from dough, you need tools. Prepare in advance:
- bowl;
- rolling pin;
- Cup;
- Scissors;
- Pen/felt pen.
We will need additional tools. We will talk about this in the next topic, when we consider different ideas for creativity.
Variety of decorating ideas

And a sea of ideas! And also flawless! But do not forget, it is worth considering 2 points:
- Abilities and opportunities crumbs;
- Crafts should relate to the theme of the New Year 2018. So, if not the symbol of the year itself, the Dog, we should succeed, then at least try to make golden colors dominate in our products.
And a lot will depend on what tools we have at hand. In principle, absolutely anything can be a tool! And already on what we own, the decorations of the works, and even their shape, will depend.
Now I intend to call what you can use as a handy tool in the manufacture of crafts, and how the work will depend on it.
Lace. They will give delicacy to the work. One has only to attach them to the dough and hold with a rolling pin.
Buttons. For children, it will be simple and interesting to press buttons into finished products to make an unusual texture.
Beads. They can simply sprinkle the finished work, and everything will immediately shine.
cocktail straw- this is an excellent "hole maker", which turns ordinary crafts into lace ones.
Marker. They can draw any patterns.
Arms, legs, paws. Attach the handle of your little one and make a palm print, the same can be done with the leg if you have a baby - a baby. If your dog does not mind, then the prints of its paws will also look symbolic.
Master Class
And now I will share what I and my crumbs did. And at the same time I will conduct a small master class.
Let's start with our video. In it, we show how to knead the dough, how to sculpt a big owl on the Christmas tree, how to decorate the window in the form of a Christmas tree with dough toys.
And now, as the photo lesson promised: how to make a slightly different owl, hedgehog and snowman.
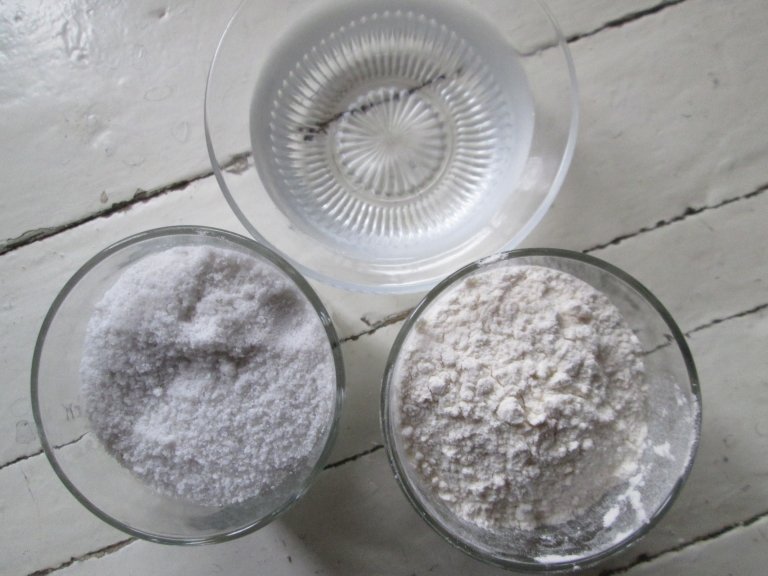
Do you remember the recipe:
- Flour - 1 tbsp.;
- Salt - 1 tbsp.;
- Water.
Salt is better to take fine. It is cleaner, and it mixes better with flour and water. But I specifically took a large one, because I intend to basically bake all the products. And when baked, coarse salt gives an unusual golden color. As for the water. I didn't say how much you need. It took me half a cup. But it is better to focus on how much the dough will “take”, so that it is not liquid.
I will try to attach a photo for each step.
So the ingredients are:
The dough is tough but very flexible. I divide it into 3 parts.

Of the two, I intend to make figures of a Snowman and a Hedgehog. And I’ll divide the third part in half, and the baby and I roll out the mass and twist two circles with a glass.
I am eager to try how flat owls are made.
And the second part is a Christmas tree toy.

Now I will talk about each craft separately.
Snowman
1. I am making the basis for the snowman. I cut out a circle and decorate it by squeezing out a relief with the tip of a knife.

I divide the remaining mass into 3 parts so that one is large, the second is medium, the third is small.
I twist the largest piece in my palms into a ball. I make a small hole in the middle.

I do the same with the second one. So the whole structure will stand firmly without much fastening.
I stick a thin branch into the middle ball. These are the hands of the Snowman. I put a walnut shell on top. It turns out such a hat.
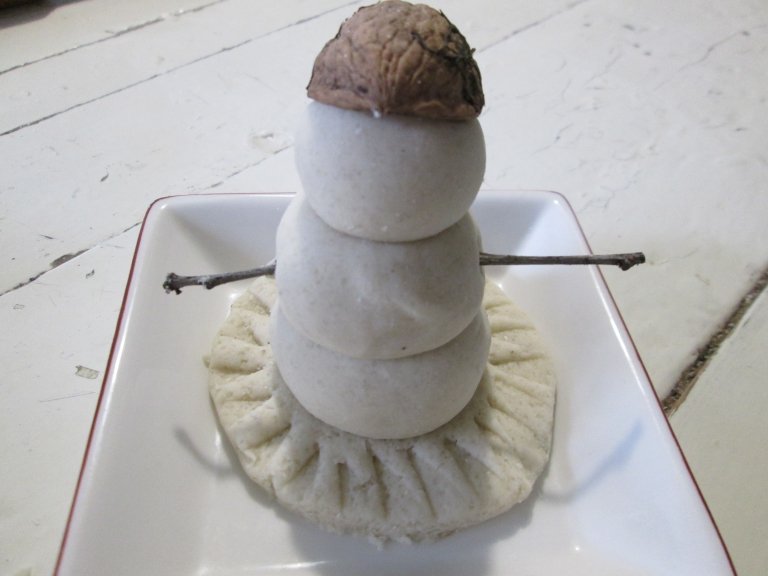
I make a nose from the tip of a toothpick.

How to paint a snowman I won't put it in the oven. Just wait for the dough to stick to the top with a crust. I have matching nail gels. I use them for painting.

The details remained: mouth, eyes, snowflakes according to the Snowman.
And here's what I got.

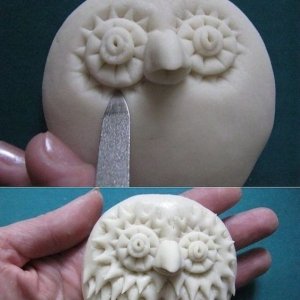
Owl
I squeeze the lower half of the circle with a cap from the pen. It turns out a pattern under the feathers.

I fold the edges on the sides so that they touch each other.
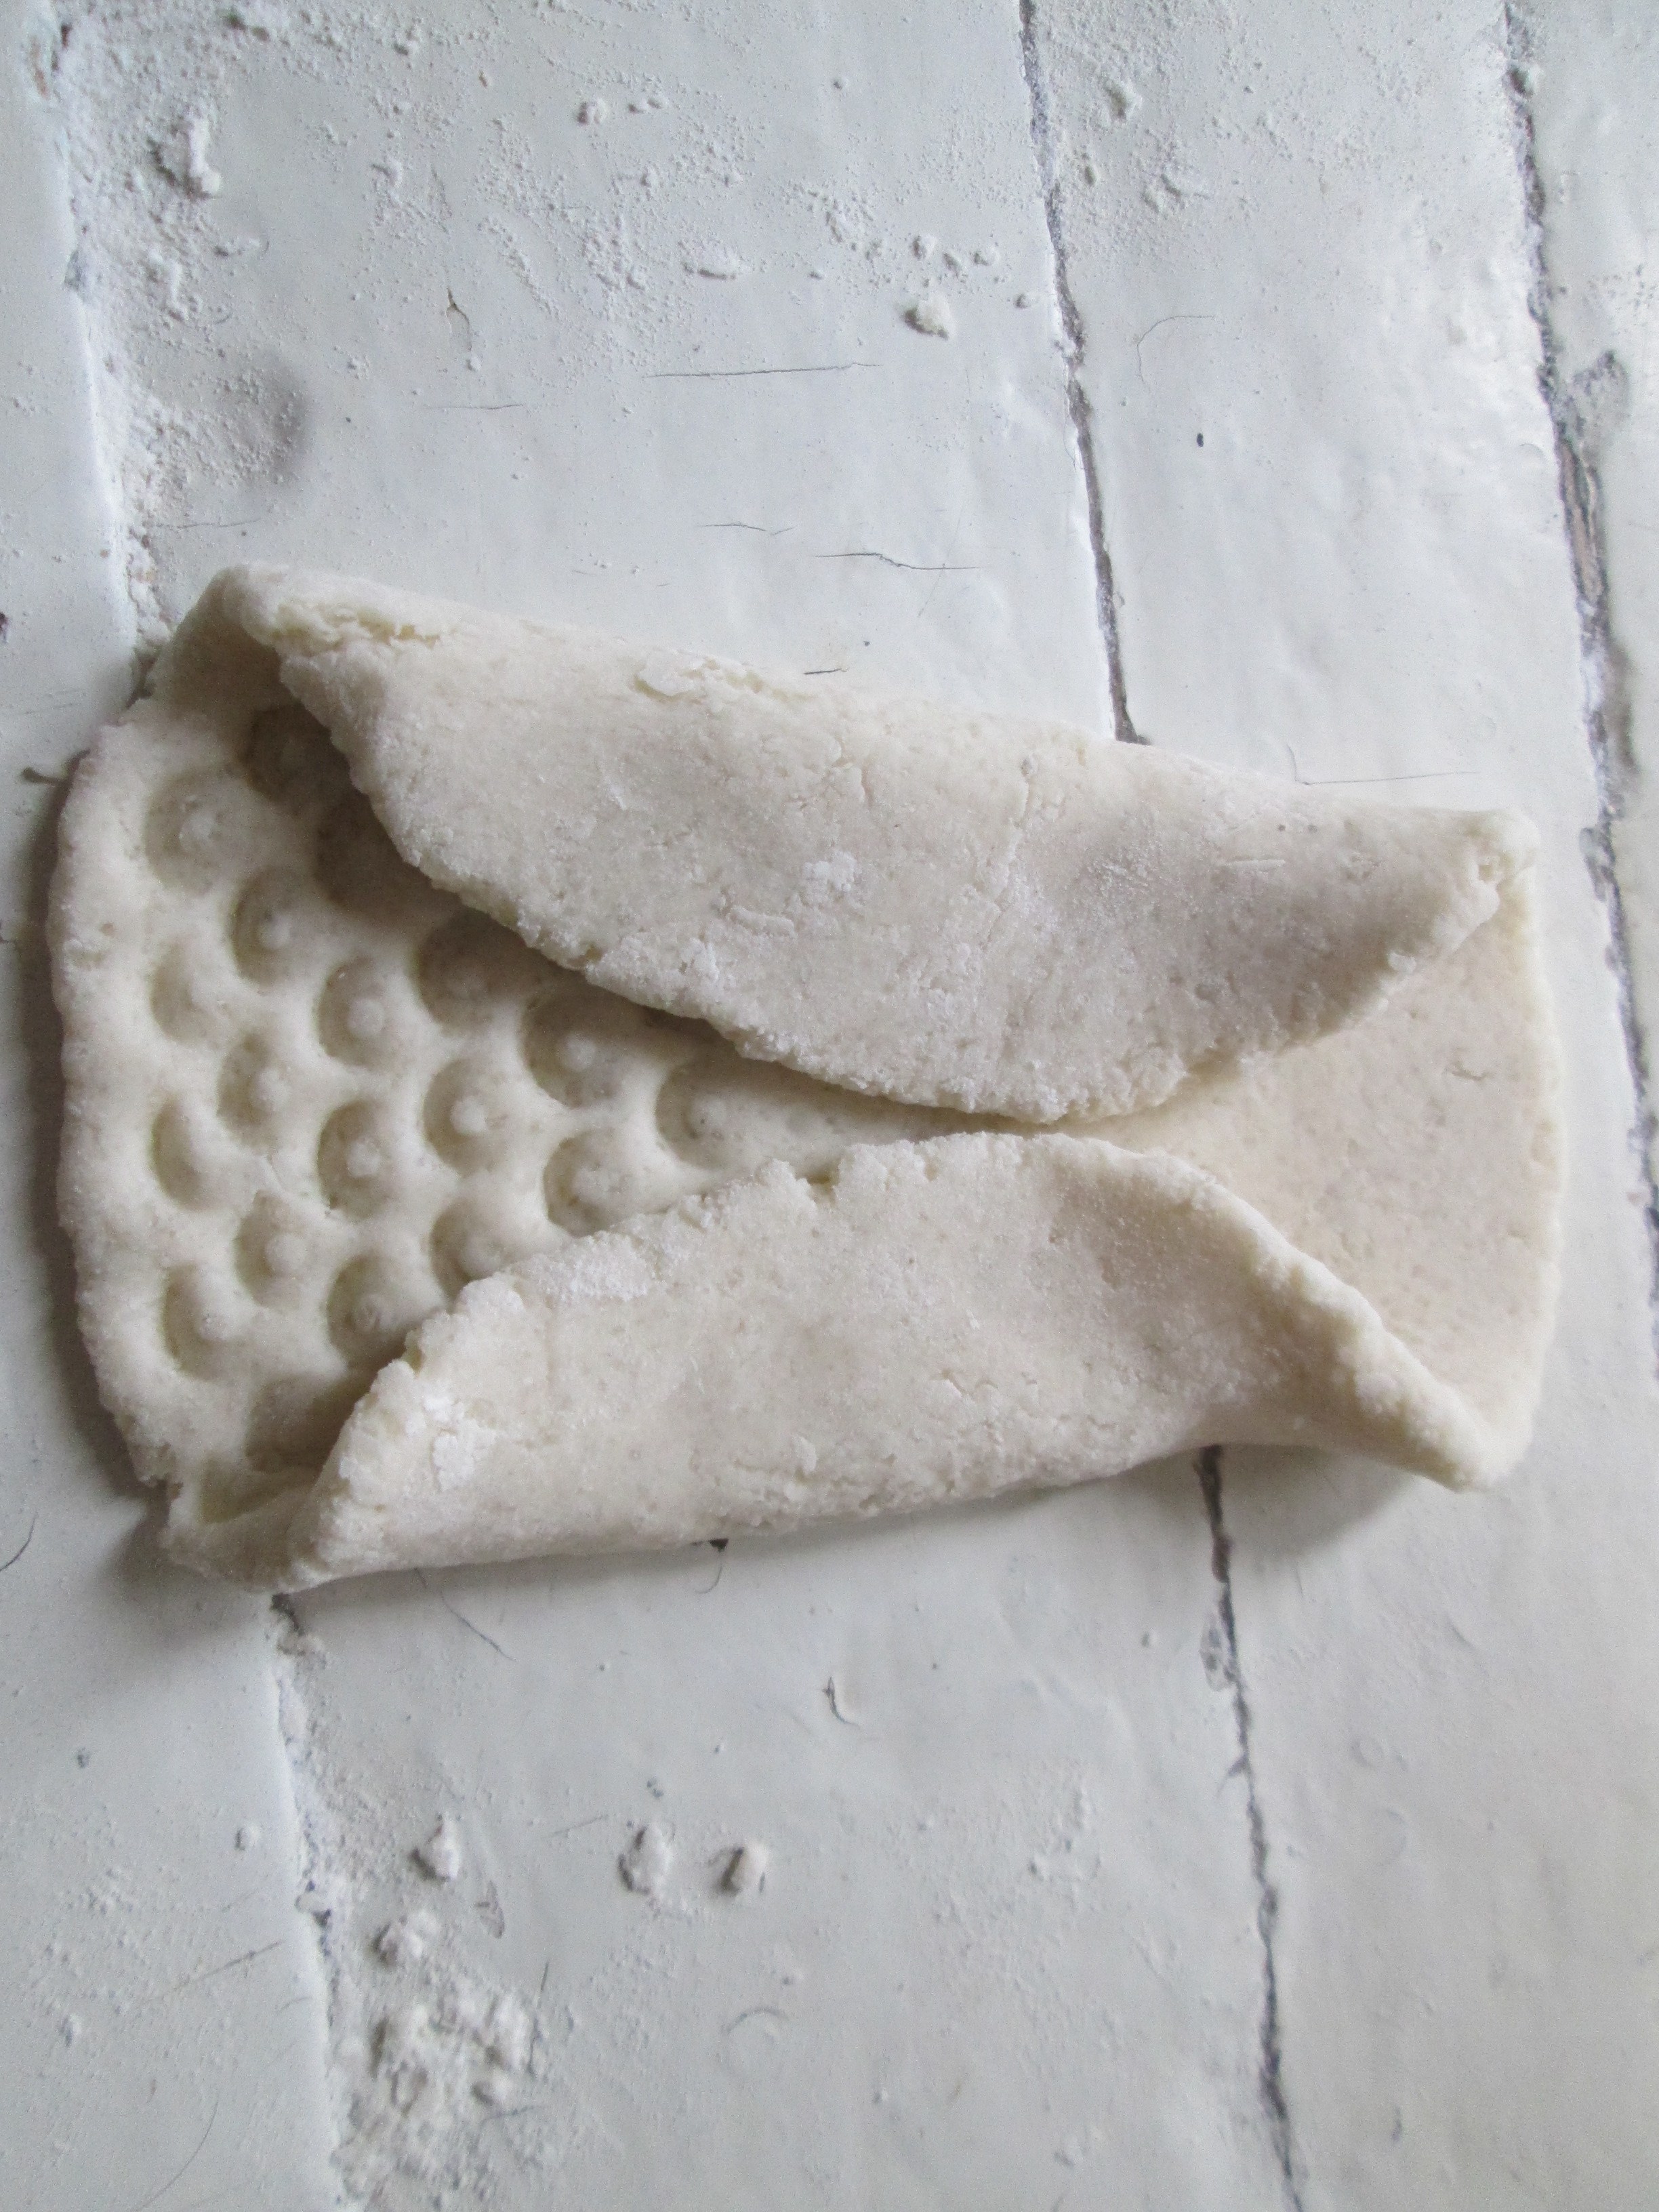
I fold the top half of the base in half and bend a little on top.
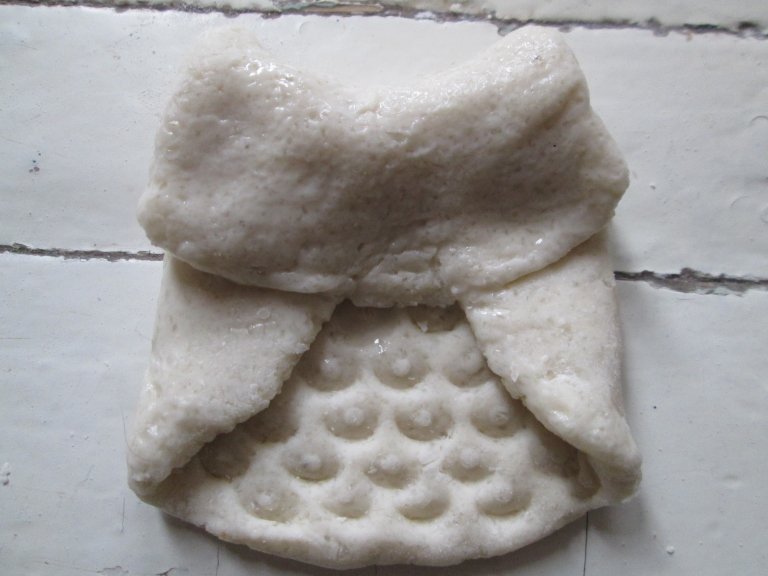
On the upper part I squeeze out round eyes with a cap and draw a beak.
Round the corners at the bottom. I make the "ears" sharper.

I put it to bake, after lubricating the wings and ears with yolk.
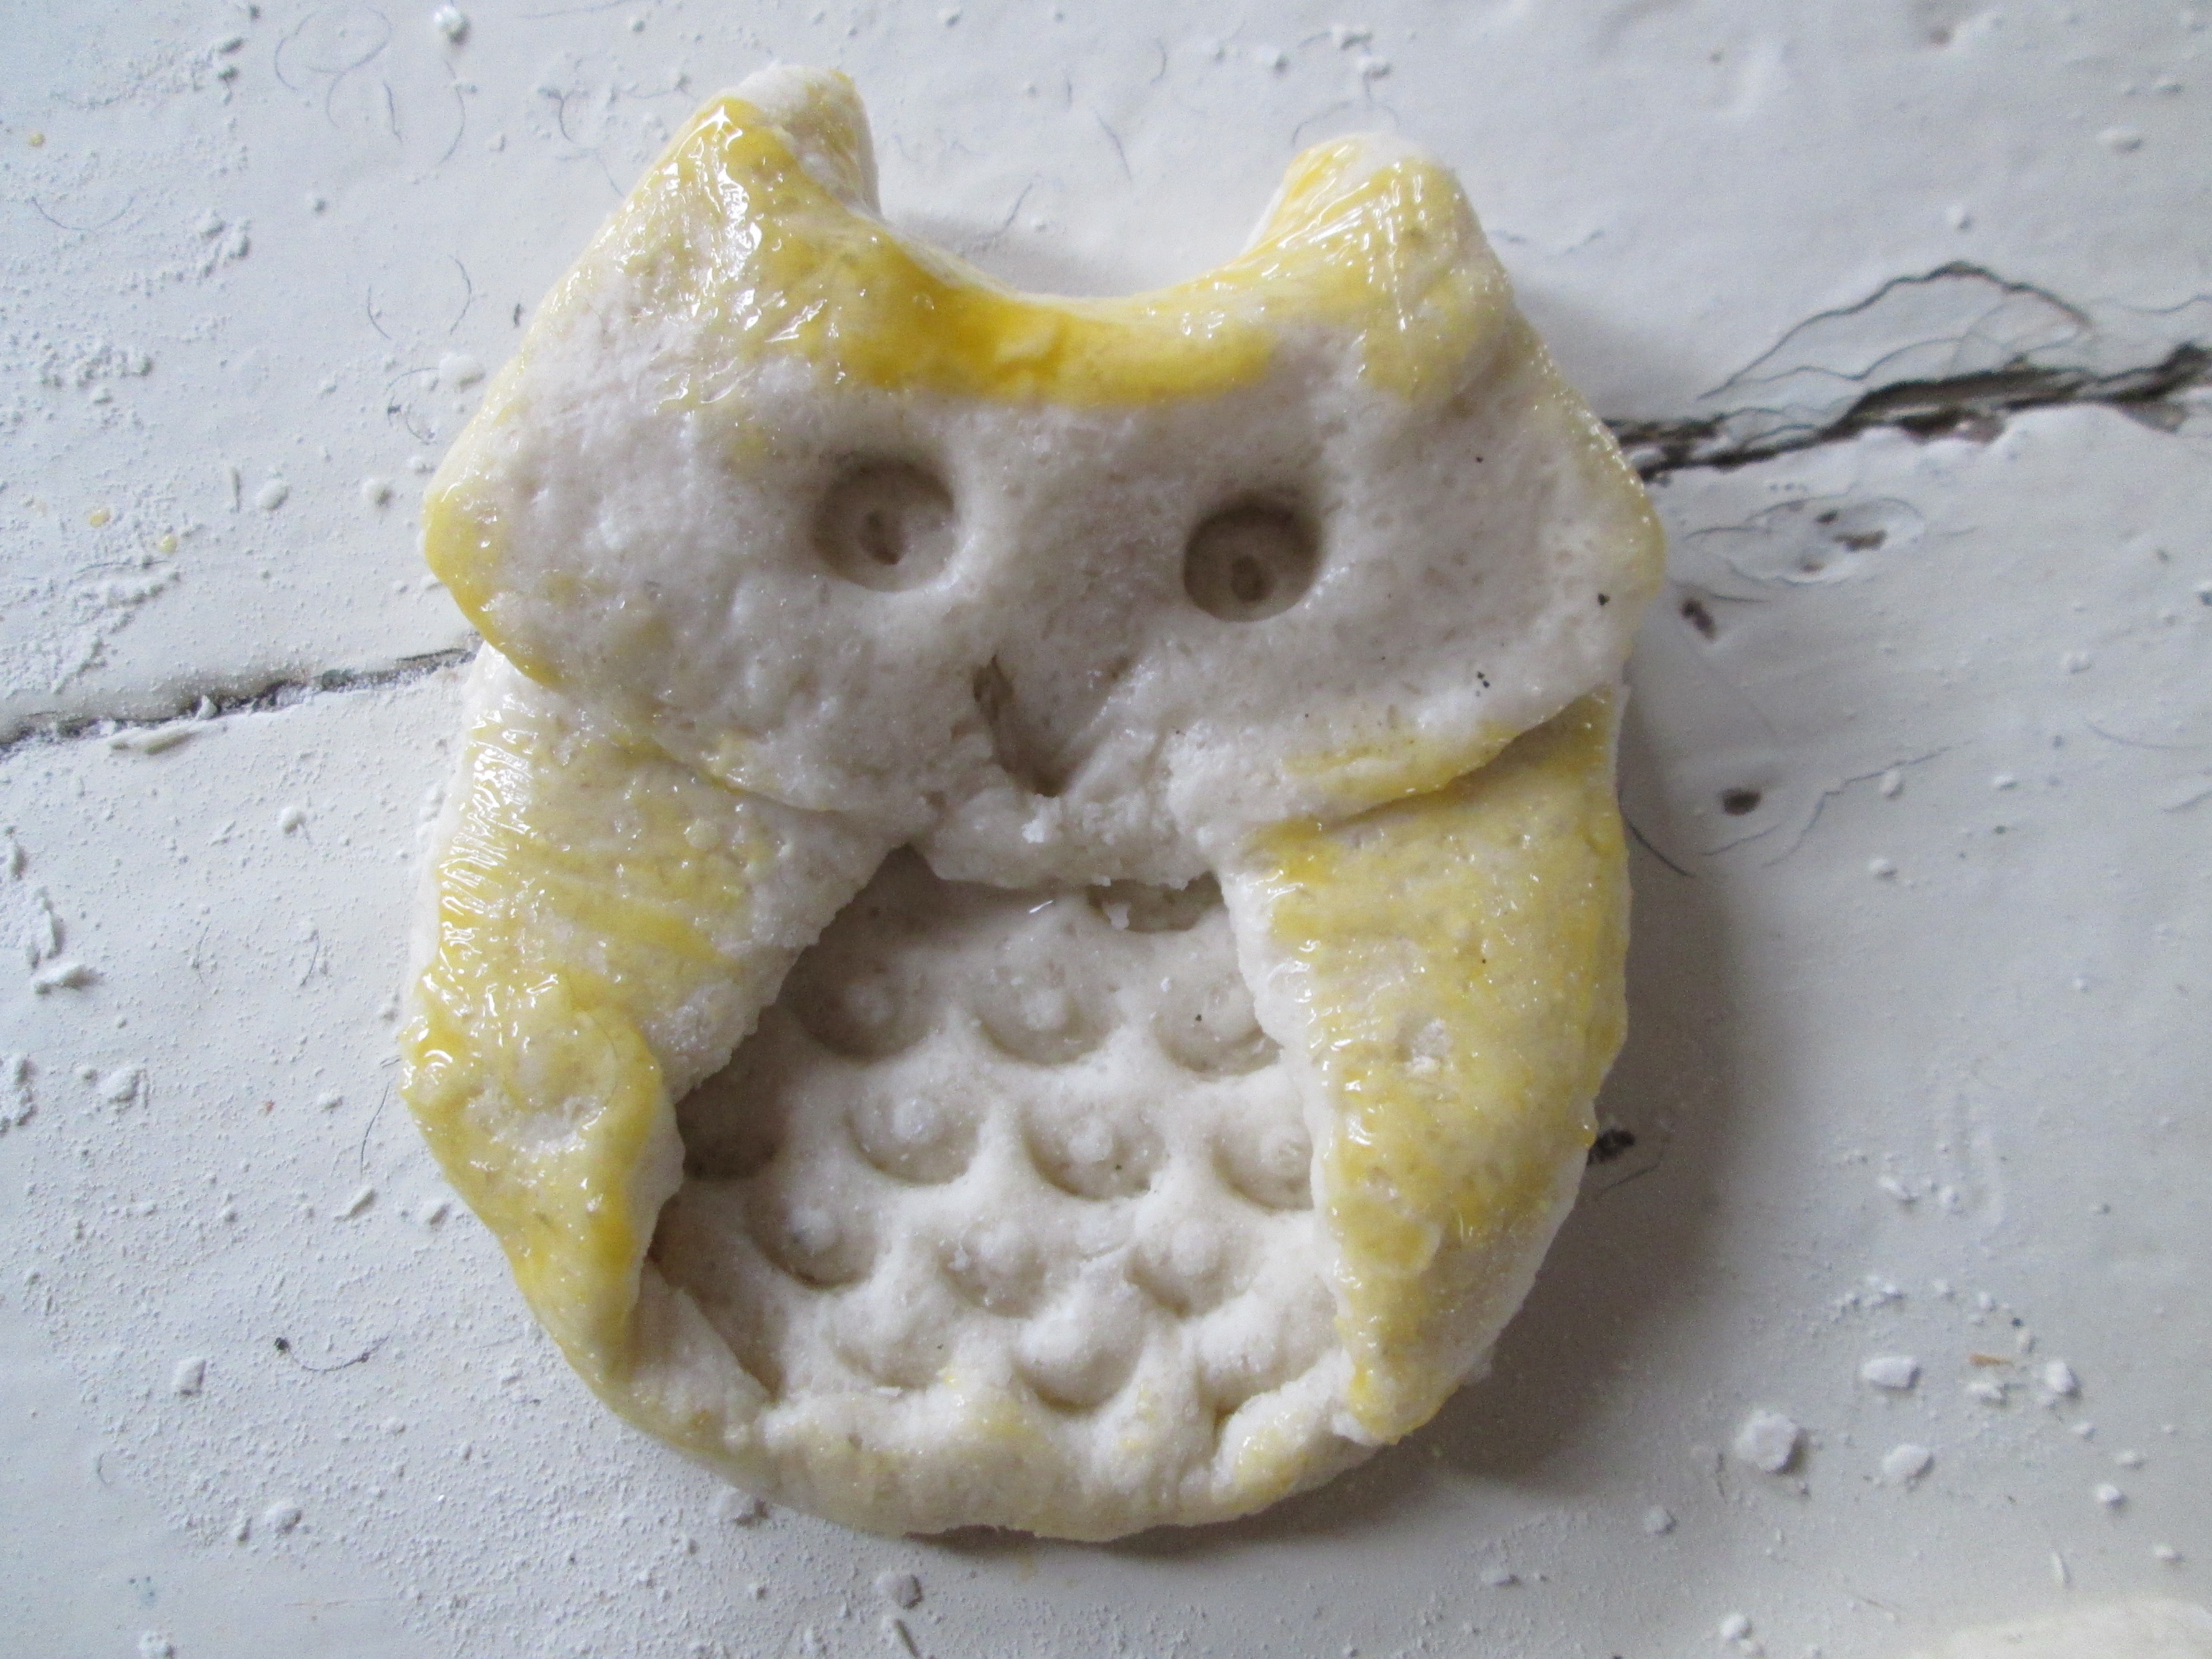
Here is such a golden owl after baking for 7 minutes at 180 degrees.

What else can you make owls?

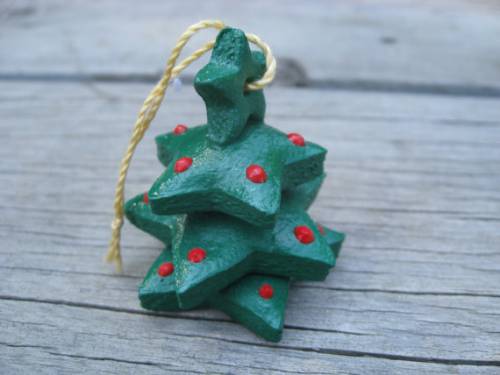
Toy
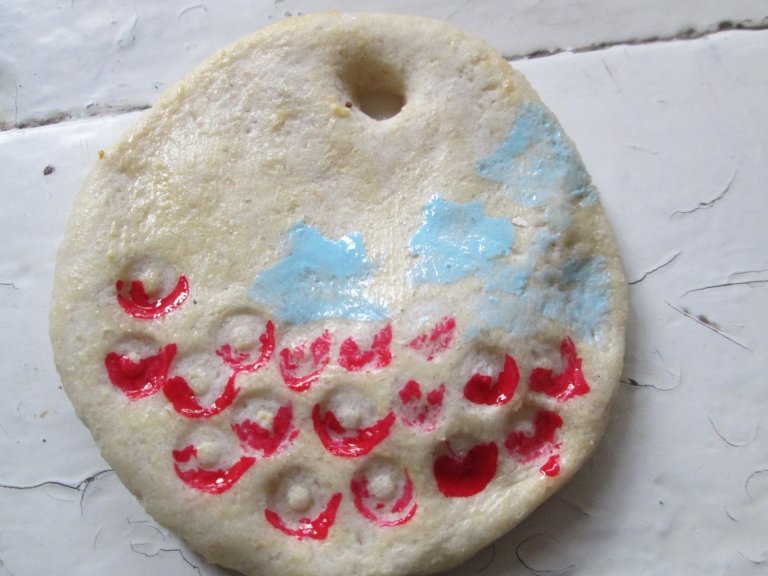
I pierce the second round blank from above with a cap through and through. And below I make prints with the same cap.
I put the toy to bake.

After baking, I put a little red varnish on all the circles, and draw leaves above them. This is mistletoe. It remains to thread a ribbon into the hole and you can decorate the Christmas tree with a toy.
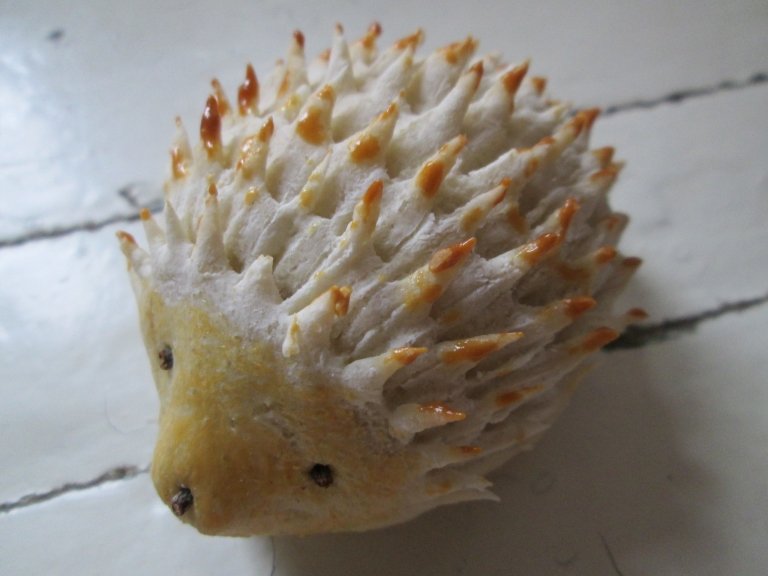
Hedgehog
A small barrel-cylinder rolls down, in which the nose of the future hedgehog is slightly lengthened.

Needles are cut across the body. To do this, you need nail scissors with curved edges.
First, the edges of the scissors are slightly pressed into the dough, then the “needle” is cut.

By the same principle, a Christmas tree is made from salt dough: its branches are cut with scissors.
Now go over the muzzle and each edge of the needle with a brush with yolk, and you can send the product to the oven.
After baking, make a nose and eyes by pressing a piece of a twig, and the Hedgehog with golden needles is ready!
That's how it turned out to make 4 toys with the baby!

Vmdeo master classes
Very! I really want you to show off your work! Send the results of your work, share your successes, so that we can rejoice for you! And that's all for today! I remind you about the subscription and please don't forget to bring your friends: it's more fun together! All! Bye bye!
One of the favorite materials used for creative children's work is salt dough. You can make a lot of funny crafts out of it, for example or. It is very easy to work with such a test, it is somewhat reminiscent of plasticine, so not only adults, but also children can freely use it. In order to make Christmas decorations from salt dough, you will need the minimum amount of ingredients that everyone probably has.
Salt dough Christmas toys
So, the recipe for making dough for crafts.
We will need:
- two glasses of flour
- one glass of salt
- 250 grams of water
The most common flour is suitable, without any impurities and additives. Water should be cool. Salt - you can take "Extra".
How to make salt dough
1. In a small bowl or saucepan, combine salt and flour, add water to them and mix, kneading the dough. How good the material turned out for making New Year's toys from salt dough can only be understood with the help of hands, if it is dry and crumbles, add a little more water, and if you realize that there is plenty of water, then you can add a little flour.
2. Some advise adding a little sunflower oil to the dough, no more than two tablespoons. Then the dough will be of the correct consistency and will not quickly become covered with a crust during operation.
3. Roll out the finished dough with a rolling pin, take cookie cutters and make figures. Well, New Year's toys from salt dough are almost ready. You can leave them as they are or decorate them to make them more original.
How to decorate the finished dough product
1.
 Using a straw for cocktails, make holes in the figurine to make them more airy.
2. Multi-colored buttons will make the toys more homey.
3. You can also decorate toys with the help of shells, spreading them over the surface while the dough is not yet dry enough.
4. So that the toys do not look boring, they can be painted in bright colors and decorated with additional elements made from the same salty text.
You can endlessly list the options, since in fact there are a huge number of them. Show your imagination and spend time with your children with benefit.
A selection of ideas for Christmas decorations from salt dough


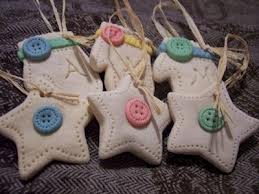

Many people do it - and every time New Year's crafts with their own hands turn out to be original, in their own style, even if they are made according to the instructions. We invite you to make Christmas decorations from salt dough with your children. You can pack them beautifully - and you will get a gift for the New Year with your own hands. The problem of Christmas gifts for grandparents and family friends will be solved!
To make Christmas toys from salt dough, we need:
- salt dough (100 g flour, 100 g salt, 125 ml water)
- cookie cutters
- rolling pin
- lace doily
- ribbons
- gouache
- brush
- sponge
- souvenir bags

Making toys from salt dough:
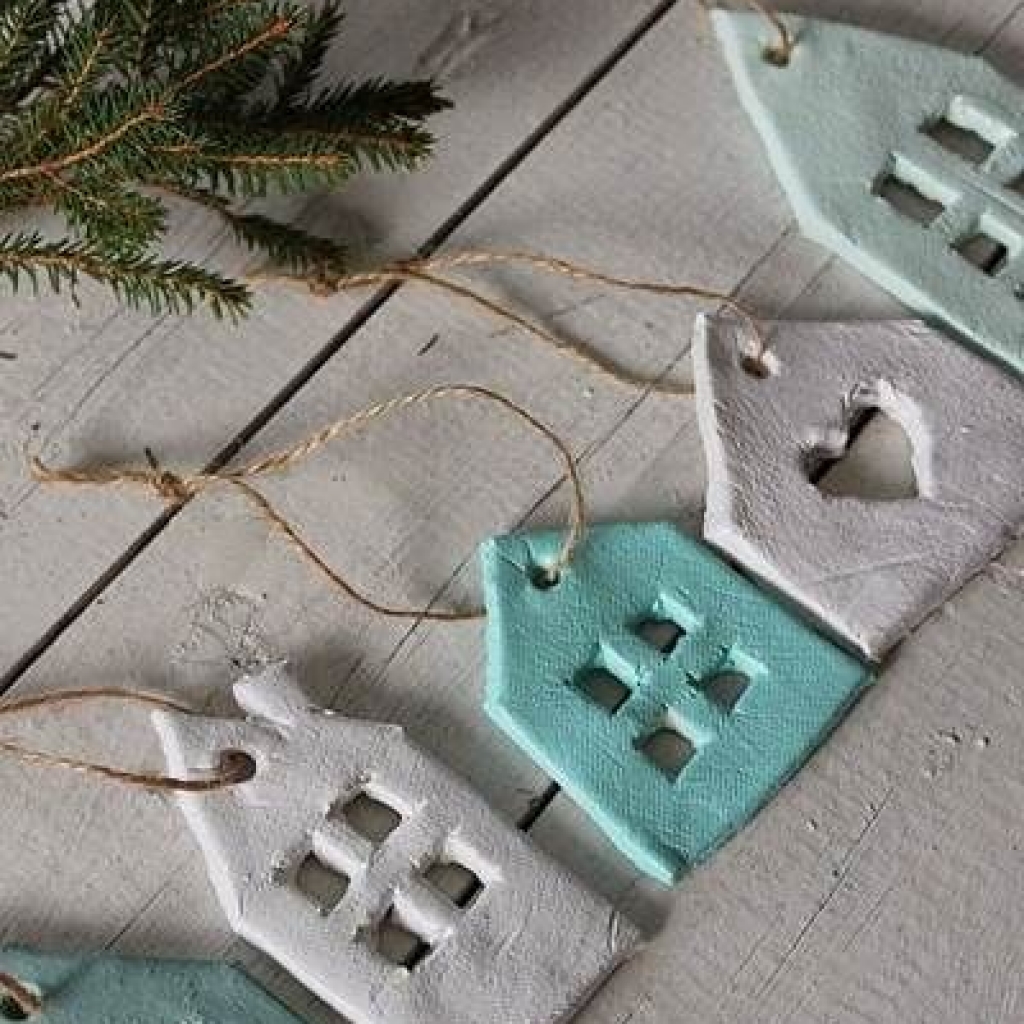
- Knead the salt dough. We roll out the layer with a thickness of 3-5 mm. We put a lace napkin on top and roll it with a rolling pin two or three times (we are not afraid to press). We got a very interesting relief.

- We squeeze stars, hearts, houses, Christmas trees with molds. Do not forget to make holes - then we will insert ribbons into them.

- The first stage is over! We dry our New Year's souvenirs in the oven (convection mode, 60 degrees, 3 hours). Let it cool down properly.

- Now the fun part! We take a brush and gouache and paint. We cover the edges with dark paint - so our souvenirs will look neater (you can skip this step).

- We walk with a slightly damp sponge dipped in paint over ready-made souvenirs. So the drawing will be more noticeable. Let's dry. We cover with varnish, wait for it to dry, and then insert the ribbons.

- Now let's get to the fun part - gift wrapping. We pack three or four souvenirs in each bag, and the gifts are ready!

Salt dough is a worthy alternative to plasticine and clay. The advantage of this material for creativity is that the figures become strong after drying, they can be decorated with paints, varnish, felt-tip pens, you can play with them for a long time.
By the way, look at what you can make as a gift for the New Year.
The advantage of dough over clay is its low cost. Today I want to show you how to make Christmas toys from salt dough and how to decorate them. Flour is needed the most common. Whole grain or rye will not work, because. the dough from them is sticky and not suitable for sculpting toys. We also take the cheapest, fine-grained salt.
What you need to make toys from dough:
- Wheat flour,
- salt,
- water,
- Bowl,
- lodge.
Stages of creating toys for the Christmas tree from salt dough:
Place flour, salt and water in a bowl. Knead the dough. It is necessary to achieve the consistency of plasticine. To prevent the dough from sticking to your hands, you can moisten them with water or sprinkle with flour. We put salt at the rate of 1 tablespoon per full glass of flour. The taste of the dough will be very, very salty. This is necessary so that the toys do not get moldy over time. We connect the child to the process. The result should be an elastic, flexible, uniform dough. 
We put the resulting elastic dough on the table, roll it out with a rolling pin or a jar. Do not roll too thin, otherwise the toys will be fragile. The optimal thickness is 5-7 mm. 
On the rolled salt dough, we squeeze out the figures with the help of molds. To do this, you can use a glass, then the toys will be round. Can be cut with cookie cutters. Or you can fantasize and draw something original on the test, for example, circle your child’s palm. 
Or carve a Christmas tree. 
I used a brush for these purposes, piercing the back end along the fingers, leaving marks on the dough, then cut it out with a knife. If the toys are made as Christmas decorations, you need to make a small hole for the string in the top of the toy. It is convenient to make straws for juice. In general, you can make any figurines. 
New Year's toys made from salt dough can be decorated with beads of different colors and sizes, shells, sequins, beads, etc. You can make a spiral of beautiful woolen yarn. While the dough is fresh, it is very pliable and it is easy to fix various decorations on it. You need to let the child fantasize, let him decorate the toy in his own way, you should not interfere, even if it turns out clumsily or not very aesthetically pleasing from the point of view of the mother. Completely decorating the toy on their own, the child will be proud and pleased with himself. 


Next, be sure to dry the carved toys. This can be done in the oven at the lowest temperature for a few hours. And you can dry on the battery, it will take one to two days. And finally, toys can be decorated. 


I use acrylic paint and nail polish. My son (3 years old) and I got such Christmas decorations. He did half last year, half this year. When the Christmas decorations were taken out, he remembered that he made them himself, he was happy and wanted to work with the dough again, to create something beautiful with his own hands again!
If you love sewing, then you can sew beautiful


