How to color eggs for easter. Dyeing eggs with multi-colored threads
The custom of painting eggs for Easter, and then giving each other bright eggs appeared, according to the Tradition, almost 2000 years ago. The Easter egg is a symbol of the Resurrection, miracle and joy.
Traces of the most famous ways of dyeing Easter eggs are lost in the depths of history. Initially, the shell was painted exclusively in red, but over time, the tradition has changed, and now no one can be surprised by mother-of-pearl, multi-colored, or patterned eggs.
There are a huge number of methods for coloring and decorating, and every year more and more new ones appear, which does not cancel the classic ones. And each has its own subtleties. However, in any case, before the procedure, the shell must be thoroughly washed and cleaned of contaminants, otherwise the color will be uneven.
How to dye eggs with onion skins
This is a traditional way of dyeing eggs, which also does not require special expenses. The color of the shell is obtained from yellow-brown to rich brown-red, depending on the concentration of natural dye in the broth. The more husks, the darker the eggs will be (usually housewives start collecting it a couple of months before Easter).
The more shells, the darker the eggs. Staining time is less affected.
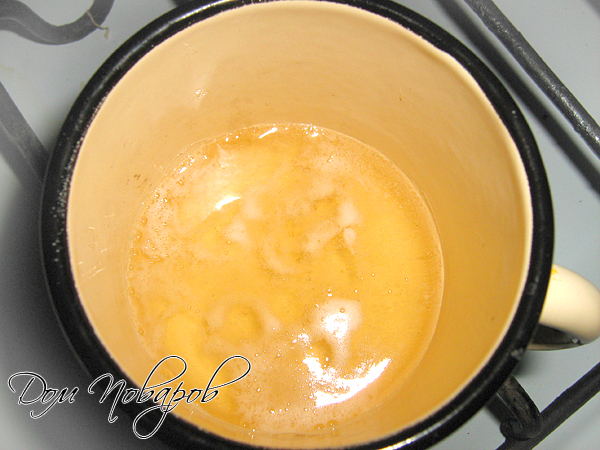
The husks are placed in a saucepan and a decoction is made from it, after which they are allowed to brew. After that, you need to lower the eggs into the water with the husk, put on the fire and bring everything to a boil. After 10 minutes, the eggs will acquire the desired color. The advantage of this coloring method is that a natural, natural dye is used, which is completely safe for the body.
How to dye eggs with birch leaves
It is not always possible to get fresh birch leaves for Easter, but dry ones are quite suitable for this method of staining, however, the effect will not be so impressive. The shell acquires a pleasant golden or yellow color. The broth should be insisted for at least half an hour, otherwise the eggs will turn out completely pale.
Eggs need to be lowered into warm water with leaves and put to boil. After the liquid boils, you must wait another 10 minutes, and then you can remove everything from the heat and set to cool.

Other natural dyes
In addition to the traditional onion peel and birch leaves, there are other ways to color the shell with natural products. What can be used?
Pour water into a saucepan with eggs, add a spoonful of vinegar, then boil with one of the following products: green apple peel, blueberries, beets, carrots, turmeric roots, walnut shells, red cabbage leaves, coffee, nettles, spinach, onions , lemons or oranges.
In order for the color to turn out even brighter and more saturated, you need to leave the eggs in the vinegar solution overnight in the refrigerator.

Coloring eggs with food coloring
Fans of environmentally friendly solutions can skip this chapter. Because it's about chemistry. But in fairness, let's say that this is food chemistry, that is, completely safe. We are talking about ready-made dyes that are sold before the holidays in stores and allow you to achieve the most incredible colors and shades of the shell.
Using these dyes is very simple: just dip a pre-boiled egg into warm water with purchased powder and a small amount of vinegar and wait a few minutes. It is best to turn the egg in the container from time to time (twist it), otherwise an unpainted stain may remain at the point of contact with the bottom.
Dyes with a metallic sheen look especially luxurious, however, if you hold such an egg in your hands for a long time, a solid part of the shining pollen will remain on them.

Fantasy ideas for Easter eggs
If, before dipping the eggs in onion broth or food coloring, stick a patch or curly drawings on the shell, you will get a light pattern. The imagination of a person in this case is practically unlimited.
"Marble Eggs" You can, for example, make a marble pattern: attach boiled onion peel on all sides to the egg, wrap it in a cotton napkin, tie the ends and dip in water - the ornament turns out to be very beautiful!

Another way to create a marble pattern is to add a little vegetable oil to the container: then the paint will form decorative spots that look very impressive.
"Eggs in the speck." First, the eggs must be soaked, and then rolled in rice groats, then wrapped in a dense cloth (for example, nylon or gauze), tied in a knot so that the rice sticks to the egg, and boiled in onion peel.

"Grass". An egg turns out to be very beautiful if you stick a beautiful leaf (parsley, for example, or celery) on it, wrap it in cloth and then boil it in broth.

"Thread". If you wrap the eggs with a thread before lowering them into tinted water, you get an unusual and interesting pattern.

"Striped Eggs". Making striped eggs is easy enough, especially if you use food coloring. To do this, you need to prepare several solutions of different colors with the addition of vinegar to better fix the shade. After that, the pre-cooked egg must be dipped halfway into one of the dyes. You can hold it with your hands for the necessary time or do otherwise: pour a solution into a regular glass by about a quarter or a third and lower the egg there: it will be fixed and only half will be painted over. After that, turn it over and lower it into a solution of a different color. If the shades are "overlapped", it will turn out even more beautiful!

"Dinosaur Egg" Dry boiled eggs should be tightly wrapped in gauze, fastening the ends with an elastic band or tied with a thread. After that, the bundle is dipped into a solution with food coloring (especially good if it is dark green or brown). White streaks will remain from the gauze on the shell, while the rest of the surface will be well stained. The result is an imitation of the eggs of ancient reptiles.

"Wax". Melt the wax in a water bath and lower one half of the egg into it first, and then the other. After that, veins in any quantity or pattern are squeezed out around the entire circumference of the shell with a thread. After the wax hardens, the eggs are dipped in warm water with paint: only open places will become colored. If, after full staining, the wax does not lag behind well, then the eggs should be put in the refrigerator for a while.

"Silk patterns". Eggs are boiled with a small amount of soda, after which they are wrapped in pieces of silk and tied with a thread. The eggs are then boiled again in the same water as before. After removing the shreds, an interesting pattern will remain on the shell.

Some subtleties of the correct coloring of eggs
There are several subtleties that will allow you to achieve the perfect result when coloring eggs:
To make the paint lie more evenly, wipe the shell with alcohol or soapy water before the procedure. This will get rid of any contamination, and the eggs will turn out very beautiful;
To give the finished eggs a shine, they need to be greased with vegetable oil: the shell will simply shine;
If you just pulled the eggs out of the refrigerator, then before cooking and coloring, they should be given time to warm up to room temperature;
When using food coloring, do not add vinegar to purple or red water. It is better to first hold the egg in a solution of vinegar and clean water for a couple of minutes, and then dip it in the paint.
Why are eggs dyed?
The custom of painting eggs is associated with a legend according to which Mary Magdalene came with the good news of the resurrection of Jesus to the emperor of Rome, Tiberius. He did not believe the woman, saying that this simply could not be, the chicken egg would sooner turn red than he would accept her words as truth. At the same instant, the egg that Mary held in her hand turned colored, after which the emperor had no choice but to recognize this miracle, like the resurrection of Christ. Different peoples have their own versions of the origin of the tradition, but this one is accepted as the main one by Christians around the world.
Multi-colored eggs have long been an integral part of Easter. This bright, cheerful holiday was created to bring people together, give joy and fill everything around with comfort. Easter has an ancient history, many of its traditions are filled with special meaning. If you want to learn more about this and have fun, you should definitely figure out how to paint eggs for Easter with your own hands (you will find interesting and beautiful ideas in the article).
It would seem that what is special about how to paint eggs for Easter with your own hands, we will consider interesting and beautiful ideas in more detail in the article below. It is enough to boil a simple egg, then cool it and take paints. Choosing a pattern or just covering it completely in one color is also beautiful. And what is the deeper meaning here? Why are beautiful eggs so important for Easter? After all, their internal component will not change from the beauty of the shell, will there be the same boiled eggs? Traditions for many years, however, like Easter itself.
Why you should paint eggs
Here it is worth recalling the history of the holiday itself. What is Easter dedicated to? Interestingly, the Easter egg for Christianity is part of the symbols of the Holy Sepulcher, which holds the secret of eternal life. Once in Palestine, people were buried in caves, closing the entrances with stone after the end of the funeral ceremonies. The stone was rolled off before being placed inside the deceased, then put back.
According to legend, the stone that closed the tomb of Jesus was somewhat reminiscent of an egg. Everyone knows that eggs hide new life under their shells, so eggs and dyed ones are an extra reminder of the miraculous, impossible Resurrection of Jesus, as the victory of life over a gloomy and sinister death. More often than not, eggs are dyed red, even scarlet.

Therefore, the most beautiful Easter eggs are considered to be with a red pattern or just red. Traditions say that Mary Magdalene, shortly after the resurrection of Christ, somehow appeared to Tiberius, the former emperor, to convey a wonderful message. Most likely, the emperor had already heard about miracles, but did not attach much importance. In ancient times, any visitor to the emperor had to bring him gifts, Mary took the egg and held it out, saying: “Christ is Risen!” this is how people of relatives and acquaintances congratulate on Easter now. The emperor nodded at the color of the egg and replied that it was white and not red at all.
An egg can't change colors, and that's how the dead don't rise again. Suddenly, the egg turned red. It is interesting that painted eggs are mentioned for the first time on the scrolls of the tenth century, which means that the tradition is really many centuries old. In the past, the Romans considered the egg a symbol of new life.

Egg coloring, ancient methods
Previously, of course, there were no artificial dyes, people isolated the paint in a natural way, using improvised means. Painted eggs for Easter had several varieties.
For example, an egg dyed in one, any color without drawings was called krashanka or krashenka (also galunka). Onion skins were often used, giving a beautiful terracotta shade, also a shade of yellow.
Eggs with some kind of ornament were called pysanky, as painted. They had to be painted only raw and then you can’t eat it, as you boil it, without damaging the drawing. Pysanky, alas, were brought as a tribute to art, although the then paints for eggs were quite safe for use.

Now eggs for Easter can be dyed either with special food paints, or with ordinary watercolors (if it is not supposed to be eaten later), or take stickers.
Traditionally, girls or women prepared krashenki for Easter, taught girls. Everyone in the Balkans dyed eggs, even Muslims, they also willingly accepted gifts from neighbors - Christians, this was not considered shameful to them. Although Islam forbids celebrating "foreign" holidays.
The Church devotes the custom of coloring eggs to a special day, which consists of Holy Week - this is Thursday, also Good Friday, or maybe Saturday.

Catholics willingly paint eggs for Easter with their own hands, then give them or eat them themselves. Interestingly, they can give not only ordinary eggs, but also sweet chocolate ones.
In addition to the usual ones, eggs were made of wood, later porcelain or glass, painted with gold and beautiful precious stones. It's easier to keep them that way, as tradition dictates. You should not try so hard when decoupage eggs, so that you can quickly eat them later, though the usual ones cannot be saved for a long time.
gradient effect
It's a beautiful, gradual transition of colors. Interestingly, decoupage or, more simply, decorating eggs with food coloring is quite simple. Dilute the chosen dye in a small glass of water, then carefully place the egg there. Wait 10-20 minutes, you're done. The intensity of the color can be controlled by the concentration of the dye. How to decorate eggs for Easter more interesting? Add a gradient effect.

Take a small ladle or sieve. Gently immerse the egg in the diluted paint, hold for 3 minutes, while constantly lifting it slightly, lower it again lower. Then raise to about half, hold for about 5-6 minutes, lower again and for the remaining 10 minutes keep only the lower part of the egg immersed in the dye. You don't even need complicated decor!
striped eggs
Coloring Easter eggs without using a brush or pencil? Easily. Dilute several glasses of the selected color, just let the concentration become different. Then alternately submerge the eggs, each time to a different level.


The decor of the same color looks beautiful, just different concentrations.
painted eggs
Of course, monotony is good and looks beautiful, but painting Easter eggs, inventing your own decor, is much more interesting. Any pencil or gouache will do, the main thing is to take a soft lead.

Sometimes the outline of an egg is used to create a composition, but more often the drawings are quite simple. The church does not limit the imagination, you can draw any thing, more often these are spring motifs, flowers, eyes or leaves. Pictures look more beautiful on a colored, plain background.
Lace eggs
It is not necessary to draw the decor manually, many drawings can be made with improvised means, just remember about the holes! For example, how to make an exquisite lace pattern.

First, wrap your egg in a piece of lace fabric, then holding it by the tail, lower it completely into a glass with already diluted paint. Wait 10-11 minutes. Then carefully remove the cloth and let the egg dry. Ready.


Any stencils will give a similar effect for Easter, the main thing is to make sure that they fit snugly against the round surface of the egg, then the pattern will not be smeared.
sequins
The dye for eggs is also varied, it looks beautiful, you can supplement it with patterns or sparkles, why not? You can easily buy them at a cosmetic or hardware store. There are loose sequins used in makeup or manicure, there are larger sequins, they are taken to decorate fabrics, they are embroidered with them. Only painting eggs and Easter with similar loose material requires care. Make sure that the sparkles do not fall into the plate later, because they cannot be eaten.

However, such sparkles can be replaced with delicious small balls, such sweets are sold in confectionery departments. They are also beautiful and bright, though they do not shine.
To attach the selected material, use glue, and preferably protein, after smearing the egg. They look beautiful on a finished colored background, then painting the eggs should precede the sparkles.

They painted it, waited until it was completely dry, then covered the selected areas of the egg with glue or protein and gently dipped it in the sparkles scattered on the saucer. Shake off excess and put somewhere to dry. Ready.
sprinkles
Yes, the mentioned multi-colored balls. They are safe and can be eaten. They are more often used to decorate delicious Easter cakes, but they will also be used for Easter eggs. Decoupage of such eggs is a pleasure, because the coloring does not spend much time.

You can simply coat the egg with protein, then carefully roll it out in a bowl with sprinkles already scattered. Such beauty does not require separate drawings! And the colors are warm, bright, real spring hues.
Drawings
Of course, alas, not everyone can be an artist. Therefore, many people, thinking about how to beautifully paint an egg for Easter, do not trust their own skills too much. They are looking for ready-made stencils, remembering the technique of painting, for example, windows for the New Year or deriving a new dye for eggs, mixing different colors.

Curious drawings can give a simple tape or tape! First, dilute the selected paint, then arm yourself with tape or electrical tape. Stick it neatly on the egg, estimating the outlines of the future pattern. Then dip the eggs in your paint, hold for the desired 10-15 minutes. Everything, now you need to wait until it dries and carefully remove the electrical tape (adhesive tape). Coloring eggs is not difficult at all.

It is so easy to make some letter or several letters on the egg, in the husk. You will get cute themed eggs, which is how dyeing regular eggs for Easter has become a part of many cultures.
Threads
They create interesting color transitions, beautiful drawings, and do not spend a lot of effort. Of course, Easter uses such eggs only as an element of decor, because it is difficult to break them, sometimes it is too pitiful.

Take different threads (mulina is better, they are soft and fit well), coat the PVA egg, then wrap it carefully, avoiding gaps. An alternative to the usual coloring of eggs. However, you can partially wrap them, leaving gaps that you can then decorate with either drawings or glue glitter.
patterns
Of course, the eye involuntarily stops on the husk with patterns, and some are painted in such a way that they seem to be part of art. It's easy to achieve this. Arm yourself with a felt-tip pen and carefully, carefully redraw the pattern you like.

It is not necessary to alternate colors or take care of a colored background, painting with one black or blue, red marker on a natural, white background also looks impressive.
Mosaic
It looks very beautiful, almost like marble eggs for Easter. Achieving the look like in the selected photo is easy: just beat your egg gently with a spoon first, then soak it inside the dye.

Speckled
Small points are also easy to provide. Take gauze, tightly wrap the egg with it, then boil it, only in the selected dye. Then carefully remove the gauze. Ready.
Yes, most of the ways to decorate eggs are easy and affordable, although some people prefer ready-made Easter stickers. There are beautiful, thematic drawings, and before use it is enough to peel off.

White patterns already on a painted egg can be easily and safely applied with powdered sugar. Dilute it with a drop of water so that the mixture comes out homogeneous, thick. Take a special confectionery syringe. That's it, paint the eggs, the main thing is to choose a dark colored background so that the white patterns look brighter.
With spring warmth and sun, the bright holiday of Easter comes to us. Tall stately Easter cakes, tender cottage cheese Easter, a variety of pastries in the form of chickens, rabbits and, of course, colored eggs. If dishes are prepared for family and guests, then eggs are presented to all acquaintances and strangers. From children who bring the news of the Resurrection of Christ in the morning to work colleagues. "Christ is risen!" - they say at the same time. "In truth, he has risen!" - they hear in response and receive a testicle in return.
What are Easter eggs?
Interestingly, dyed Easter eggs have their own names, depending on how the eggs were dyed. Krashenki are plain eggs, krapanki are eggs covered with multi-colored spots, which are obtained with the help of droplets of wax. And if we paint the eggs and scratch out the drawing, then we get a drape. Separately, it is worth noting the Easter eggs. This is not just an Easter attribute, but a work of art! Drawings on eggs are made with a special tool - a scribbler.
In the article, we have collected both the well-known ways of painting eggs, which everyone knows very well, but may have forgotten the nuances, as well as the more interesting and “unhackneyed” ones. In addition, we will talk about quick options for beautifully painting eggs with the least effort, about decorating methods that you can do with your child, and about such original ways where you can let your imagination go free swimming and expect great results! For convenience, all 20 methods are divided into thematic blocks.

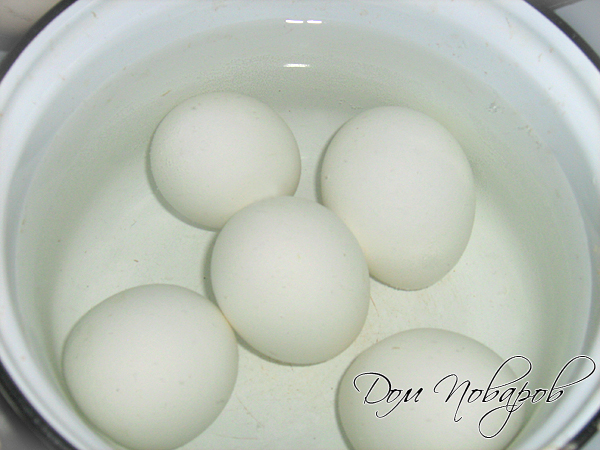
Key to start - preparing eggs for painting
- First: never start boiling eggs without first taking them out of the refrigerator at least an hour or two before coloring. Eggs should be at least at room temperature so they don't burst during cooking. You can prevent the explosion of eggs in another way. They need to be pierced with a thin sharp needle. However, the first option is much easier and safer.
- Second: when cooking, add 1 tbsp. l. table salt per 1.5-2 liters of water. It is believed that this is done so that the shell does not burst. In fact, it is correct to say that salt will prevent the protein from leaking out and forming white “growths” if the shell suddenly cracks.
- Third: the eggs should be thoroughly washed, perhaps even using a dish sponge. This is done so that the paint lies more evenly. You can also wipe the testicle with soapy water or alcohol.
- Fourth: you can paint eggs for Easter not only chicken, but also quail. It turns out very interesting and unusual! We also pre-keep them at room temperature, rinse and cook for 4-5 minutes.
- Fifth: in order for the paint to hold better, vinegar (9%) is added during the dyeing process. On average, 1 tbsp. l. for 1.5 l. water.
- Well, one last piece of advice. how to give already dyed eggs a festive look. Rub them, after wiping dry, with vegetable oil.

How to dye eggs in onion skins
First: classics of the genre - onion peel and its variations
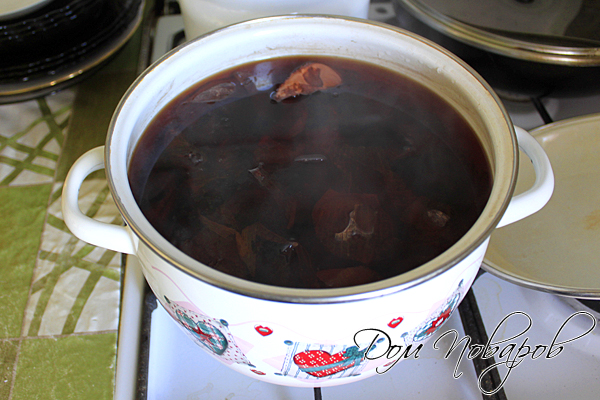
The traditional crimson, brown or dark yellow eggs are obtained by dyeing them with onion skins. In this case, both the husks of ordinary onions and red onions are used. When calculating the color, you can focus on such a hint. If you take the husks of 8 onions for 2 glasses of water, you get a red-brown color.
- Prepare the dye solution. To do this, pour onion peel into a pot of water.
- Bring to a boil and simmer for about half an hour.
- Let the broth cool down. During this time, he will insist.
- Strain the "paint", discarding the husk.
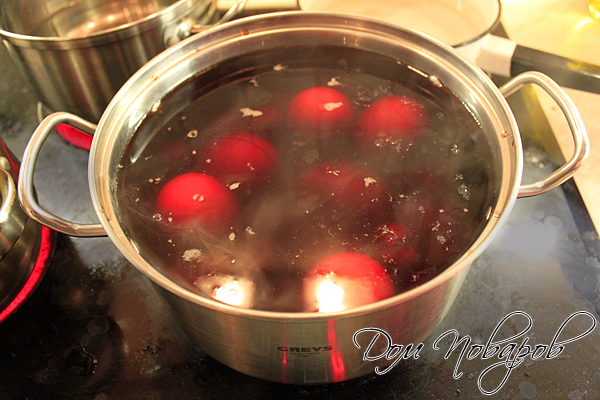
- Immerse the prepared eggs in the solution so that it completely covers them.
- Boil the eggs in onion broth over low heat "hard-boiled", that is, 12-15 minutes.
- Cool them quickly with cold water to make it easier to peel off the shell.
- If the eggs have not received the desired shade during this time, return them back to the coloring solution.


Second: a tandem of husk with brilliant green
A very interesting option is burgundy-green or brown-brilliant eggs. For their execution, you will need onion peel, brilliant green (standard vial, 10 ml per 1.5 l.), nylon stocking (or gauze), gloves (to protect the skin of the hands from brilliant green).

Third: coloring in the husk with patterns
You can diversify the coloring with onion peel if you first apply a patterned figure to the egg and fix it with a piece of nylon. At the same time, to obtain a pattern, you can take what is at hand. For example, parsley leaves, parsnips, dill, peppermint, fresh or dried flowers. Dry material must first be soaked with hot water, and then applied to the egg.


The chosen motif - a leaf or flower, tightly fix with a nylon stocking (or bandage, gauze) and carry out standard staining with onion peel. Then remove the stocking, remove the stencil for the pattern, and an egg painted with onion peel, but with an imprint of a leaf or flower in the natural color of the shell, will appear.
By the same principle, you can decorate the dot with chaotic dots of the color of an unpainted shell. To do this, roll a wet egg before painting with onion peel in rice, crushed peas or millet, or attach a piece of lace to it. Fix the croup or lace patterned motif with stocking capron. 
You can get a variety of patterns without using a fixing material:
- for straight lines in the natural color of the shell on the egg, put rubber bands on it for money;
- any pattern can be made from masking tape, plaster, self-adhesive paper, or simply paint the egg with wax crayons;
- eggs in the "cell" will turn out if you put on them mesh stockings or a vegetable mesh.
Methods with dyes - natural and not very
Fourth: gifts from nature - natural dyes

- Pour water into a 1.5 liter saucepan and put a natural pigment - the source of color.
- Bring to a boil, let it boil a little and leave to infuse for half an hour.
- Strain the broth, pour in 1 tbsp. l. 9% vinegar and put eggs in a saucepan.
- Simmer over low heat until at least tender (12-15 minutes). If the color is taken poorly - up to half an hour.
- If the coloring is not successful even within half an hour, leave the eggs in a saucepan with a coloring solution overnight.
Fifth: a scientific alternative to natural dyes - food grade dyes

Multi-colored eggs on young grass, what could be fresher and more attractive for Easter? To make them quickly and without much hassle, you can buy a special Easter set in the store. When choosing it, please note that dyes are different according to the method of application.
One of the options is exactly the paint that needs to be applied directly to the boiled egg. The other is a powder or tablet for diluting a colored solution. Eggs are lowered into it and kept there until the paint is taken.
The staining method must be indicated on the dye packaging. There is nothing complicated in using ready-made liquid paint. It is applied to the prepared egg, evenly distributed and allowed to dry. The method of coloring with water-borne dyes in the general case looks like this:

Sixth: with the world on a string - a colorful egg

A riot of colors in one egg is a method of dyeing with floss threads. Very simple and beautiful:
- Wrap multi-colored floss threads on a raw, room temperature, pre-washed egg. Combine colors and arrangement of threads as your fantasy tells!
- 2. Boil them in the usual way until hard-boiled (12-15 minutes).
- 3. Remove threads.
Seventh: fabric translators
Transfer a beautiful pattern from fabric to an egg? It is quite possible. Just take the choice of fabric seriously. In our age of the extremely developed chemical industry and the desire to reduce the cost of things at any cost, you can run into a chemically dyed fabric. Despite the beauty of the drawing on it, it is better to refuse to use it. Examples of permitted material are a Pavloposad shawl or a silk tie with an interesting pattern.
- Place the selected fabric with the right side on the egg. Secure it by stitching along the contour.
- From above, you can additionally fix the matter by wrapping the egg with a nylon stocking or white cotton cloth.
- Add 9% vinegar (3 tablespoons per 1.5 liter saucepan) to the cooking water and boil the hard-boiled eggs (12-15 minutes).
- Drain the water, cool the eggs and free them from the tissue. The drawing should appear with gentle contours on the shell.
- Color the egg yellow with food coloring. Although chickens can be of other colors: blue or pink, for example. Even a child from 3 years of age can cope with coloring with colored powders or tablets diluted in water. Of course, under the supervision and strict guidance of an adult.
- Cut out details for decorating a chicken from colored paper: eyes, wings, tail, beak, scallop. And also: a bow - if it's a girl or a bow tie, a tie - if it's a boy. You can also use decorative fluff from a needlework store. It turns out cool and very cute!
- Use gelatin glue to fix the prepared parts. To do this, soak the gelatin as indicated on the package. Drain excess liquid, and heat the granules until they dissolve. It is not necessary to bring to a boil.
- Apply gelatin glue with a brush on the details, the egg and gradually turn it into a chicken!
- Boil the eggs. If necessary, color with food coloring, for example, if you are making a lion's face - yellow.
- Slowly pour warm water into a tablespoon of cocoa until sour cream is thick.
- Plant the finished eggs on stands, such as plastic bottle caps, and draw.
- Let the chocolate gouache dry.
- Then glue the eyes with gelatin glue if they do not initially have an adhesive base.
- Take them out of the pot, pat dry with a towel.
- Place the egg on a stand, such as a bottle cap.
- Start drawing with wax pencils. The wax will diverge from the heat and create bizarre transitions, overflows. Choose colors carefully!
- You can paint eggs in this way not only with pencils, but also with the help of sprinkling with wax crumbs. To obtain it, the crayons are rubbed on a fine grater. And then poured onto a hot, freshly boiled egg.
- And another way to decorate with wax crayons is to melt them and dip an egg into it.
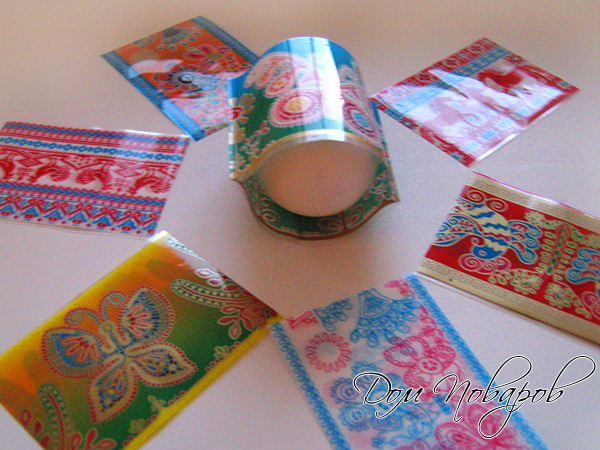
- Boil the eggs in the usual way.
- Put the thermal base on the egg and put it in a strainer.
- Dip the strainer in boiling water for a few seconds. As soon as the thermal sticker "hugs" it, pull it out.
- Boil the eggs.
- Cut multi-colored foil (sold in stationery stores) into rectangular pieces of such a size that it is enough to wrap an egg.
- Prepare decor elements or just use confetti.
- Wrap cooled eggs in foil. Attach decor to them with glue.
- Boil the eggs.
- Take one and paint it completely in the lightest color.
- Dip the painted egg into the paint a tone darker, but not completely, but up to half.
- Wait for the paint to take. Then dry it.
- Then do the same, applying paint in layers.
- Boil the eggs, be sure to hard boil.
- Set them on stands and apply the chosen pattern with a permanent marker.
- After finishing work, let it dry. This will take approximately an hour.
- Choose a stencil pattern.
- Apply it to ultra-thin paper (tracing paper).
- Moisten the paper so that it becomes plastic and can be easily applied to the egg.
- Firmly fix the attached stencil on the egg with a nylon stocking or bandage (gauze).
- When the preparation for coloring the eggs is completed, do it in any way: onion peel, food coloring. Only if the eggs are dyed with onion skins, they do not need to be boiled first. And if the method of coloring with food coloring is chosen, then they must be pre-cooked “hard-boiled”.
- Remove the fixing material and stencils from the finished cooled eggs.
- Boil the eggs.
- Color them in a light-colored dye: yellow, orange, blue. Let dry.
- Dilute in a deep narrow container (in a glass, tea cup) a dark-colored dye: purple, brown, dark blue. Add 1 teaspoon to each cup of dark solution. vegetable oil. Stir so that a spoonful of oil disperses into many small oil droplets.
- Dip light dyes in dark dye. It's ideal to do it once.
- Let dry. Marble eggs are ready!
- Take the finished dye.
- Light a candle and use melted wax (paraffin) to apply a pattern on it. Do it very carefully. The flame should not touch the shell, otherwise a gray trace of soot may remain.
- Roll the egg in the material of your choice. You can also put decorative elements on the adhesive base with your hands.
- When the work dries, you can grease the decorated surface with vegetable oil for a more presentable look.
- Slowly pour water into the powdered sugar so that a white mass of thick consistency is obtained.
- Place the decorative sugar mass into a confectionery syringe.
- Take the finished dye.
- Put a pattern on it.
- Let dry.
- Take a pretty napkin. Tear out with your hands (without using scissors) an interesting fragment. Remove the top layer - we will use it.
- Prepare gelatin glue.
- Apply the selected fragment to the dye.
- Apply gelatin glue over the napkin with a brush. You need to do this from the center to the edges.
- Let dry.
- Make dye with onion skins.
- Draw a pattern on it with a simple pencil. You can do without it if you feel confident or your hand is full.
- Walk along the line drawn with a pencil with a clerical knife, scratching the outline.


We paint with the children

Both adults and children look forward to Easter with the same impatience. Give the kids the opportunity to make a beautiful craft egg and give it to, for example, grandparents. Being engaged in such creativity, we encourage the children's desire to make beautiful things and give it to loved ones. Moreover, it is very interesting and fun!
Eighth: craft egg

From krashenka you can make a perky chicken:
Ninth: funny faces
Show your children that you can draw on the egg in an unusual way. But since this is a product and it is then eaten, the paints must be natural. For example, it is very easy to make an edible "gouache" from cocoa powder. She can draw the face of an animal, the face of a funny weirdo, or even a portrait. Eyes can also be depicted, but it will be more interesting to glue ready-made ones from a needlework store. 
Tenth: wax crayons (pencils)
This is a way for school children. Since you have to work with a hot, freshly boiled egg. 
Time saving
When a woman is not only a housewife, but also the main earner in the family, there is not so much time for home life. Moreover, Easter eggs are painted on Maundy Thursday. Until the weekend, this activity is not postponed. Therefore, in the absence of time, you can resort to "quick" ways to make Easter eggs.
Eleventh: thermal film stickers
Once and done - this is about one of the easiest ways to create an Easter mood using thermal stickers. How beautiful they are: with Gzhel-style painting, Khokhloma, with intricate patterns, butterflies, flowers, church plots, as well as rabbits, kittens and even children's cartoon characters! If you plan on using thermal stickers, choose smaller eggs. Otherwise, they simply will not enter the thermal basis. Stickers can be applied to unpainted boiled eggs, and you can also use them as a fallback option, if the shell cracked when painted with husks.
Please note: eggs in thermal stickers are stored less than, for example, dyed with husks or food coloring.


Twelfth: holiday attire
Being one of the most important Easter symbols, the egg requires an appropriate outfit. So far, we have talked about its color, but you can do it differently. It is enough to wrap a boiled egg in bright foil. Voila! And it is in the spotlight. And in addition, it will be decorated with exquisite decoration. 
flight of fancy
If the standard traditional methods of dyeing eggs seem boring and monotonous, let your imagination fly and follow it like a white rabbit.
Thirteenth: the power of the rainbow
This method is a variation of food coloring. The combination of colors, the depth of staining, the number of layers ... All this is chosen individually. Therefore, such dyes are 100% original. However, in order for the eggs to turn out like in the picture, you need high-quality dyes that give rich colors. You need to breed them, following the instructions. Another tip: you need to start with light tones, gradually resorting to darker and darker ones, and finish with the darkest ones. 
Fourteenth: eggs "on style"
Easter, originally a religious holiday, has now become more secular. Therefore, eggs are not only traditionally painted red or a pattern corresponding to the holiday is applied, but they also approach this activity more simply and creatively. For example, eggs will be stylish if you apply a pattern to them with a permanent marker. You can come up with a coloring book yourself or get ideas from the Internet. 
Fifteenth: stencil work
This method is relatively traditional. We find a stencil, apply it to the egg, paint it with natural or food coloring. A flight of fancy should manifest itself in the choice of a stencil. Here everyday experience, information from books, magazines, the Internet can come to the rescue. Or maybe you have family symbols. The main thing to remember is that the selected color and stencil should be in harmony with each other. 
Sixteenth: marble effect
Artistic flair will be needed for those who decide to paint eggs in marble color. It is not difficult to do this. The main thing is to choose colors beautifully and purchase high-quality dyes. 
Options for decorating ready-made dyed eggs
If the simple coloring of eggs is not enough and the soul asks for an artistic continuation, choose one of the proposed options. Turn paint into a work of art!
Seventeenth: 3D decor
Quite laborious, but worth it. To decorate eggs, you will need a wax or paraffin candle, as well as a variety of cereals, small pasta, confectionery sprinkles and whatever else your heart desires. 
Eighteenth: sugar lace
Eggs in voluminous lace are very stylish, festive and go well with any traditional pattern on krashenka. To make them, you need powdered sugar (about a glass) and water. If powdered sugar is not at hand, you can make it yourself. To do this, you need granulated sugar and a coffee grinder. 
Nineteenth: decoupage technique

In order for a picture to appear on the dye, it is not necessary to apply a thermal sticker on it or transfer the pattern from the fabric. You can remember about the decoupage technique. It is designed to decorate not only plates and furniture, but it can also be transferred to the plane of Easter decor. To do this, we will have to use beautiful napkins or their elements and gelatin glue. To prepare the glue, gelatin is soaked according to the instructions on the package. Then the excess moisture is drained and heated, without bringing to a boil, until the granules dissolve.


Twentieth: drapanki
Colored eggs with a white pattern can be made not only by applying a stencil. The pattern can be scratched on the surface of an egg painted with onion peel with a clerical knife or a thick, sharp needle. This method is laborious, but applicable when it is planned to make a thin, elegant pattern on the egg, which is difficult to achieve by applying a stencil. 
Easter is a family holiday that gives hope for the future and faith in a miracle. Touch and you a piece of beauty - choose the way you like and paint the eggs for the Easter table. There is only one minus in dyeing eggs according to the methods described. It can turn out so beautiful that it will be a pity to eat!

Spring is on the street, which means that soon the whole country will celebrate one of the main Christian holidays - Easter. Both adults and children are looking forward to this bright day, preparing traditional dishes and treats with pleasure. On the eve of the bright Easter holiday, we want to tell you about interesting and unusual, as well as well-known ways to paint eggs.
Since ancient times, it has been customary to exchange painted eggs during the Easter holiday. Since childhood, in many families, relatives came to each other and even played out some kind of battle with eggs. Two people chose their testicles, in their opinion the strongest, and hit them against each other, first with sharp tips, and then with blunt ones - whoever didn’t break an egg during a collision won, taking the opponent’s egg for himself. It was possible to continue this action as long as there are those who want to fight for victory.

According to memories from childhood, painting Easter eggs is a very entertaining activity. The kids so enthusiastically and diligently immerse the eggs in multi-colored solutions, stick stickers, tie them with threads and improvised materials to get spectacular lines and patterns.
All preparations for Easter begin at Clean Thursday , the day when the soul and body are cleansed spiritually and physically. It is not for nothing that Thursday is called clean, according to Christian customs on this day you need to take a good bath, swim in running water, and even better go to the bathhouse. On Good Thursday, in addition to everything else, you need to thoroughly clean up, wash dirty clothes, and scrub everything off, because on the following days before Easter it will be impossible to do household chores.

And, of course, on Maundy Thursday they bake Easter cakes, make Easter, paint eggs.
Have you ever wondered why eggs are dyed for Easter? And do you know what traditional color they should be painted in?
The most beautiful legend says that during the existence of the Roman Empire, in order to get an audience with the emperor, it was required to bring him something as a gift. The rich brought gold, and ordinary people carried everything they had in their households. So, Mary Magdalene, about to inform the ruler Tiberius about the resurrection of Christ, was able to bring as a gift only a white chicken egg with the words: “Christ is Risen!”
Seeing him, the emperor laughed and said that he would believe it if only the egg turned red, and at the same moment the testicle acquired a bloody hue. Then the stunned Tiberius exclaimed: “In truth, He is Risen!”
After that, the traditional color for coloring the testicles became red, purple, and the custom of christening is still known to both old and young.

How to color Easter eggs
onion peel
One of the most popular ways is still considered to be coloring eggs in onion skins. In order to make the testicles even more attractive and pretty, you can press dried leaves, blades of grass against them and tie them with threads, then lower the husks into the coloring solution. The color can vary from lighter to darker depending on the time the eggs are in the broth.

natural dyes
- brown or beige color will give coffee to the testicles;
- blue color gives red cabbage;
- husks of black sunflower seeds not fried, red onions, poplar catkins, mallow flowers, snowdrops, blueberries and elderberries will give the testicles a blue and purple color;
- eggs will acquire green color by staining in a decoction of spinach leaves, nettle, lily of the valley, primrose, buckthorn bark, ash;
- the testicles will turn pink if they are rubbed with beet juice;
- yellow color will give a decoction of birch leaves, calendula flowers;
- violet flowers will turn the testicles purple.
a light yellow color will turn out if you rub boiled eggs with lemon, orange or carrot juice;
In order for the testicles to stain in the broth, you need to add 1 tablespoon of vinegar to it (into a small saucepan of the solution). Let the broth brew for about 30 minutes and start laying eggs. You need to boil the eggs for 15-30 minutes, depending on what color saturation you want to get, in some cases you can leave the eggs overnight in the solution, for example, when stained with spinach or violet flowers.

You can make different patterns on Easter eggs, wrapping them with an elastic band for money, colored threads, cut out blanks, again tying them with threads. You can dip the egg in water, and then roll in rice, or some other cereal, and wrapped in gauze, boil in a coloring solution.
The marbled effect of the testicles will be obtained if a little vegetable oil is added to the water a minute before the end of cooking, or you can spread already cooked krashenki with it.
Easter food coloring
Probably the easiest way, for those who have no time to bother. As a rule, in small bags there are multi-colored powders that are diluted in boiling water with the addition of a spoonful of vinegar. Our testicles are placed in this solution for 5-15 minutes, depending on what color intensity you want to get.

Thermal stickers for testicles
An easy, fast and convenient way to decorate your eggs for Easter. You can apply the film on pre-boiled and painted eggs, or on ordinary white or brown ones.

Decorating testicles with cereals and improvised means
Very unusual testicles are obtained if they are pasted over with cereals, while still drawing various patterns. Try to paint the egg with wax crayons, and then color it - you get an original design. Another idea is to wrap the eggs with insulating tape and paint in this form, the output will be beautiful smooth lines, or any word or sign that you stick.

Decoupage technique
First you need to prepare a gelatinous mass, a kind of glue. Then take a beautiful napkin with your favorite picture or ornament, or flower. Cut out a fragment and press it against our testicle, and apply a layer of gelatin glue on top. Let dry and enjoy the beauty of your creation.

Coloring testicles with felt-tip pens, markers, paints
Inventive and non-standard people can prepare such eggs for Easter.

And the kids will definitely like eggs in the form of their favorite characters. The children themselves will be happy to color them, dry them and admire their work.

Coloring testicles with fabrics
Eggs dyed with a variety of fabrics look very expensive and uncomplicated. In order for the pattern to move from the fabric to the egg, you need to tightly wrap the raw egg with a cloth (front side), and tie it with elastic bands, or simply stitch it, making a few stitches along the edges so that everything does not slip during the cooking process.
Then boil in water for about 10-15 minutes, with the addition of a spoonful of vinegar. After putting in cold water, carefully remove the fabric and evaluate the resulting masterpiece.

Here are some beautiful testicles obtained after dyeing with fabrics

Permanent makeup for testicles
The original way, which requires only a little patience, skill and a marker. Put the egg on a special stand and display the most beautiful patterns either according to the scheme or to your taste.

Foil, confetti, beads - egg decorations
Fashion does not stand still, now eggs are not only dyed, but simply wrapped in colored foil, beads, sequins, confetti and other bells and whistles are glued, and hand-made eggs are obtained.

Patterns on eggs with sweet powder, varnish, paints
Cute and not too hard to make the testicles fresher and more fun, you can use a variety of squiggles, flowers, sticks, specks, dots and other patterns. It all depends on the flight of your imagination. Easy to color with a toothpick.

Choose from this variety of ways to decorate testicles the most suitable for you, experiment, because creating is always so pleasant and exciting.
Recommendations and tips for boiling eggs, preparing eggs for dyeing
- 1 hour before the start of cooking, testicles stored in the refrigerator must be pulled out and allowed to lie at room temperature. Then your testicles will not crack when cooked;
- another option is to gently pierce the shell of a raw egg with a thin needle. In this case, the egg will not burst in boiling water;
- wash and rub the testicles, you can use a soft sponge, you can use a soapy cloth. This is necessary so that the layer of paint lies as evenly as possible on the egg;
- in the water where the eggs are boiled, add a couple of tablespoons of salt - again, it will help from possible cracks, and the shell then peels off better when cleaned;
- before painting, eggs can be rubbed with vinegar, so they will absorb dyes more intensively;
- at the end, for a glossy effect, you can lightly rub the testicles with vegetable oil.
Some kind of bright feeling reigns in the soul when you are preparing for Easter, the feeling that everything will be fine. May there always be love and happiness, health and joy, comfort and prosperity in your home! Happy Easter to you!

Easter is coming soon! Each housewife tries to make beautiful and unusual eggs on this bright holiday. The name of the resulting eggs depends on which method of staining to use.
1:850 1:860For example, eggs dyed the same color are called dyes.
1:977Eggs with multi-colored dots due to wax droplets are called specks.
1:1112Drapanka- This is a one-color egg with a scratched pattern.
1:1225Eggs with a pattern or pattern made using a special tool - a scribbler - these are pysanky. They are the most beautiful, they can even be called works of art.
1:15521:9

Preparing eggs for dyeing
There are many ways to paint eggs for Easter. However, regardless of the option chosen, the eggs must be properly prepared. Here are some tips:
2:889- an hour before dyeing, you should take the eggs out of the refrigerator so that they take room temperature. In this case, they will not burst during cooking. The same result can be achieved by piercing the egg with a thin, sharp needle;
- in order for the paint to lie more evenly, the eggs must be thoroughly washed. Color uniformity can also be achieved by wiping the eggs with soapy water or alcohol;
- colored eggs will acquire a shiny appearance if, after painting, wipe them dry and rub with vegetable oil.
Now you can go directly to painting the eggs. Here are a few ways, among which everyone can find the most suitable for themselves.
2:20912:9

The first way: a classic of the genre - onion peel
This is the way of our grandmothers, which is still relevant today. As a result, you can get red eggs, as well as yellow, brown or their shades - it all depends on the intensity of the paint and the duration of the staining procedure.
3:1050- Pour water into a saucepan and add onion skins. Red-brown color will turn out if you take the husk of eight onions and pour two glasses of water. Based on this, it is possible to calculate the amount of water and husk for a particular case.


- Water with husks should be brought to a boil and boiled for 30-40 minutes. Let the decoction stand.
- The broth should be filtered, freed from the husk, and boil the prepared eggs in it for 7-10 minutes.


- In order for the eggs to be well cleaned, they must be sharply cooled with ice water.
- To obtain a more intense color, the eggs can be returned to the broth and left until they have acquired the desired shade.

The second way: gifts of nature - natural dyes
Many natural components have a coloring effect. This allows you to get a variety of colors and shades.
10:1215Pink color gives beet juice,
10:1272Pale yellow - lemon, orange, carrot,
10:1355Yellow - birch leaves, calendula flowers.
10:1439Green color can be achieved with spinach or nettle,
10:1554Blue - through red cabbage.
10:91Beige color of eggs gives coffee,
10:154Violet - violet flowers.
10:213 10:223Some dyes are not very intense, for example, violet or spinach, so eggs can be left in such decoctions all night.
10:482- Pour water into a saucepan, add vinegar (1 tablespoon) and natural dye. Bring to a boil. Let the broth brew (»30 minutes).
- Boil prepared eggs in broth, depending on the desired shade - from 15 to 30 minutes. If necessary, you can leave the eggs in the broth and longer - for a day.

11:9
The third way: decoupage technique
To decorate an Easter egg with a picture, it is not necessary to buy stickers. You can decorate it using decoupage technique.
11:294- Hard boil the eggs.
- Prepare gelatin glue. To do this, fill the gelatin with water in the proportions indicated on the specific package of gelatin, and soak. Strain it through a strainer and remove excess liquid. Heat the gelatin and wait for the granules to dissolve.


13:9


- Choose napkins with beautiful color patterns. White eggs look better as a background, although it all depends on the color of the napkin.
- Separate the top layer of the napkin and cut out the piece you like.
- Attach the picture to the shell. On top of the drawing, apply gelatin glue from the center to the edges.


18:9
The fourth way: the food industry presents - food coloring
One of the most trivial and easy ways is to color eggs with Easter dyes. There is always a recipe listed, but you can do it like this:
18:451- Hard boil the eggs.
- Dilute the dyes with water - each color in a separate bowl. There should be enough water to cover the eggs. Add vinegar (1 tablespoon).
- Keep the eggs in bowls until they take on color.
It turns out bright multi-colored eggs, pleasing to the eye.
18:979 18:989

20:9

Fifth way: colorful palette - colored threads
To get intricate stains, paint the eggs with multi-colored floss threads:
21:781- Wrap the eggs with yarn.
- Weld hard.

Sixth way: marble effect
Marble eggs look unusually festive. For their execution, you will need food paint for eggs of different colors, vegetable oil and artistic flair.
22:1745- Color the eggs in bright bright colors, such as yellow, red, orange.
- Let the eggs dry.
- Dilute dark colors (blue, brown, purple) with water. Add vegetable oil (1 tsp) to each cup. Gently stir (do not shake) the oil so that there is a lot of oil "money", no larger than a pea.
- Dip each egg in the dark color and remove immediately. A beautiful marble pattern is obtained if you do this no more than once.

Seventh way: eggs in silks
Exquisite eggs with drawings are obtained by dyeing them with fabrics. You can use a silk tie or a Pavloposad woolen scarf.
23:1721- A raw egg should be wrapped in a patterned cloth. The front side should fit snugly against the shell.
- To prevent the fabric from slipping, sew the egg along the contour. Wrap it over the colored cotton fabric, securing it at the blunt end.
- Pour water into the pan, add vinegar (3 tablespoons). Place the cloth-wrapped eggs in the pan and cook for 10-12 minutes after boiling.
- Pour the cooked eggs with cold water. When they are completely cool, carefully remove the fabric. A thin pattern will remain on the egg, such as on fabric.

Eighth way: fantasies in patterns using improvised materials
Using the methods of dyeing eggs described above (for example, using onion skins), you can.
24:1750- chaotic specks can be achieved if wet eggs are rolled in rice or millet before coloring;
- a drawing in the form of a leaf can be obtained by attaching a parsley leaf to the egg before coloring and fixing it with gauze or stocking;
- in order for the egg to cross straight lines, you can stick masking tape on its shell or pull an elastic band over it for money;
- symbols or letters XB can be glued to the egg before painting, using a plaster or masking tape. After painting, they should be carefully removed;
- checkered eggs are obtained by boiling them wrapped in mesh stockings or in a fruit or vegetable net.
- a lace pattern will decorate an egg if, before painting, an interesting lace motif cut out of a napkin is fixed on it;
- paint the egg with wax crayons. The pattern will appear at the end of the staining procedure.

25:9
The ninth way: to the delight of children - a craft egg
Easter is a family holiday, so you can decorate eggs with your children. You can make funny chickens from testicles.
25:337- We cook hard-boiled eggs.
- Painted bright yellow.
- Preparing gelatin glue.
- We decorate the eggs with details cut out of colored paper. These are wings, beak, scallop, paws, tail and others (bows, cilia, curls) - it all depends on the imagination. Eyes can be glued or just drawn.

Tenth way: saving time - thermal stickers
An indispensable method for busy people is to decorate eggs for Easter with thermal stickers. They are sold on the eve of the holiday in supermarkets, newsstands and other stores.
26:1809- Hard boil the eggs.
- Put a sticker on the egg. To avoid problems with size (the sticker may be small for the egg), it is better to choose medium-sized eggs.
- Dip the egg in boiling water so that the sticker hugs it and takes the desired shape.


These are such interesting and peculiar recipes that turned out to be how eggs are painted for Easter. Traditionally, housewives do this in Pure Thursday. Easter is a wonderful Christian holiday that gives wings and hope for a better life. Spend some time dyeing eggs and let a bright spring holiday into your life!
29:593


