Nice biscuit cake. How to bake a sponge cake
Biscuit cake Anniversary
5 (100%) 4 votesFriends! We have a small anniversary today - exactly one hundred articles are posted on the site. And on this occasion, from all the prepared recipes, I chose this one - a biscuit cake, a very tasty and simple recipe. The basis of the dessert is a regular biscuit soaked in syrup. A layer of butter cream with condensed milk, and the cake is decorated with biscuit crumbs and ready-made colored beads. Decor can come up with another, more elegant. I baked the biscuit in the oven. In my opinion, the recipe for biscuit dough with the addition of baking powder is very successful. Cake layers are always lush, soak quickly and taste wonderful.
I made the recipe for a biscuit cake as detailed as possible. It is bulky, but nothing complicated. I'll show you how to make a biscuit for a cake and make a cream. And you can decorate the dessert to your taste.
Ingredients:
To make homemade sponge cake you will need:
- eggs - 4 pcs;
- granulated sugar - 180 g;
- wheat flour - 150 g;
- fine salt - 2 pinches;
- baking powder - 1.5 tsp.
- softened butter - 200 g;
- powdered sugar - 2 tbsp. l;
- fine sugar - 2 tbsp. l;
- condensed milk - 0.5 cans;
- jam syrup for impregnation - 9-10 tbsp. l.
Biscuit cake - a very tasty and simple recipe with photos step by step
One of the main conditions for a fluffy biscuit is well-beaten yolks and whites. The more air bubbles, the lighter the dough will be and the better it will rise. Before cooking, I take the eggs out of the refrigerator, wipe them with a damp sponge. I take two containers, both deep and not very wide. Carefully break the shell, separating the yolks from the proteins. I clean the dishes with proteins in the refrigerator.

Advice. If you haven't gotten your hands on this yet, break an egg into your palm and pass the egg white between your fingers. Place yolks and whites in separate bowls.
Pour about half of the sugar into a bowl with yolks. I'll add the rest while whipping.

Gradually increasing the speed of the mixer to a maximum, beat the yolks and sugar. When the mass begins to lighten, add the deferred sugar and bring to a creamy lush consistency. The mass will increase several times.

I wash the whisks, wipe dry. I take out the squirrels from the refrigerator, throw in two pinches of salt, beat until fluffy, snow-white foam. At the beginning of whipping, the proteins will be liquidish, transparent, but after about three minutes they will begin to turn white and thicken. You will get a dense, but very gentle lush foam filled with air bubbles. If you raise the whisks, tubercles, “hard” peaks will remain on the surface - you need to beat to this consistency.

For convenient mixing, I transfer the yolks with sugar to a spacious bowl. I add whipped egg whites.

I mix in slow circular motions, picking up from below and, as it were, wrapping up. The photo clearly shows how lush, weightless the basis for biscuit dough turns out.

Combine flour with baking powder, sift through a fine sieve into the egg mixture.

I combine very carefully, stirring with a spoon from the bottom up until all the flour is combined with the egg mass.

Advice. You can not use a mixer at this stage - the biscuit dough will “tighten”, it will not rise well in the oven.
The result is a very fluffy, airy biscuit dough. It will slowly drain from the spoon in a wide wave, loose in structure, filled with air bubbles.

I use a detachable form, 22 cm in diameter. I put a circle of baking paper on the bottom, I don’t lubricate the walls with anything. I pour out the dough, scroll the form several times to disperse it from the center to the edges, otherwise a “dome” may form during baking.

I preheat the oven, set the temperature to 180 degrees. I place the form on the middle level on the wire rack, bake for 35-40 minutes. I check the readiness with a skewer - the finished biscuit is pierced easily, the skewer comes out dry.

Advice. When baking a biscuit, do not open the oven door for the first half hour. From a sharp change in temperature, the dough may fall and not rise again.
I don’t immediately take out the finished biscuit from the mold, I let it stand for 15-20 minutes. Then I run a knife along the walls, remove the bezel. I cool the biscuit on the wire rack for several hours. He needs to stand for a while to get stronger, dry, otherwise, when cutting, the cakes will crumble. I usually leave it until the next day.

I cut it into three cakes with a sharp knife with a thin long blade (a knife for cutting bread with cloves is also suitable). I cut off a small bulge from the top cake, I will make crumbs from the scraps for sprinkling the top.

Cooking butter cream for sponge cake. I take out the butter in advance, it should be very soft, plastic, so that it whips easily.

Beat with a mixer until smooth, shiny mass. After about five minutes, the oil will become more magnificent, it will resemble a cream.

I add powdered sugar and sugar. In this recipe for a simple biscuit cake, a little sugar is added, and the sweetness of the cream can be adjusted by adding condensed milk.

I beat the butter, gradually adding condensed milk. You can add less than in the recipe if you do not like a very sweet cream. In any case, it's best to try.

Butter cream for biscuit will turn out lush, thick, homogeneous. While whipping, you can add vanilla sugar for flavor or a spoonful of cognac.

To impregnate the biscuit, I used apricot jam syrup, adding a little water. Each cake took about three tablespoons of syrup.

Advice. You can soak the cakes with canned fruit syrup, sugar or lemon syrup, sweet cherry juice.
Now you can collect the biscuit cake. I put one cake on a flat plate (the most unsightly goes down). I spread a portion of a cream.

I smear evenly, the layer is about 1-1.5 cm. It is convenient to level the cream with the flat side of a knife or spatula.

I cover with a second cake, again a layer of cream. The top cake should be smooth, without dents and tubercles. Usually this is the middle of the biscuit.

I also smear the top and sides with cream. I apply the cream on the walls with a spatula, level the top with a spatula.

Since I made the simplest biscuit cake, I also decorated it in a simple way. I dried the scraps of cakes, crushed them into crumbs. Not quite in the dust, you need to come across pieces of different sizes.

Advice. Instead of biscuit, you can crush cookies. Or any nuts: walnuts, hazelnuts, peanuts.
Sprinkled the top and sides of the cake. It is convenient to throw a crumb on the sides with a brush, pressing it against the cream. And just sprinkle the top in an even layer.


Ideally, a biscuit cake should stand for a day so that the cakes are soaked and become juicy. Or at least 10-12 hours. I leave until the morning at room temperature, then put in the refrigerator. That's when you get an amazing biscuit cake! A very tasty and simple recipe for this dessert, I hope you will like it, it has long been my favorite. Happy baking, delicious cakes and desserts! Your Plushkin.
Prepare the ingredients for the biscuit.
Grease a baking dish lightly with oil and cover with parchment (or grease with oil, sprinkle with flour and shake off excess flour).
Sift flour 1-2 times.
Separate the whites from the yolks.
Separate the whites from the yolks very carefully so that not a drop of the yolk gets into the whites, otherwise the whites will not whip. Also, the bowl in which the proteins will be whipped should be clean, without traces of fat. It is better to wipe it with a paper towel dipped in vinegar or lemon juice.
Put the yolks in a bowl, add half the sugar and vanilla sugar.

Grind the yolks with sugar well until they increase in volume and whiten the mass.
Yolks can be ground with a fork, whisk, mixer or rod grinder.

Place egg whites in a clean bowl or mixing bowl.

Beat egg whites at medium mixer speed until light, fluffy foam (soft peaks) is formed.

Continue beating while slowly adding sugar.
When all the sugar has been added, continue beating until the egg whites spill out when you tilt (or turn) the bowl (be careful not to overbeat the egg whites).

Add a third of the whipped proteins to the yolks.

And gently, from top to bottom, mix with a silicone spatula.

Add the sifted flour to the yolk mass.

And mix well.

Then add the remaining whipped egg whites.

And very carefully, with movements from top to bottom, as if lifting layer by layer, mix the dough.
Tip 1. The dough does not need to be mixed for a long time, so as not to destroy the air bubbles, due to which the biscuit rises.
Tip 2. Grated lemon or orange zest, sifted cocoa, chopped nuts can be added to the biscuit dough. These ingredients are pre-mixed with flour. If cocoa or nuts are added to the dough, the flour should be taken less by the same amount. Also, part of the flour can be replaced with starch.
Tip 3. The form is filled with dough no more than 2/3 of the height, since during baking the biscuit increases in volume by about 1.5 times.

Pour the batter into the mold and smooth the surface.

Bake the cake in a preheated oven at 180°C for about 30-35 minutes.
Carefully remove the cake from the mold, place on a wire rack and let cool.
Tip 1. During baking, it is advisable not to open the oven door for the first 20-25 minutes, otherwise the biscuit may fall off. But, if there is no need, it is better not to open the door during the entire baking time of the biscuit.
Tip 2. The biscuit is ready if it has shrunk a little, the edges move away from the walls of the mold, and when you lightly press it with your fingers, the biscuit springs up, and the hole is quickly restored.
If the form was not covered with parchment paper, you need to walk along the edge of the form with a knife and separate the biscuit from the walls of the form. Cover the cooled biscuit with a napkin or paper towel and let it rest at room temperature for 8-12 hours (then, when soaked with syrup, the biscuit will not soak and crumble when cut ).
Enjoy your meal!
Cake layers
A recipe for making a simple and delicious biscuit for a cake with photos and videos. Recommendations and tips for cooking. Other options for making biscuits.
30 min
370 kcal
4.5/5 (4)
Biscuit is a great addition to tea, as they say, you can’t imagine better. Since ancient times, it has been used as a basis for the manufacture of a variety of confectionery products, from the simplest cakes (something like a cake) to multi-tiered, rather labor-intensive in the technology of making cakes.
Therefore, it would seem that everything is easy and simple. Yes, but only if you know all the basics of preparing this product, you will be able to create simply magical in the good sense of the word, incredible, various desserts in the future.
Therefore, I propose to plunge into the world of the tops of cooking, namely baking, and prepare a classic biscuit recipe for a cake. How to make a biscuit for a cake with step-by-step instructions, see below.
Kitchen appliances: oven, mixer.
Ingredients
Important! Make sure that the ingredients are all at room temperature (besides the butter, it should be cold!) Take them out 1 hour before cooking. The thing is that when the ingredients are warm, our biscuit will bake much faster. It is better to take homemade eggs, due to homemade yolks, the dough will become more fragrant and acquire a beautiful, slightly yellow tint.
Step by step recipe for making sponge cake
- Let's prepare all our ingredients.

- Separate the yolks from the whites. Beat the whites until a thick fluffy foam forms.

- Continuing to beat, we introduce our yolks one by one, plus pour a little bit of granulated sugar and vanilla sugar.

- At this point, set the mixer aside. And slowly add flour. Then carefully mix the dough with a spoon.

- The dough is ready! It should not be liquid, but at the same time too thick too.

- Now I want to present you more detailed photos, since further you should be especially careful. So, we take a solid aluminum baking dish, grease it with a thin layer of oil. In cooking, this baking method is called "French shirt". Then sprinkle the form with flour (so the cake will not stick to the walls), remove the excess flour and put parchment paper. I advise you to cut a circle out of paper, it is more convenient to take out the biscuit and paper is spent less.

- Pour the dough into the mold and put it in the oven, preheated to 190 degrees (you can pour the whole mixture at once, only then the cakes will need to be cut, but it would be better for us to bake three equal cakes). We put it on the middle shelf in the oven and set the time for 20 minutes. I have a new electric oven, so everything basically bakes fairly quickly. If you have a gas oven and there is no way to turn off the convection, then be careful and determine your baking parameters in advance using other dishes as an example.

- Carefully remove the cake from the oven, place on a wire rack. Now we check the readiness of the biscuit in a proven simple way, piercing with a wooden skewer or toothpick along the edges and in the center of the cake. If you do not find pieces of dough on them, then the cake is baked well.
Did you know? Another good way to check doneness is to take it out of the oven and after a minute we can see how the cake starts to shrink, after which the so-called dark outline appears just above the biscuit.

- We take the cake out of the mold, put it on the wire rack. Then carefully turn the cake over to the other side and carefully remove the sheet of parchment paper. The paper should not be thrown away, we will bake our next two cakes on it (in exactly the same way as we baked the first one). What do you think of my fluffy sponge cake recipe? Appetizing, right?

- Having removed the parchment, turn the cake over to the previous side, set it aside and proceed in exactly the same way to baking the following cakes.

Cake recipe video
Now I propose to deal in more detail with the preparation of a biscuit for a cake. I leave a link to the video below. It may be easier for some to perceive this information.
How to cook in a slow cooker
Baking a biscuit for a cake in a slow cooker is even easier than baking in an oven. But keep in mind that the cake can turn out to be dryish, and it will take much more time.
We knead the ingredients as I indicated above, and pour into the bowl (watch what size bowl you have, if it is twice as large as my form, which you see in the photo, then the dough will need exactly the same amount more. And all in order for us to get three equal cakes).
We turn on the multicooker and set the "Baking" mode. Set the time to 50 minutes. We remove from the bowl in the same way as in the previous scheme (in the case of baking in the oven). Our biscuit is ready!
Before proceeding to the secrets of preparing a recipe for a delicious and simple biscuit for a cake, I want to suggest going through the fundamental important points. I've talked about the importance of using ingredients at room temperature before. Thus, the dough will not only be kneaded better, but the process of making a biscuit in the oven will be much faster.
You ask: “But how to get an airy biscuit for a cake?” As for this issue, soda plays a significant role here (also called baking powder), it gives the same bubbles in the dough, thanks to which our dough is airy, light and porous when baking. In our case, we did not add it, since our recipe contains a sufficient amount of eggs, which, when beaten, form a wonderful foam and make our dough the way we need it. In case you have few eggs, add soda slaked with fermented milk products (kefir).
I also give one important advice regarding the dosage of the test. It is very important to use special scales. With the help of them, you can easily measure the desired height of the cake, which in turn will bring your cake closer to the ideal. I recommend using this advice to beginners, as well as people who want to go far into the depths of cooking (cook, confectioner, etc.).
When you bake the cakes, do not look there too often. Be careful during the baking process and follow the recipe for making a cake biscuit in the oven. Although we don’t have custard cakes, nevertheless, during 5 seconds of your peeking, the temperature drops by 5-15 degrees, and if the crust has not had time to form, then the dough may settle. It's better to be patient and wait.
I advise you to bake exclusively in an aluminum form. In no case do not use a silicone mold, the dough will turn out to be uneven, and we don’t need this at all! Is it true? In the event that you saw that the cake began to burn on top, and you can’t get it out of the oven, as it’s still wet, I advise you to cover it with foil with the mirror side up. Thus, it will reflect heat, and your cake will be baked the way you want.
When taking the cakes out of the oven, place them fluffy side down on a wire rack. You ask: "Why a grill, because you can put it on a plate, and it's done ?!" But no, everything is much more interesting here. By laying the biscuit on the wire rack, we allow air to circulate around the cake. On the plate, the biscuit becomes wet, becomes soft, in which case we will not get a tender biscuit for the cake.
Another important secret, I think you have not heard about it yet. It would be advisable to wrap slightly cooled cakes in a film and put them in the refrigerator for 3 hours, and even better at night. During this time, the moisture in the center will be perfectly distributed to the walls of the cake, and it will become juicy.
If your soul wants something new, you can make a chocolate biscuit for the cake (the recipe is the same, only cocoa is added to the mixture). See this recipe, as well as other biscuit options, below.
Variants of biscuit cakes
If you are already an experienced culinary specialist, I advise you to take on more complex recipes, for example, it will be a great addition to tea and will take less time to prepare than today's dessert. takes more time to cook, but I assure you, its amazing taste will definitely pleasantly surprise you, and also - two great recipes for those who monitor their nutrition and carefully plan their diet for the day.
I have, perhaps, everything for today. So, you have learned how to bake a biscuit for a large cake. Hope you are happy and satisfied! Write in the comments below your impressions, you may have questions. I will be glad to help you, suggest, advise more specifically. And for those who have just plucked up the courage and are enthusiastic to start preparing a biscuit for a cake according to this recipe - success! And yes, arm yourself with a wonderful mood, with it everything will certainly turn out much more interesting and tastier!
Today in the blog I give not only the recipe for the cake, but also describe in great detail with photos and videos all the steps, from kneading the dough and preparing the molds and oven, to the final decoration of the finished cake. Finally, you will learn how to make the cake naked or vice versa to cover with different creams and make patterns. Let's talk about forms, oven modes. You will learn the secrets of how to make the cakes juicy and the cake perfectly smooth. I will clearly show how to make a French shirt and what to do so as not to wash the forms after each baking of the cake. There you can also see links to my previous notes and recipes, which will also help you learn how to make cakes like real professionals.
By and large, this is a great training master class online. After it, acquaintances will stop believing that you made the cakes yourself, and did not order in a pastry shop. Your self-esteem will deservedly increase and you will begin to cook cakes more often, and spend many times less time. Perhaps for some this will be a small start in future career growth.
We all love desserts and beautiful delicious cakes. I have a lot of recipes for chocolate and vanilla cakes on my blog, there is also the famous Red Velvet. And I decided to talk about the basic recipe for biscuit cakes (although I also talk about its variations there). They turn out so perfectly and keep the geometry that you don’t even need to cut off the side walls, and naked it looks like a work of art. A big bonus is that there are no baking powder and soda (this will be important to someone). Only flour, sugar, butter and eggs are used. Each cake takes roughly 20-25 minutes. That is, following all the steps of the lesson, you can cook a cake in just an hour and a half, from the moment of idea to cutting into pieces.
The biscuit itself is so neutral that it will be happy with any color: lemon impregnation, berry jam in layers, pieces of berries inside the dough or between layers. Love nuts, candied fruits or cinnamon - please add as you wish. You can cover it with one of several recipes of my creams (by the way, there will be two more creams for cakes soon), pour ganache, chocolate or caramel on top (links are also in the recipe), and decorate on top with ... hmm, popcorn!
Interesting: birthdays have always been celebrated in different ways, but once a cake was brought as a gift. Since then, the tradition of having tea parties over cake has entered our lives, it was around 1785.
Crack eight eggs into a mixing bowl. Don't be intimidated by so many. There will be no taste and smell, especially if we use cream and impregnation. But there is no baking powder, soda and other agents. 
Pour sugar (220 gr). 
Beat on medium speed until the mixture triples in size. At the same time, it will become almost white.


Sift flour (190 gr) through a fine sieve. 
Add nut flour (50 gr). If it is not there, replace with ordinary flour (also 50 gr). Stir with a whisk. Nut flour makes the cakes more interesting in taste and a little more moist. 
Carefully fold the flour into the egg mixture. Thoroughly mix the mass until smooth. 
Melt butter (80 gr). To do this, I put a cup of butter in the microwave for 30 seconds. I take it out, stir and put another 10-15. Cool the melted butter a little, shaking it with a fork. Add to dough. Mix well. 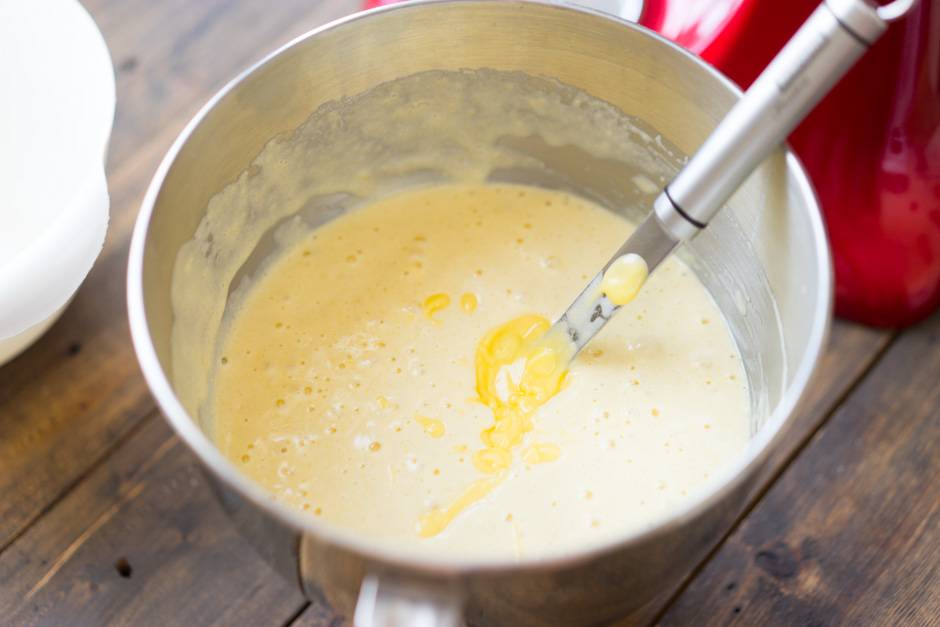
Divide the dough into two parts, pouring into molds. I have a diameter of 16 cm and got two decent cakes. For cakes of 20-24 cm, it is worth doubling the proportions and making 3-4 cakes. 
We bake for 20-25 minutes at a temperature of 180 degrees (top-bottom mode, middle shelf). Check with a skewer, it comes out dry. 
Assembling a beautiful cake
And now the most interesting and important. I'll tell you how I make cakes, decorate and collect. If you read everything carefully and practice a couple of times, you can make amazing cakes at home. This cake took me 3 cakes (1.5 servings of the basic dough recipe) and one serving of cream, here.
Test preparation
Unless otherwise stated in the recipe, always use ingredients at the same (room) temperature. This means that when you are going to make a cake, take eggs, butter, milk and other cold ingredients out of the refrigerator for an hour. The fact is that, on the one hand, the ingredients mix better when they have the same temperature (now we are talking about the dough), on the other hand, the finished dough will be at room temperature and will quickly begin to bake in the oven.
Next is the porosity of the dough. For the cake to be airy, we need air bubbles. For this we use, read about them and never repeat the mistakes of many. Sometimes you can do without them, but only if the recipe offers something different. In the recipe above, we took a lot of eggs, which are perfectly whipped into a foam with sugar. Proteins hold the structure (those same bubbles) and the dough does without additional help.
It is clear that bubbles are formed during the release of gas, during the reaction of alkali and acid (we recall chemistry lessons at school). To make it clear how this works, you can take a spoonful of soda and drip a couple of drops of vinegar. The mixture will begin to actively foam. These are the bubbles that form in our dough. If a baking powder is added to the dough, then it is self-sufficient in itself (it contains both acid and alkali), and it will start working when the temperature rises, that is, in the oven. Such a dough is tolerant of waiting, for example, if you bake four cakes one by one. Another option is when vinegar, sour-milk products and so on are added to the dough. Then soda is used, which will combine with acid and bubbles will appear. That's how it's done. These cakes are best baked as soon as possible, and do not leave the dough for a long time.
Working with Forms
How many hostesses, so many opinions about which forms are better. No wonder I have a blog post about. For myself, I made a choice - these are, unambiguously, solid aluminum molds and, for rare tasks, detachable. They are convenient in that they perfectly keep their shape (unlike silicone ones, which have the properties of “walking”), are durable, easy to clean and behave predictably. The only restriction is that you cannot work with a knife. But these are trifles, I never cut cakes inside forms. 
For my taste, the cake looks more beautiful when it has the same height and diameter, that is, square when viewed from the side. I don’t like big low cakes of 24 cm or more at all. Someone thinks that there is MORE cake, but more often you make the same amount of dough as I do, only my cakes look more interesting. Yes, and confectionery trends say that flat cakes are a thing of the past, while compact cakes, on the contrary, are gaining popularity. In addition, the cakes are thicker, and the cakes themselves from one dough batch are more. There must be at least three cakes in the cake. Aesthetic, beautiful, and delicious.
french shirt
I won’t say where this name came from, but this is the best way to prepare a form for a future cake. The principle is very simple. The walls are smeared with cold butter (so the layer will be thinner), and dusted with flour on top. Pour out the excess flour. We have a form in our hands, with a thin layer of flour on the walls. I went ahead and use parchment circles that I put on the bottom of the form. So there are no problems with the excavation of the cakes at all, and you do not need to wash the form. Usually it looks like this: I make a French shirt, fill in a portion of the dough and bake the cake. I take it out of the mold, cool it a little, make the shirt again and bake the next cake again. You don't need to wash anything. I even use parchment from the first cake - I remove it and put it on the bottom of the mold.
This is what the “dusty” form looks like. 
See how easy the cake comes out. I take it out of the oven, and after a minute it shrinks a little, moving away from the walls perfectly. Pay attention to the dark stripe, this cake has moved away from the shape. 
Test dosage
I highly recommend having a scale in your arsenal. They save a lot of time and effort. And they also allow you to dose the dough very accurately. On the scales, find out the mass of your cup, in which you will beat the dough. Let's say it's 188 grams. Then we measure the weight of the bowl with the finished dough. We get 1088 grams. So the dough weighs 900 grams and is well divided into three cakes of 300 grams of dough. Put the baking dish on the scales, zero and pour 300 grams of dough. Bake, repeat. In this case, the cakes will be of the same thickness, and this will help with assembly.
Oven
Let's agree that everyone's ovens are different (gas, electric, combi steamers), the sensors are also different. Different ovens heat differently and the temperature can vary. You need to understand what kind of oven you have. Perhaps the cakes are baked in it not for 20 minutes, as indicated in the recipe, but for all 35. So remember that there will always be more time. Or the top quickly burns at the cake, most likely in the oven not 180 degrees, but all 190. You need to get used to any oven, remember the adjustments and enjoy cooking.
In recipes, I always mean the “Top-Bottom” oven mode, and put the mold on the middle shelf in the oven. If you have a gas oven that gives a gift from below, or convection does not turn off, adjust the settings. And it's best to experiment on one type of test. Just make three cakes with different combinations (temperature higher, lower, shelf lower or higher). We ALWAYS preheat the oven to the temperature indicated in the recipe, you do not need to put the dough in the still cold oven.
I have, which does not lie at all and honestly heats the entire volume of the oven, so you always see what temperature I set, what heating mode and the position of the baking sheet.
We bake
So, you put the form in the oven and wait. Many baking recipes forbid opening the oven until the dessert is fully cooked. This also applies to others. When you open the oven, the temperature drops sharply by 5-15 degrees in the first seconds. If the crust of the cakes has not yet had time to form, the air inside will compress and the cakes will settle. Try to wait patiently without opening the oven. With the usual dough for cakes, the situation is simpler, but it makes no sense to look in there often, the cake will not bake faster from this.
Readiness is ALWAYS checked in one and only one way: with a wooden skewer or match, we pierce the cake vertically in the very center. If it comes out dry (or with dry crumbs), then the cake is ready. If it is still damp, continue baking. There is no more reliable way to check than this. Cook cookies and custard cakes until golden brown.
A situation may occur that the cake starts to blush too much in the oven, but in the center it still remains wet, what should I do? Very simple. Cover the top of the cake with a sheet of foil, mirror side up - it will reflect heat and save the cake from burning.
And now the most common question is the tubercle. It's okay if the cake in the oven starts to look like a volcano, the middle rises up, forming a large hill. Its appearance is influenced by factors such as the dough itself, the material and size of the form, oven and temperatures. Let me explain his appearance. You poured the dough into a mold and put it in the oven. The walls of the form quickly heated up and began to bake the dough, forming a crust. The top crust also blushes from the edges of the form to the center. Therefore, it turns out that at some point the batter is sealed in the crust. What remains of the dough, which expands from temperature and bubbles? That's right, grow up. I've heard of ways to combat this such as wrapping the sides of the pan with a damp towel to slow down the crusting process. But I think it's more of a hassle.
We cool the cakes
When our cake is ready, take it out of the oven and let it stand for a minute or two. It will shrink slightly, moving away from the walls of the form (you have already seen the photo above). Turn it over onto a rack. And take off the parchment. It can be used again on the next cake. 
Flip over again to the other side and let cool completely. 
What is cooling on the grate for? If the hot cake is put on a plate or on a board, it will simply start to sweat, become wet on one side, fall apart, and so on. So you need a lattice - to create an opportunity for cold air to circulate around the cake. We turned it over to the bottom because there one side of the cake will remain flat. If we leave the cake on the grate with the tubercle down, it will sag, bending the opposite side as well.
Wrap the finished and completely cooled cakes in a film and put them in the refrigerator for at least two hours. The secret is that the cakes become juicier in the refrigerator. Moisture from the center (drive it there in the oven) is distributed back throughout the entire volume of the cake. Thanks to this, by the way, it will crumble less.
A cake that lies overnight in the refrigerator (in a film) will generally be a hundred times tastier than if you collect a cake from freshly cooled cakes. This is suitable for ANY cakes and even cupcakes / muffins: carrot, chocolate, red velvet - everything will be tastier.
Slicing cakes
Remember I said that I measured an equal amount of dough into a mold? Therefore, all three cakes turned out to be the same height, even the tubercle was of a similar size. The rim is clearly visible in the photo. 
Along the upper border, I will cut off the tubercle. For this you need a saw blade. A simple one won't work here. You can use strings for cakes, but I don't like them. Put your hand on the cake, hold the other knife horizontally and cut the cake just a couple of centimeters deep. With the hand that holds the cake on top, turn the cake, and with the knife, continue to make an incision. When you cut along the entire circumference, sink the knife even deeper and again, turning, cut. 
If you cut just from left to right, there is a danger of cutting the cake obliquely. And with such small cuts, we will make the move smooth. Here's what happens. 
Perhaps your cakes are not so even, or you want to make two identical cakes from one cake. Then you should use the beacon for the knife. Use any kitchen item that has straight edges and the height you want. I use cookie cutters. Put it close to the cake, put a knife on it and cut, also turning the cake. Again, all cakes will be the same height. Now you can soak the cakes. I do not do this. 
Sometimes the sides of the cakes are also cut off. This is necessary in two cases: when the sides are very burnt and become hard, or when you are making a white biscuit and you want the sides to be white on the cut of the cake (without a thin strip from the crust). You can also cut off the sides so that they are better saturated with cream.
Confectioners manage to do this with a simple knife, cutting off thin strips of crust a little bit. Or you can use special rings (they will appear in the store soon). There, the principle is simple - take a ring 1-2 cm smaller in diameter than the form in which the cake was baked. Let's say you have a shape of 20 cm, then carefully cut out with a ring of 18 cm. A little uneconomical, but super aesthetically pleasing. The only point is that such shortbreads are softer (the crust does not hold the geometry), so you need to collect them more carefully so that they do not walk and become the Leaning Tower of Pisa.

Special aesthetes can also cut off the bottom of the cake, then you get a solid “pulp” from the cake.
Cream
I give in, the recipes are gradually replenished, so check back sometimes. It's best to work with . They do not need to be washed, you can buy a lot at once, and then easily throw them away. It is good if you also have a round nozzle with a diameter of about 8 mm. If not, just cut off the spout at the bag for the desired hole (only after you put the cream in it). 
If there is a nozzle, then insert it into the corner of the bag. 
It is convenient to fill the bag by pulling it over the neck of a tall glass. I have this. 
Gently put the cream into the bag with a spatula. 
Now cut the corner of the bag. On the back of the bag, wrap it so that the cream does not come out. 
Cake assembly
I collect cakes for . If you don’t have one, collect on a dish in which you will serve the cake. You can also on a cutting board (and then shift). In the center of the substrate / plate, put a dot of cream. This is so that the cake does not travel on the substrate. 
When you make cakes often, I advise you to get one. It makes decorating a cake quicker and easier.

If you are not a professional pastry chef, do not even try to apply an even layer of cream between the cakes with a spatula. It is better to do this with a bag with a nozzle. Then the layer thickness will be the same everywhere. Apply it to the entire surface of the cake, in a spiral or zigzag pattern. 
At this stage, berries, chocolate pieces, nuts, and so on are added. Just randomly insert them into the cream. We put the second cake on top. 
Here is a small toolkit to help you. This can be bought from me. 
Place a large spatula vertically and align the cakes along its line. They put it at one point, trimmed the cakes so that they stood exactly. Put the spatula at another point and leveled again. 
We apply cream on the second cake. All the same. 
Place the top layer upside down. We need the top to be perfectly flat, because this is the clean side. Again, check with a spatula whether the cakes are even. 
Breadcrumb coating
It doesn't matter if you are making a naked cake or will cover it completely with cream. You need to make the first layer. In translation - covering the crumbs with cream. This layer is thin, but it sticks together the crumbs and they will not get further into the cream. On a straight spatula, apply a strip of cream equal to the height of the cake. 
Lean it against the cake and coat the cake, covering with a thin layer of cream. Run the spatula along the side of the cake. We hold the spatula strictly vertically.


The top is also covered with cream. Everything is easier here. We put the cream in the center and smear it, in a circular motion.

This is how the NAKED CAKE turns out. Put it in the refrigerator for half an hour. The cream needs to set if we plan to apply more layers. 
There is less cream in the bag, in order to use it as much as possible, each time with a spatula move it to the nozzle. 
And wind the end so that the cream goes only forward. 
Working with cream
Remember that the cream from the refrigerator is quite thick, and after standing on the table, it becomes softer. Each state has its pros and cons. Soft is more tender and confident movements with a spatula are needed, but a cold cream sometimes seems to crumble. Monitor the temperature of the cream and refrigerate if necessary.
The most convenient and quick way to cover the cake with cream is to make strips of cream from the bottom up, using the bag nozzle (or cut spout). 
Make such tracks around the perimeter. The thickness of the layer will be the same everywhere, because we deposited them from one hole. 
Just as we did the first layer, we do the second. We hold the spatula vertically, coat the cream in a circle. If you want to make a gradient (ombre), divide the cream into two or three parts, paint each one, and apply the paths not along the entire height of the cake, but by half or a third. For example, the bottom is red, and the top is white, in half. 
If it worked out well the first time, great. Sometimes the cream layer is a bit thin and the cakes are translucent (in the photo above, the right edge). Then put it back in the fridge for half an hour. And then the third layer. The more layers, the smoother the final cake will be. This is definitely where you need to practice. Always remove excess cream with a spatula.
That is, they ran a spatula along the side of the cake, removed the cream from the spatula (I take it off the bowl with cream) and move the spatula further. If suddenly you had a local accident - touched the cream with a spatula or pressed hard. Don't worry, this can be fixed. The photo shows the damaged area. 
Put a little cream on the spatula and apply it to this area from the bottom up. 
And now, with a clean spatula, swipe the cream from left to right (as in the video). 
You can make the side embossed. In this case, apply a thicker cream. And use teeth. 
If there is no spatula, it does not matter. Take a teaspoon or a thin, rounded spatula. Apply more cream. Level it up.


Make vertical grooves. With the tip of a spoon, draw from the bottom up with confident movements, one groove - one movement. 
And if you want, make it vertical. Here the difficulty is that the cake needs to be rotated. In my case, I would rotate the entire board. Do you see bubbles appearing (small dimples in the grooves)? This cream has already become very soft. A colder cream would not give such traces. Therefore, it is worth freezing it in the refrigerator. 
With a rounded spatula, you can make "feathers". They always look interesting and mask inexperience. As confectioners say, a lazy way to decorate a cake. Here, simply swipe the tip of the spatula from the bottom up diagonally. First the bottom row, then the top. 
top of the cake
While we were smearing the cake, a small excess of cream appeared on top. 
Place the spatula at an angle to the top and remove this "fence" inside the cake. Make small sections by turning the cake. Thus, we get a very even angle. And the top itself will gradually also become even.

The main advice is to experiment and practice. Rarely does a great cake come out right the first time. But on two or three, you can get a good hand and make really high-quality cakes. In any case, outwardly they will be so beautiful that the guests will not believe when they find out who made it.
Please write to me in the comments what topics have remained undisclosed for you, what else you would like to read as part of the training in working with desserts.
Biscuit in translation from Italian means "baked twice". A classic biscuit is made from flour, sugar and eggs. A delicious biscuit recipe may also contain cottage cheese, sour cream, kefir, chocolate, etc. Cooking a biscuit, as a rule, does not take much time. It is for the speed of preparation and excellent results that many housewives love to cook biscuit dough. Products from it are lush and delicate. Biscuit baking can be the most diverse. There are biscuit for cake, roll, cakes, etc.
How to make a biscuit? A simple biscuit recipe, however, has some cooking features. It is well-beaten egg whites and yolks with sugar and flour that give splendor to pastries. The quality of the biscuit largely depends on the freshness of the eggs, as well as the temperature of all the ingredients included in the composition. An equally important role is played by the duration of whipping and baking mode. How to cook a biscuit will tell our recipes. Cooking a biscuit at home will not be difficult if you follow all the cooking rules. To get the most fluffy and tender biscuit, it is recommended to carefully separate the yolks from the proteins so that they do not mix. Proteins are less amenable to whipping if they get yolk or fat.
There are many biscuit recipes. The dough recipe may include grated lemon or orange zest, vanilla sugar, cocoa powder, chopped nuts, poppy seeds, raisins, and other fillers. They must first be mixed with flour. In a classic biscuit, the recipe of which consists of eggs, sugar and flour, you can add sour cream and kefir. Biscuit on sour cream and biscuit on kefir is even more delicious and lush than the classic one. The recipe for a biscuit on sour cream will not cause you any difficulties. The chocolate biscuit recipe, which includes cocoa powder, is especially popular with children who require to make a chocolate biscuit regularly. We advise you to cook a very popular biscuit with apples - charlotte. You can even try to cook a biscuit without eggs - in vegetable oil and soda solution.
Cake layers are baked from biscuit dough. The biscuit recipe for the cake can be found on our website. The combination of sponge cake with various creams, fresh berries, fruits and nuts allows you to get a variety of delicious confectionery. An important component for such sweet products is biscuit cream. The biscuit cream recipe may include cottage cheese or chocolate. The curd biscuit may contain curd both as a filling and as a component of the dough.
How to cook a biscuit? You can use two ways to prepare this delicacy - cold and hot. Beat proteins should only be in a completely clean, without traces of fat, dishes. If the proteins are whipped poorly, then they need to be cooled. Beat the whites until a stable foam is formed. Excessively whipped whites with small bubbles, during baking, cause the dough to shrink. The yolk should be rubbed with sugar until white and beat until foamy. Mix whites and yolks immediately, while adding flour.
Cooking the biscuit in a warm way speeds up the process. How to make a biscuit in a hot way? In a water bath at a temperature of 40-50 degrees. You can immediately beat the eggs with sugar. Such a biscuit is denser and more crumbly than a cold-cooked biscuit. It is best to beat the resulting mass in an electric mixer, but you can also manually. The finished dough must be immediately poured into special molds and immediately begin to bake.
How to bake a biscuit? A delicate structure and a thin crust are obtained only if the biscuit is baked correctly. You need to bake a biscuit on a uniform medium heat. Do not open the oven during baking. But the finished biscuit must be left for a while in an open oven. This is done so that it does not fall off. A freshly baked biscuit is poorly cut, so after baking it is advisable to keep it for about a day.
How to bake a biscuit quickly? You can also cook a biscuit in the microwave. This method is simpler than the previous one. The dough itself is a bit dry, so impregnation for the biscuit is needed. As an impregnation, you can use chocolate, various syrups or alcohol.
Prepare a biscuit! Recipes with photos on our website will tell you how to do it right.


