Do-it-yourself two-story cake. Bunk cake at home
Cooking a delicious cake is a responsible task for every housewife. And if the cake is baked for the holiday, it still needs to be given a beautiful design. Prepare a beautiful two-tier cake for the celebration, decorated with mastic and roses from it. This one will definitely win over all the assembled guests.

Ingredients:
For the top tier (honey cake with prunes and sour cream):
- flour - 3 cups;
- egg - 2 pcs.;
- sugar - 1 glass;
- honey - 2 tbsp. spoons;
- butter (can be replaced with margarine) - 100 gr.;
- soda - 2 tsp;
- Vinegar - to extinguish soda.
For cream:
- sour cream (fat content 15-20%) - 400 gr.;
- sugar - ½ cup.
For filling:
- prunes - 250 gr.

For the lower tier (chocolate biscuit with cherries and buttercream):
The ingredients are for one biscuit (you need to prepare two biscuits for the cake in order to give the cake the required height).
- flour - 80 gr.;
- egg - 4 pcs.;
- sugar - 150 gr.;
- baking powder - 1 teaspoon;
- cocoa - 2 tbsp. spoons.
For cream:
- whipping cream - 1 cup;
- powdered sugar - 1/2 cup.
For filling:
- cherry (fresh or frozen) - 500 gr.;
- sugar - 3 tbsp. spoons.
Common ingredients for two cakes:
To align the cakes:
- butter - 400 gr.;
- condensed milk - ½ can.
For mastic:
To cover the cake:
- marshmallows (white) - 300 gr.;
- powdered sugar - ~ 1.5 cups;
- butter - 1 tbsp. spoon.
- marshmallows - 400 gr.;
- powdered sugar - ~ 2 cups;
- butter - 1 1/4 tbsp. spoons;
- pink food coloring - on the tip of the knife.
For leaves:
- marshmallow -100 gr.;
- powdered sugar - ~ 0.5 cups;
- butter - 1 teaspoon;
- green food coloring - on the tip of the knife.
The diameter of the top tier of the cake is 15 cm, the bottom tier is 22 cm.
How to cook with a photo step by step
Let's start preparing our two-tiered mastic cake with the preparation of roses, as they must dry out a little before being placed on the cake. 
So, take marshmallows, separate them by color. Leave the white marshmallows to cover the cake, and use the pink marshmallows to make roses. Put the pink marshmallows in a container, add oil to them. 
Put the container with the listed ingredients in the microwave and heat them at 600 W for 1 minute until the marshmallows increase in volume. Mix everything with a spoon. 
Add pink food coloring (or any other of your choice). We use the dye to give a bright color to roses. Mix everything again until the color is uniform. 
Add powdered sugar in small portions and knead until you get a homogeneous plastic mass - mastic. 
Roll it out on a table sprinkled with powdered sugar with a rolling pin into a layer.
In our two-tiered cake, we will use two types of roses. We will make one type of roses with the help of clearings.
So, with the help of special cuttings "Rose", cut blanks of different sizes. 
Thin out a bit with the flower edge tool. 
From a small piece of mastic, make a cone and stick it on a toothpick. This will be the base of the rose. 
Pass a workpiece of the smallest diameter onto a toothpick and attach it to the cone with a drop of water. 
Now, in the same way, with the help of a drop of water, glue one petal to the cone (wrap around it). 
Next - glue the opposite petal to the already glued petal. 
Then, in the same way, glue all the other petals. 
In the same way, thread the next largest workpiece and glue it with a drop of water. Also, glue all the petals to the previous blank. 
Next - glue the next blank. 
And - the last one. Let the rose dry. 
Make the required number of roses in this way.
To make the second rose for the fondant cake, cut out two smaller circles (mine is 4 cm) and five larger circles (mine is 5.5 cm). These will be rose petals.
Thin the edges of the petals. 
Make a cone for the rose and stick it on a toothpick. 
Glue one petal to the cone with a drop of water and wrap around it, leaving a little free edge. 
Then place another petal on the free edge of the petal and also wrap around the previous petal. Glue each petal to the previous one with a drop of water. 
Next - the next petal. Glue all the petals in this way. Dry the roses. 
Prepare green mastic. Roll out and cut out the leaves using a special cutting. 
You can also make flagella from green mastic. You need to roll the mastic into thin strips and wrap them around the pencil. 
Honey cake preparation.
Combine eggs with sugar. Beat them with a mixer or grind with a whisk.
Add softened butter and honey.
Quench the soda with vinegar and also add to the ingredients.
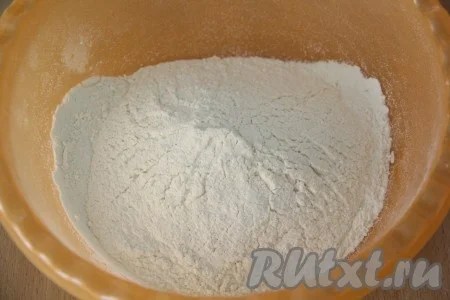
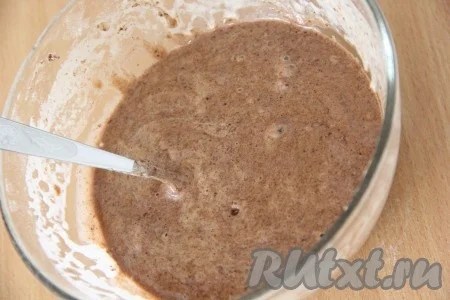
Mix everything. Now you need to make a "water bath". Boil water in a saucepan. Place a container with mixed ingredients on top of the saucepan (the water in the saucepan should not reach the bottom of the top container). Keep the container in the bath for 15 minutes. During this time, the mass in it should increase. Remove the container from the bath and pour in the flour.

Separate small pieces from the dough. 
Roll them out with a rolling pin. Cover with a plate (lid or mold) of the required diameter and cut off the excess dough. 
Transfer the dough onto a baking sheet dusted with flour. 
Bake in a preheated oven at 180⁰C until golden, about 10-15 minutes.
Cool the finished cakes.
To make honey cake cream, combine sour cream with sugar.
Whisk with a whisk until the sugar is completely dissolved.
Pour prunes with hot water and leave for half an hour to swell. After that, dry it and cut into small pieces.
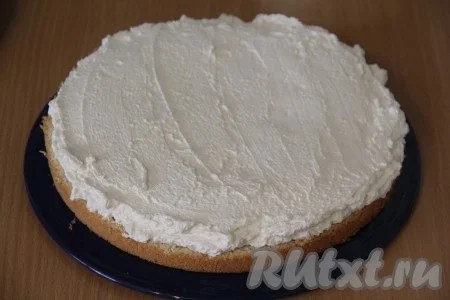
Assemble a two-tiered cake. Place the cake on a flat dish. Lubricate it with cream, not reaching the edges of about 1 cm (this is necessary in order to prevent further contact of the cream with the mastic).
Sprinkle prunes on top. 
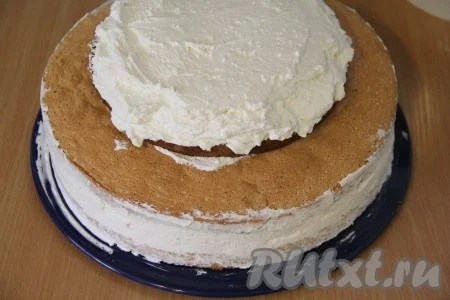
Cover with the second cake and follow the same procedure. Collect the whole cake in this way. Leave it on for at least a few hours to soak in.
By the way, instead of sour cream, you can use condensed milk, as in ours.

Cooking chocolate sponge cake.
This cake uses two biscuits.
Divide the eggs into whites and yolks.
Add half the amount of sugar to the yolks. Beat the yolks with sugar with a mixer until the mass is light.
Separately, beat egg whites to soft peaks. After that, while continuing to beat, gradually add the remaining sugar. Beat egg whites with sugar until stiff peaks (when turning the bowl upside down, they should not spill out of it).
Add a third of the whipped proteins to the yolks. Stir the mass. Sift flour to it, previously mixed with baking powder and cocoa. Stir with a spatula, lifting the mass from the bottom to the top.
Add the remaining proteins. Once again, gently mix everything. 
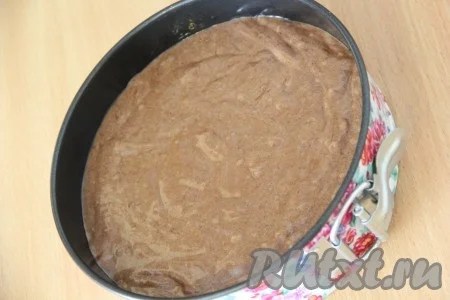
Grease a springform pan with butter and line with parchment paper. Pour the batter into it and smooth the surface. 
Bake the biscuit for about 30-35 minutes at 180°C in a preheated oven. Do not open the oven for the first 20 minutes, otherwise the biscuit will fall. After the biscuit is baked, leave it in the oven for about 1 hour. Then take it out and cool on a wire rack.
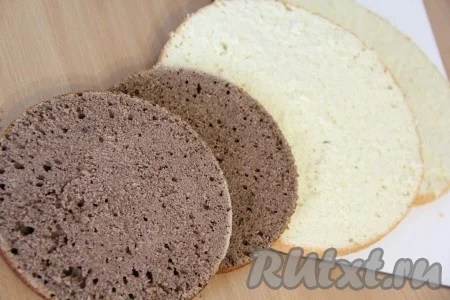
Biscuit should rest for at least 5-6 hours. After that, cut it lengthwise into 3 cakes. Since we have 2 biscuits, we get only 6 cakes (I did not use one cake, because the cake turned out to be too high). You can use all cakes. 
To prepare the chocolate biscuit cake impregnation, combine cherries with sugar.
Put on fire and boil them for 5 minutes. Cool down. Strain them through a colander.
Soak biscuit cakes with expressed juice. Put some cherries on the soaked cake. 
To make cream for the cake, whip cream with powdered sugar.
Then grease the cake with cream.
Cover with the second cake, put the cherries and grease them with cream.
Collect all the cake. Leave it for a few hours to soak in. 
Beat the softened butter with a mixer.
Then add the condensed milk and continue beating until you get a fluffy cream. 
Coat both cakes on top and sides with cream, smoothing out all the bumps on the cake with it. The surface under the mastic should be as even as possible, because the mastic does not hide, but on the contrary, shows all the irregularities. 
Put the cakes in the refrigerator for several hours so that the cream freezes well. On top, you can re-apply a layer of oil cream, if necessary. The frozen butter cream can be further leveled with a knife. To do this, heat the knife in hot water and wipe it dry. 
Prepare white mastic, roll it out and use a rolling pin to transfer it to one tier. Smooth well, cut off excess. 
Do the same with the second tier.
Now assemble the cake. Since the top tier of the cake is heavier than the bottom tier, the cake can be further strengthened with wooden skewers. To do this, cut the required length of the skewers, equal to the height of the lower tier, and stick them into the lower tier. (If you have a light top tier of cake, such as a biscuit cake, then you don’t need to stick the skewers in). 
Install the upper one on top of the lower tier. Close the gap between the tiers with a tourniquet. 
Decorate a two-tier cake with mastic roses, leaves and flagella. 
As well as lovers of mastic jewelry, we offer you to look
For a significant celebration, a tiered cake is the highlight that everyone expects to see and taste, crowning the holiday.
A dessert from several tiers (two or three, and even more, which is inherent in wedding ceremonies), must be carefully collected so that the lower tier does not sink under the pressure of the upper ones.


We do the same in several places.

Now it is permissible to install the second tier of dessert in place, and not be afraid that the top will push through and besiege the lower base.

Strengthening a tiered cake
It is easy to strengthen the cake in two tiers, but what to do if the culinary idea is more ambitious. And we solve this issue, but how, we look further MK.
We prepare in advance, for example, three tiers of cake of different sizes. The tiers are covered with mastic and kept for about one hour or more in the refrigerator.
It is worth noting: Each of the tiers should be placed on separate paper ones, in the center of each of them we will make holes of small diameter in advance.

To strengthen each tier, we will also use cocktail tubes, but only one wooden skewer, which is recommended, in addition, wrap with cling film.


So, we begin the assembly of a three-tiered cake.
We will make a hole in the center of the product using our wooden stick wrapped in cling film. The length of the stick should approximately match the height of all tiers in total. But do not pierce the cake through.

Around the hole made in the center, at a distance of up to 3 centimeters from each other, we will make smaller holes with tubes. We adjust the length of the tubes to the height of the first tier flush.

Melt white chocolate in a water bath, and pour it, using a bag, into the holes made in the cake.

Now we return the stick and cocktail tubes to the previously done places, filled with chocolate.

You can give the white chocolate some time to harden.
We take up planting the second tier on a long skewer through a hole in the base.


Now it's time to put on the base of the mount (wooden skewer) and the third tier of the birthday cake.

Once again I was going to make a two-tiered cake at home, and it turned out to be big, very tasty and beautiful. In the preparation of the cake, I decided to use one cake from a white biscuit, and the other from a chocolate one. I made the impregnation for the cake based on coffee and liquor, but you can also soak it with any syrup). I decided to make the cream from whipped cream with the addition of cream cheese. Decorated the cake with chocolate decor and of course fresh berries. It turned out very bright and beautiful. I share a step-by-step recipe, maybe someone will find my recipe useful.
To make a two-tiered cake at home, you will need:
For a white biscuit with a diameter of 25 cm - 1 tier):
egg - 5 pcs.;
sugar - 250 g;
wheat flour - 250 g;
vegetable oil for greasing the mold.
For a chocolate biscuit with a diameter of 18 cm - 2 tiers):
egg - 3 pcs.;
sugar - 150 g;
wheat flour - 150 g;
cocoa - 2 tbsp. l.
For cream:
cream cheese (I have homemade cream cheese) - 500 g;
powdered sugar - 3-4 tbsp. l.;
whipping cream - 500 ml.
For impregnation:
coffee dissolved in water - 500 ml;
liquor I have Baileys) - 50-100 ml instead of coffee and liquor, you can use any syrup to taste).
For decor:
chocolate - 600 g;
fresh berries.
To prepare a white biscuit for the first tier: separate the yolks from the proteins.
Beat egg whites with a mixer until fluffy. Then add sugar gradually, without stopping beating for 5 minutes. The mass will turn white and increase in volume.
 Then add the yolks, one at a time, while continuing to beat. The mass should become homogeneous and very airy.
 Pour the liquid mass into the flour and mix gently with a silicone spatula. The dough should become homogeneous and airy.
 Grease the mold lightly with vegetable oil. Put the dough into a mold. Put in a preheated oven and bake at 200 degrees for about 35 minutes. Readiness to check with a dry toothpick. For the first 20 minutes, it is better not to open the oven door, otherwise the biscuit may fall off. Cool the finished biscuit in the pan, then cool completely on a wire rack.

Then prepare a chocolate sponge cake for the second tier of the cake. Sift flour with cocoa. Separate the whites from the yolks. Beat egg whites until stiff, then gradually add sugar and beat for 5 minutes. Then add the yolks one at a time and beat again until smooth.
 Pour the liquid mass into the flour and gently mix with a silicone spatula until smooth.
 Lightly grease the form with vegetable oil, put the dough into the form and level it. Put the form with the dough in a preheated oven and bake at 200 degrees for about 25-30 minutes. Readiness to check with a dry toothpick. Let the cake cool slightly in the pan, then cool completely on a wire rack.
 When the cake layers are completely cool, cut each cake into two pieces. Soak the cakes with any syrup, I added liquor to 500 ml of coffee, mixed well and soaked the cakes).
 Prepare cream for our homemade two-tier cake: combine cream cheese with powdered sugar and mix with a mixer. You don’t need to beat for a long time, we just need to combine cream cheese and powder into a homogeneous mass.
 Cool the cream well and then whip until firm peaks. I use cream with vegetable oils.
 Add the cream cheese to the cream and mix on low speed until smooth.

Assemble a two-tier cake: put the cake on a flat plate or stand and grease it with cream.
 Put the second cake on top of the cream and press lightly. Lubricate the sides of the cakes with cream.
 Lubricate the middle of the white cake with cream and put the chocolate cake on top. Lubricate the cake well with cream.
 Lay out the second chocolate cake and press lightly. Coat the top and sides of the cake with cream. In this form, put the cake in the refrigerator for the night.
 Ready-made two-tiered cake, prepared at home, decorate as desired. I surrounded the sides of the cake with a chocolate rim. To do this, melt the chocolate in a water bath. Cut out strips from parchment paper, determine the width and height of the side according to your cake. Spread the chocolate on the parchment paper and place it on the sides of the cake. Place the cake in the refrigerator for 10-15 minutes for the chocolate to harden. Then carefully remove the parchment. I made chocolate sides a little higher than the cakes, and put fresh berries in the resulting niches. This is how the cake turned out. Unfortunately, there is no piece in the section, as the whole cake was eaten at once on the festive table, leaving not a piece for the morning.
 Happy tea!
Delicious and tender children's birthday cake. Bird's milk will be made according to a simple recipe on gelatin. Since the soufflé is made from raw proteins and is not baked, but only slightly heat-treated, eggs must be used that have been tested. Of course, it's better when it's your own homemade chicken coop eggs. In the manufacture of multi-colored mastic, natural products for coloring are used. The mastic itself is made from purchased American marshmallow marshmallows, which can be found in supermarkets. Instead of mastic, the cake can be decorated, for example, with butter cream or chocolate icing. And finally, what I want to say is that the birthday cake turns out to be just huge and very satisfying. And don't be intimidated by this mass of ingredients, especially eggs, which should be consumed by children in moderation. After all, the baby will get about the 20th part of the cake.
Ingredients:
for the biscuit:
- 16 yolks + 4 eggs;
- 2.5 st. Sahara;
- 3 art. flour;
- 200-300 ml of children's not very sweet sweet and not sour juice, thick compote or milk for biscuit soaking;
butter cream for lubricating biscuit:
- 400 g butter;
- 4 tbsp without a slide of condensed milk;
for soufflé bird's milk on gelatin:
- 16 proteins;
- 700 g of sugar;
- 80 g of gelatin;
- 300 g butter;
- 3 tbsp without a slide of condensed milk;
- 0.5 tsp vanillin;

for marshmallow fondant:
- 500 g marshmallows;
- 500-800 g of high-quality powdered sugar (it is better to take with a margin);
- 1 tsp carrot juice;
- 1 tsp spinach juice;
- 0.5 tsp cocoa;
- 3 tsp citric acid.

Preparatory stage
First, we mentally prepare ourselves for a long but rewarding work. Secondly, we prepare the necessary dishes. I used 2 round springform pans with a diameter of 24 cm for the 1st tier and a diameter of 19 cm for the second tier.
So, we stock up on a good mood, because the result depends on how the cake will be seen by your beloved baby. And we start with a simple one - with a stencil for mastic. My boy, like everyone else, just loves cars, especially police ones. So I drew a car that will be easy to cut out of mastic.  The above figure can be printed, or you can carefully outline with a soft pencil directly on the computer screen in the light. The machine should turn out to be small, for the upper tier with a diameter of 19-22 cm, approximately 5-6 cm in length. The drawing can be opened in a standard image viewer and enlarged as much as you need. We outline first on plain paper, then transfer the image to hard cardboard and cut out the wheels and windows. When the stencil is ready, you can proceed to the most responsible - the preparation of a children's cake.
Recipe for a children's cake for a 2 year old boy
Turn on the oven (top and bottom mode) at 200 degrees Celsius.
Preparing a biscuit for a cake
1. 16 proteins are separated from the yolks. Proteins will go to the refrigerator, and the yolks will go to a large container for making biscuit dough. Crack 4 more eggs into the bowl.

2. Proteins are waiting for their time in the refrigerator while we start preparing the dough. Pour 2.5 cups of sugar to the eggs.

3. Beat with a mixer for about 5 minutes, the egg mass should double and turn white. The most important thing is that there should be a lot of bubbles, which will saturate the dough with oxygen and the biscuit will turn out tender and airy. There is no need to add soda or baking powder to a children's cake, the biscuit will rise well by itself.

4. Add flour. First, mix with whisks, without turning on the mixer, so that the flour does not scatter in different directions. Then beat the dough for another 5 minutes at high speed. The consistency of the biscuit dough should be like very thick sour cream. If it seems that it is too liquid, you can add a couple more tablespoons of flour, just do not overdo it.

5. Lightly grease the baking dishes with vegetable oil to form a thin greasy film that will prevent the biscuit from sticking to the mold. Lightly blot with paper towel to remove excess oil. I played it safe a little and used another small square baking sheet to bake the sides for the cake. Thanks to them, the finished cake perfectly holds its shape.

6. Pour the dough into round molds 1/3 of the height. Pour the remaining dough into a thin layer on a square baking sheet. We send it to the oven preheated to 200 degrees for 20 minutes. The dough on the baking sheet will bake a little earlier, after 15 minutes, since the layer is thinner. But you don’t need to pull the oven door back and forth, checking the readiness of the biscuit, thereby creating a draft. From this, the biscuit may settle. Better watch him through the window.

7. While the biscuit is being drunk, you need to prepare the gelatin. Pour the gelatin immediately into a bowl suitable for a water bath. I have a glass bowl with thick looms. Dilute 80 g of gelatin with two glasses of cold water, mix and leave to swell.

8. We take out the biscuit molds from the oven and leave to cool in a warm place. Just in case, we check for readiness by piercing the biscuit with a toothpick. If there is no leftover dough on the toothpick, the biscuit is ready. Do not leave the biscuit in a draft or in a cold place, the biscuit may settle heavily due to a sharp temperature drop. While you have 20 minutes to rest. When the biscuit has cooled, carefully remove the detachable form.

9. Cut each cake in half.

10. Soak on both sides with baby juice. Do not use sour juice - bird's milk can settle. Also, the impregnation should not be cloying, because the cake will turn out to be very sweet. Recently, I really like to use regular milk for impregnation, when you need a neutral mild taste, I advise you to try. Part of the cake is laid in a detachable form.

11. Remove the cooled rectangular biscuit from the baking sheet and cut it into several parts along the height of small and large detachable forms.

12. We lay out their sides, from the inside we also slightly soak with juice. We remove the prepared forms with the biscuit to the side.

Cooking bird's milk on gelatin for cake
13. Beat 300 g of softened butter at room temperature with a mixer with 3 tbsp. condensed milk. We take it aside.


14. Pour 700 g of sugar into a thick-walled pan. It is better to take a larger saucepan, sugar syrup will boil strongly. It is advisable not to use enameled dishes - sugar can burn in it.

15. Pour 100 ml of water. We set aside.

16. Pour water into a deep saucepan, make a water bath and put dishes with swollen gelatin on it. We send to a low heat and bring the gelatin to complete dissolution, stirring occasionally. In this case, gelatin in no case should boil.

17. Pour the chilled proteins into the deepest bowl or pan. Add a pinch of salt.

18. Whisk the whites to stable peaks (more on how to beat the whites).

19. Put the prepared sugar with water on medium heat and bring to complete dissolution, stirring constantly. When the syrup boils, all the sugar should have dissolved. Cook over medium heat until the state of a dense ball, we do not leave the pan so that the sugar is not digested and seized by crystals.

20. We constantly check for readiness by dripping a little syrup from a spoon on a saucer. When the drop solidifies on the saucer with a ball, it does not spread, but the ball remains soft inside - the syrup is ready.

You can also check by substituting a spoonful of syrup under cold running water. If the sugar solidifies immediately, while remaining soft inside, the syrup is ready.

21. Pour the sugar syrup into the proteins in a thin stream, without ceasing to beat with a mixer. The protein mass will become denser, shiny and increase in volume. Beat for a couple more minutes.

22. Pour the gelatin warmed up in a water bath in a thin stream, without ceasing to beat the whites with sugar syrup. Beat for another 3-5 minutes until shiny.

23. Reduce speed to a minimum. Without ceasing to beat, add the butter with condensed milk in portions along the blade of the mixer. Stir until smooth and turn off the mixer.

24. Pour bird's milk into prepared forms with a biscuit.

25. Top with the remaining cakes. We send it to the refrigerator for at least 6 hours.

Cooking mastic for the cake
26. Peel the carrots, wash them, cut them into several pieces. We also wash the spinach. We skip in turn through the juicer. Thus, we will have 2 natural dyes - orange and green. We will also use cocoa powder to give the mastic a brown color.

27. Divide the entire amount of marshmallows into 4 parts and put them in a microwave (or water bath) dish. For the brown fondant, I used less marshmallows, and for the base white, I used a little more. In the first and second bowl, add 1 tsp. coloring juice and 0.5 tsp. citric acid. In a bowl with white marshmallows, add 1 tsp. citric acid + 1 tsp. water (I replaced the acid with water with the juice of half a lemon). In the remaining bowl, add also 0.5 tsp. citric acid, 0.5 tsp. cocoa powder and 0.5 tsp. butter to compensate for the stickiness of the cocoa. For more information on how to make mastic, see here. Please note that you need a lot of powdered sugar for mastic, citric acid will neutralize the sweet sugary taste. The less extra liquid in the recipe, the less powdered sugar you need. Do not knead a very thick and dense mastic, in the finished product it will become very stiff after hardening. Of course, it should mold well and keep its shape, but the cake topping should also be light and tasty, and not just beautiful.
Ready mastic is obtained with a margin. Leftovers can be stored in cling film in the refrigerator for up to a month.

28. We send bowls of marshmallows in turn to the microwave. The time for different chewing marshmallows is different, from 20 to 40 seconds at maximum power. As soon as the marshmallow increases in volume by 2-3 times, it can be taken out.


29. Add about 1 tbsp. powdered sugar, sifted through a sieve, knead with a spoon like dough. If the mastic hardens strongly during cooking, it can be slightly warmed up in the microwave.

30. At first, the mastic will stick strongly to the spoon. When the mastic is more like dough in consistency, it can be laid out on a table sprinkled with powdered sugar and kneaded until it acquires a uniform structure and color. We roll up koloboks from mastic of all colors and put on a plate. My table.

Assembly of a two-tiered cake
31. We take out our 2 cakes from the refrigerator and carefully remove the molds. The biscuit on top sagged a little, but it's okay, we'll fix it.

And the remains of the biscuit, which we baked on a square baking sheet, will help us with this.

32. We prepare the oil cream for lubricating the cakes. The butter should be soft, at room temperature, so it will be easy to beat.

33. Beat the butter cream for 2-3 minutes.

34. We put a large cake on a tray or serving board. Cover with a thin layer of buttercream. Sprinkle all the shortcomings with crumbs of the remaining biscuit and grease with cream.

35. Lubricate the table with a thin layer of vegetable oil and roll out the mastic. It is much easier to roll it on butter than on powdered sugar. This will be the mastic to cover the first tier of the cake. For him, it is better to use the largest bun of mastic, leaving a little for decorations. So, let's roll out the mastic. Thanks to the oily coating of the table, the mastic does not stick to it and rolls off easily, but it still takes a little skill.

36. We cover the first tier of the cake with a layer of mastic.

37. Smooth over the surface and sides of the cake, cut off the rest of the mastic.

38. Separate a little less than half from the green mastic and roll out the strip. This will be the ribbon tying the first tier of the cake. Cut a ribbon about 4 cm wide with a knife. 
39. Gently lay it on the base of the cake, lubricating the joints with water to stick to the base.

40. Making a bow. Roll out a small piece of green mastic. Cut out a small ribbon about 14 cm long and about 4 cm wide.

41. Fold with a bow, cut in the middle.

42. Using a pencil, we form the folds and shape of the bow.

43. Separately, roll out a small ribbon and fold it like an accordion. This ribbon will tie up our bow.

44. Glue the bow with water to the junction of the tape. We correct the bow, giving it a shape.

45. It's time to make the second tier of the cake. We lay a small cake in the center of the first tier and also coat it with butter cream and sprinkle with biscuit crumbs.

46. Similarly, cover the second tier of the cake with a rolled layer of mastic. We lay all joints with mastic balls. We roll out the remaining mastic and cut out cars of different colors and wheels separately according to the stencil (I picked up a small shape-cover for the wheels according to the diameter). With a lid of a slightly larger diameter, you can squeeze out circles that will perfectly hide all the flaws in the mastic and decorate the cake.

Here's what I ended up with. Son really liked it! And good luck with your cooking, good mood, and everything will work out! :)


Two-tier cakes are an inexpressible splendor that very few risk being honored in their kitchen. Yes, and people agree to buy such a celebration of the stomach only for very significant reasons, which include a wedding, the first birthday of a child, his admission to school and, of course, the end of it. Most of all, housewives are not even embarrassed by baking - which of us does not do it! However, the assembly of the structure and the need for magnificent decoration are scary. Let's say right away that if you build a two-tier mastic cake, you will cope with the first fear in an elementary way: even without additional design elements, it will turn out to be neat and elegant. And how not to spoil the results of many hours of work at the assembly stage, we will tell you in detail in this article.
In some stores, this mass can be bought. But if you have planned a delicious, beautiful and fresh two-tiered cake, it is better to make mastic with your own hands, especially since the process is not very complicated. Two hundred grams of marshmallows are taken in the form of sweets (marshmallows are very suitable). Sweetness should be dense, chewy, not airy and soft. If the sweets are long, they break, pour a couple of tablespoons of water and put on a steam bath, where they melt into a viscous mass with continuous stirring. Then powdered sugar is gradually added (the total amount is four hundred grams) until a smooth “dough” is obtained. If you need a colored mastic, in the middle of the process, a dye of the desired shade is poured along with the powder. In finished form, rolled into a ball, it practically does not stick to hands and does not blur like plasticine. So that the lump does not wind, it is wrapped with cling film and hidden in the refrigerator.
Cakes, from which two-tiered cakes are assembled, are traditionally baked biscuit and thick. It is possible, probably, to build a solemn dessert from thin, of a different origin, but they will keep the shape of the structure much worse, and soak for longer. Two cakes are made; the upper one should be at least half as large in diameter so that the “steps” are well defined. It is tastier and more interesting if the ingredients are baked according to different recipes. However, the same cakes are also not bad, if you layer them with different fillings. The following recipes are recognized as the most successful and compatible with each other.
Chocolate biscuit "Kanash"
With it, two-tiered cakes are especially tempting, because it really does contain chocolate. Black tiles with 72% cocoa content (800 grams) are taken, broken into pieces and melted in a steam bath. Good butter (half the dose of the mass of chocolate) is first rubbed with two glasses of sugar, and then whipped to a steady fluffiness. A dozen eggs are driven into the mass; the mixer does not stop. Next, a spoon is introduced with a generous slide of soda (quenched with vinegar or lemon juice), then two tablespoons of cocoa and four glasses of flour are sifted into the dough. When the mixer makes the mass homogeneous, hot chocolate is poured in, it is finally mixed and hidden in the oven for about an hour with heating to 175 degrees.
Vanilla chiffon sponge cake
Another option for cakes, with which any two-tiered cake is simply irresistible. The recipe will require some effort, but the result of its implementation just melts in your mouth. Two cups of flour are sifted into a large bowl, one and a half cups of sugar are poured, vanilla to your liking, three tablespoons of baking powder and half of salt. Six eggs are divided into yolks and whites, the first are sent to the dough, the second are cooled and beaten with citric acid crystals to dense peaks (it, like salt, is taken half a spoon). Non-cold water is poured into the dry ingredients, a little more than half a glass, and exactly half of such a container of vegetable oil. When everything is kneaded until smooth, the whites are gently folded in with a wooden spatula from top to bottom, the dough is distributed in shape and hidden in the oven at a normal temperature of 180 Celsius for an hour, maybe a little longer. For the first 40-50 minutes, the door cannot be opened, otherwise the biscuit will settle.
sour cream
All two-tier cakes contain some kind of cream. Made on the basis of sour cream is considered universal: it is not very fat and heavy, but goes well with any biscuits. It is prepared in an elementary way: a glass of sugar is taken for two glasses of a fermented milk product, a mixer is turned on for five to seven minutes - and you can smear it. It is better to take sour cream not too greasy, with 15 percent it turns out quite elastic cream. If desired, it can be flavored with vanilla.
A few words about the filling
Cakes for the conceived "tower", as already mentioned, are baked thick. To make them juicier, they are carefully cut horizontally into two or three plates and soaked - you can use ordinary syrup, you can use special impregnation, for which two tablespoons of sugar are dissolved in a stack of hot water, the liquid is combined with half a glass of berry or fruit syrup and a stack of rum ( cognac). Such a mixture is especially successful if a two-tiered wedding cake is being prepared. When collecting, individual plates are folded into the original cake with cream spreading and pleasant additives laid out between them. For "adult" options, for a wedding or anniversary, dried fruits (raisins, prunes, dried apricots) and nuts are most often used. If your cake is two-tiered - for children, then canned fruits or berries from jam would be more appropriate. The use of peaches and cherries is especially successful. Candied fruits and pieces of marmalade are also good. Anyone who fears that his two-tier cake, lovingly made with his own hands, will be too sweet due to impregnation, can only get by with cream between the plates. Only then should it be smeared more generously.
How to assemble correctly
When all the components of the dish are prepared, it remains only to fold the cake so that it does not sink, the top does not move out, and the base does not sag. Since both floors are quite heavy, there are certain secrets on how to achieve a beautiful view. To begin with, each cake collected from the layers is coated on all sides with cream and sent for some time to the refrigerator for soaking. At this time, a thin layer of mastic is rolled out, divided into two unequal parts. The larger circle is carefully placed on the bottom cake and leveled. The sides are evenly and smoothly covered with mastic. The excess edge is cut off - not very high, as it can then shrink a little and ride up. The same manipulations are done with a smaller part of the cake. Now, so that your two-tier mastic cake does not fall apart, 4-5 skewers are taken equal to the height of the lower cake and stuck vertically into it. A substrate is cut out of cardboard, two centimeters smaller in diameter than the upper “floor”, and placed on these supports. A second cake is placed on top with two spatulas.
It remains only to decorate your work of culinary art. If you are baking a two-tiered wedding cake, you can buy basic decorations - swans, hearts, figurines of the newlyweds - and complement them with roses twisted from mastic and painted with colored cream. For children, you can bake funny gingerbread figures, color them and paint the “landscape” with whipped cream. Here already - complete freedom of creativity and a free flight of fancy!


