Sweet yeast dough. Yeast pancakes Yeast dough - a straight method
Let's bake pies!
When kneading the dough, you need to focus on the amount of milk.
For example, for 0.5 liters of milk, calculate the amount of other products: eggs, sugar, salt, fat, flour and yeast.
It is not advisable to change the dough recipe arbitrarily, since a violation of the composition and quantity of products may affect the quality of the dough.
1. DoughIf you add too much sugar or salt to the dough, it will rise slowly, and when frying, the products will quickly brown, but remain raw inside.If there is not enough sugar, the pies turn out pale and tasteless.
Excess salt deteriorates not only the taste of the pies, but also their appearance: the crust does not brown.
If the dough is too steep (with a lack of liquid), it does not ferment well, the baked goods turn out hard, and if there is too much liquid, the dough does not form well, spreads, and the pies turn out flat and blurry.
If you increase the amount of yeast, fermentation speeds up, but the dough may acquire an unpleasant yeasty smell.
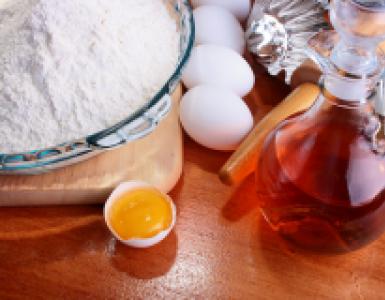
For 0.5 liters of milk you need to take:
- 4 eggs,
- 100 grams of granulated sugar,
- 1 teaspoon salt,
- 1 pack of creamy margarine,
- 50 g yeast,
- 900 grams of premium or first grade wheat flour.
Break the eggs into a bowl with a capacity of about 5 liters, add salt, granulated sugar, and add melted margarine.
Divide the slightly warmed milk into two parts: pour half into a bowl, and dilute the yeast in the other part and also pour into the bowl.
Sift the flour, also pour it into a bowl, stir well and knead the dough until it comes away from your hands.
Knead the dough for at least 15 minutes.
Then cover the bowl with a clean towel and place in a warm place until the dough rises.
When it comes up, knead the dough and put it back in the bowl.
Let it rise a second time, knead it again and put it in a warm place again.
When the dough has risen for the third time, place it on a clean table sprinkled with flour.
Then, cutting off small pieces, divide the entire dough into small balls of equal size. While you are rolling the last balls, the first ones will already fit, and you can make pies from them.
Now sprinkle your hands with flour, take a ball and make a round cake 1 cm thick out of it. You can roll out the dough for the dough with a rolling pin, or you can stretch or knead the dough with your fingers. Place the filling on the flatbread, press together tightly and seal the edges. 2. Filling
Pies can be made with different fillings:
3. Baking
- with meat;
- with meat, green onions and egg;
- with cabbage, onion and egg;
- with apples,
- with mushrooms,
- with cottage cheese.
To prepare the filling from rice with eggs, you must first wash the rice, boil it, and place it in a colander to drain. Then mix the rice in a bowl with chopped hard-boiled eggs, butter, and salt.
Tasty and filling of cottage cheese with herbs.
You need to mash the cottage cheese, add salt to taste, add finely chopped dill and onion leaves and one raw egg per 0.5 kg of cottage cheese, mix.If you want to make a filling from fresh cabbage, you need to cut the cabbage, pour it over first with boiling water and then with cold water, drain it in a colander, squeeze it out, fry it for a few minutes in vegetable oil, add salt and ground pepper and use it for the filling.
The filling of buckwheat porridge with liver is quite tasty.
Soak the liver a little in milk and fry in butter along with chopped onions, then pass through a meat grinder, add salt and pepper, mix with chopped eggs and, if desired, with crumbly buckwheat porridge.It should be borne in mind that salted meat, mushroom and fish fillings are not suitable for sweet dough, just as salty dough cannot be prepared for sweet fillings.
Place the finished pies on a greased baking sheet, seam side down, leaving three-finger gaps between them so that the dough fits freely. At the same time, you need to keep in mind that the baking sheet is greased evenly, otherwise the pies will spread in a large accumulation of fat or burn on insufficiently greased areas of the baking sheet.
Then the baking sheet with the pies should be placed in a warm place for 20-30 minutes for proofing, that is, for them to rise.
During this time, the products increase in volume and become lush. It is necessary to protect baking sheets with pies from drafts, which could be caused by an open door or window, so that the crust does not dry out on the surface of the dough, which will make the taste of the pies worse.
The oven must be preheated to a temperature of 230-250 degrees.
To make the pies beautiful, rosy and appetizing, after proofing they need to be greased with a raw egg. To do this, pour the egg into a cup and beat with a fork so that the yolk mixes with the white. Better yet, just brush with beaten yolk.
You need to grease the pies carefully so as not to crush them and so that the egg does not get on the baking sheet, otherwise the pies will stick to it during baking. Try to place the baking sheet in the oven carefully, without jostling, otherwise the pies may settle.
Bake the pies over medium heat for 10-15 minutes.
The baked pies should be immediately placed on a large plate covered with paper napkins.
To make the pies tastier, you can grease them with butter while hot.
Then cover them on top with a clean towel and leave for 10-15 minutes.
Russian dough pies in French style

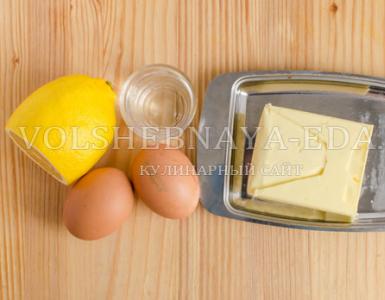
For the French test you need:
milk – 1 glass
margarine – 1 pack
eggs – 2 pcs.
fresh yeast – 1 pack (100 g)
sugar – 5 tbsp. l.
flour - 3 cups +1 cup or a little more for mixing
You can boil the milk, turn it off and put the margarine in it whole, but to speed up the process it is better to cut it into pieces. The margarine has melted, add sugar. While we stir it, the milk cools down so that you can add lightly beaten eggs - they will no longer curdle. We don't stop stirring. By this time the milk becomes lukewarm, and we are not afraid of dissolving the yeast. Crumble with your left hand and stir with your right.
When the yeast has dissolved, we begin to add flour - in small portions, and again without ceasing to stir. I warn you that the result will not be pie dough at all - it is too liquid for this, and if you also used a food processor, then not at all. But don't let this bother you!
Place the dough in the refrigerator for 25-30 minutes.
Three or four times during this time we look into the refrigerator and knead the dough with a spoon or spatula.
After half an hour we continue work. Pour a lot of flour onto a cutting board and lay out the dough. Gradually adding flour, bring the dough to the desired consistency.
There is no salt in the recipe. Its absence in the test is not felt in any way. But the filling should be moderately salted or a little more. It also doesn’t hurt to add sugar if you use even a bitter filling, for example, with onions. Sugar helps the dough “work.”
Does it seem like there is too much yeast? But, apparently, thanks to them, the pies do not go stale for a long time.
Filling: mashed potatoes with onions and mushrooms.
They eat pies with milk or tea.
The dough can be prepared in advance, it is good even after defrosting.
Yeast dough from the refrigerator

Yeast dough that is refrigerated.
Convenient for any baking, it always turns out great.
Ingredients:
* Milk - 0.5 l
* Yeast (fresh) - 100 g
* Vegetable oil - 200 ml
* Egg - 3 pcs
* Sugar - 4-5 tbsp. l.
* Salt (to taste)
* Flour - 7-8 cups.
Recipe:
Dissolve yeast in warm milk, add beaten eggs with sugar, vegetable oil, salt and flour.
Knead the dough.
Place the dough in a plastic bag, tie it to leave room, and put it in the refrigerator for an hour and a half (or overnight).
When the dough has risen, mold whatever you want!
Shortbread dough
- Flour with a small amount of gluten is more suitable for shortcrust pastry. But since under normal conditions there is no way to check the quality of flour, you can add a small amount of starch to the dough. It will turn out more crumbly.
- It is very important to use high-quality fat, as it significantly affects the taste of the dough. Natural butter with a fat content of 82% is best. Depending on the recipe, the butter is used cooled or softened, but never too cold or melted. Friability and plasticity also depend on the oil. If there is less oil than needed, the dough will turn out dense and hard.
- To make the dough more crumbly, you can use only egg yolks (in this case, it is not necessary to add baking powder).
- When baking, the layer of dough must have the same thickness, otherwise it will bake unevenly.
- The finished dough should be placed in the refrigerator for at least half an hour to make it easier to roll out and to prevent it from cracking during baking. If you suddenly change your mind about baking a pie, don’t worry, shortcrust pastry can be stored in the refrigerator for up to three days, or you can even freeze it.
- Shortbread dough does not need to be kneaded for a long time: it will lose its plasticity and the baked goods will turn out tough.
- Before baking, the shortbread dough can also be placed in a mold and placed in the freezer, then there is less chance that it will “slip.” To prevent the sides of the dough from moving, you can place baking paper and beans on the bottom of the mold directly on the dough.
- The dough sets best in the oven at convection and a high temperature of 200-220 degrees.
Shortbread dough (basic recipe for sweet pie)
Ingredients: 2 cups flour, 200 g butter, 0.5 cup sugar, 1 egg (you will get 800 g dough). Preparation. Mix flour with sugar. Add the pieces of butter and rub the butter into the flour mixture. Add the egg and quickly mash with your hands until smooth.
Puff pastry
 Puff pastry is made from flour, salt, water, butter (or margarine). When baking it should spread into many layers. “Layeriness” is achieved by a special mixing method:
 The butter is “rolled” in layers into a base of flour and water, then rolled out, folded, frozen and the operation is repeated 4-5 times.
Since classic puff pastry requires a lot of time and considerable physical strength, it is often used at home simplified recipe.Puff pastry without yeast
Ingredients:
3 cups flour (more may be needed), 1 egg, approximately 200 - 220 ml water, 200 g butter, 1/4 tsp. salt, 2 tsp. vinegar 9%. Preparation.
Mix the egg and water in a bowl, add salt and vinegar, stir. Add flour gradually, knead into a thick but flexible dough. Wrap the finished dough in film and leave it for 30 minutes or 1 – 2 hours at room temperature.
Remove the butter from the refrigerator, cut into cubes, add flour (50 g flour per 200 g butter, 75 g flour per 300 g butter), mix everything, preferably using a food processor.
Transfer the mixture onto film or parchment paper. Cover with a second sheet of film and roll out a thin pancake. Place in the refrigerator for 20 minutes.
The next step is to combine the dough and butter. To do this, roll out the dough to a thickness of 5 – 7 mm. Place the butter pancake on it so that it occupies 2/3 of the area closer to one edge. The edge of the butter pancake should not be at the same level as the edge of the dough layer, the indentation is 1 - 1.5 cm. Place the free 1/3 of the dough on the butter pancake and pinch the side edges. Now close the “envelope”: cover the top of the dough with the butter part and pinch the edges, put it in the refrigerator for 15 - 20 minutes.
Next, you should “roll out” the dough. When rolling out, place the puff pastry with the short side facing you. You need to roll out with quick movements and in one direction. Before each rolling out, fold the dough three times. Triple fold: Turn the dough with the wide side facing you, fold the left third of the dough up, and cover the dough with the right third. Afterwards the dough is rolled out into a layer of 8 - 10 mm and folded again in a triple fold. The maximum number of possible rolls is 4. If after rolling the dough gets hot, it should be put in the refrigerator for 15 - 20 minutes.
In this case, chopped cold butter is mixed directly into the dough.Adviсe
For quick puff pastry, you need to sift the flour (6 cups), saturating it with oxygen. Then add 1 teaspoon of salt and grate 600 g of cold, hard butter on a coarse grater (margarine is cheaper, but worse). Mix everything thoroughly and rub the mixture again until a homogeneous fatty mass is obtained.
Then separately beat 1.5 cups of cold water (or milk) with 4 yolks, pour in 1/2 teaspoon of diluted citric acid, mix well and carefully begin pouring this liquid into the butter and flour.
You should get a homogeneous plastic dough. The finished dough should be wrapped in film and placed in the refrigerator for a couple of hours.
- You need to prepare puff pastry in a cool room (17-20? C).
- Butter or margarine must be cooled to a temperature of 15-17? C, but not lower. Oil that is too cold will crumble when rolling out products, and will leak out during baking. The dough itself should also be chilled.
- Baking trays for puff pastry should be greased with cold water, not grease.
- You only need to cut the dough with a well-sharpened knife so as not to disturb the layers.
- The edges of a puff pastry product should not be greased with yolk before baking - this may prevent the dough from rising.
- Before baking, the dough can be pricked in several places with a knife to avoid swelling.
- It is not recommended to store puff pastry as its taste deteriorates.
Dry yeast dough

- 1 packet of dry yeast
- 2 cups warm water
- 2 tsp Sahara
- 1 tsp alcohol
- 4 cups flour
- 3 - 4 tbsp. spoons of vegetable oil
- sugar - to taste
When the yeast has risen, add 4 cups of flour, 3-4 palms of vegetable oil, salt, sugar to taste (1 tablespoon of sugar and 2 pinches of salt, if the filling is sweet, add more sugar) and knead the dough. The dough should be elastic and not stick to your hands.
Place the dough in the refrigerator for 30 minutes.
Pies in five minutes
(recipe for sloths) Ingredients:
 - - 4 tbsp. flour (sometimes you need a little more, because flour varies)
- - 2 tbsp. l sugar
- - 1\2 tsp. salt
- - 2 tbsp. l. sunflower oil
- - 500 ml. milk (you can warm it, you can straight from the refrigerator, I tried it both ways, the result was the same)
- - package of dry yeast 11 gr. (for example, a small bag of SafMoment)
Stage 1.
Mix all ingredients until smooth. Place the resulting mixture in a bag and place in the refrigerator for 2 hours.
ALL! Stage 2.
After two hours, you take the dough out of the refrigerator, lightly knead it in flour and make pies with any filling. The dough is soft, does not stick to your hands, molds well and the pies do not fall apart. Can also be used for all types of pies and pizza.
So, at the request of the workers, I give the basic recipe for the yeast dough that I use. That's what my grandmother taught me. When I tried to tell her that this is what’s written in the book, she told me: “Do you like my pies? So listen.” I obeyed and did not regret it. I still listen to it :) This is a good point of support, then you can vary it a lot depending on what you are going to create and what products you have in general. I’ll also write how I make it, for those who have never taken on yeast dough before.
Basic principles of yeast dough:
1. Yeast must be fresh.
2. The more baking you put in the dough (butter, eggs, sugar), the more yeast you need to use. In smart books they write that “To prepare the dough, yeast is consumed from 20 to 50 g for every kilogram of flour.”
3. The kitchen where the dough is made should be warm and there should be no drafts. Yeast loves heat.
4. The dough needs to be kneaded well, patience is very important here :)
So, proportions. From this amount I get about 14-16 cheesecakes or buns OR 2 rolls. I use this dough for sweet and savory baked goods. We really like the dough to be sweet even in savory pies/pies. If you don't like it, just reduce the amount of sugar.
for 0.5 liters of milk (preferably kefir) - now I started taking about 0.75 liters of milk and the dough still rises perfectly. Our yeast is thermonuclear.
50-60 g fresh yeast (~3 bags of 7 g dry yeast)
4 - 5 tablespoons sugar
100 g butter
2-3 eggs
1/2 teaspoon salt
enough flour to make a soft dough (~3 - 4 cups of flour)
2 tablespoons of vegetable oil - for kneading.
First you need to check the yeast. Heat half the milk (the milk should be warm, but not hot. I put it in a bowl in the microwave for 30 seconds). Add or add yeast and a spoonful of sugar to the milk. Mix everything well and place in a warm place for about 15 minutes. A cap should form in the bowl. If it is there, the yeast is fresh and you can start; if it is not there, then the dough is canceled or you need to urgently run to the store (now to a different one, since the first one sold you not fresh yeast) for a new batch.
Let's start the main process, melt the butter and cool. Never add hot oil. You will kill the yeast and the eggs will curdle! (Yes, yes, I know, the yeast is alive and we will kill it later anyway, but it doesn’t hurt).
In a large bowl, sift some of the flour - 2 cups, sugar and salt. Add eggs, COOLED butter, the rest of the milk (this should also be heated) and yeast with milk. Mix everything well. The dough should not be liquid, but not very thick.
Dust a clean table with flour and place the dough on it. (it’s much easier to work on a table than on a board, since in my opinion there’s no board big enough :)). We begin to knead slowly, gradually adding flour. When you achieve the desired consistency, remove the flour so you don’t accidentally add more. The dough should be soft and slightly stick to your hands. It’s better not to add a little flour than to add too much flour. If there is too much flour, the finished products will be dry. If the dough sticks to your hands or table, pour a little vegetable oil on your hands and table and continue kneading until it becomes elastic and stops sticking to your hands and table. This process takes 10-15 minutes.
Now you and the dough need to rest. Place the dough on a board or in a large bowl (if the bowl is aluminum, it is better to cover the bottom with cling film), sprinkle the top with flour, cover with a towel and place in a warm place. When you see that the dough has doubled in size, press it down and put it back in a warm place. How to check that the dough has risen completely? Press the dough with your finger. If the indentation remains on the dough, then the dough has reached its limit; if it rises back or tightens, then the dough has not yet risen. When the dough has risen a second time, you can start baking, or you can let it rise again.
Yeast dough with milk, in addition to the main products (yeast and milk), includes: flour, sugar, salt. May include: eggs, vegetable or any other oil. It is suitable for a variety of baked goods, both sweet and savory. It can be liquid or thick - its consistency depends on the type of final product. For example, a jellied pie is prepared with a liquid dough, and an open braided pie is prepared with a thick one. May include additional baking or do without it.
The five most commonly used ingredients in yeast dough recipes with milk:
A simple recipe for yeast dough with milk is as follows:
- Mix active yeast with sugar and add a small amount of warm water, leaving to rise in a warm place.
- Beat an egg into warm milk.
- Add melted butter, salt and sugar, stir.
- Pour in the yeast and stir.
- Add flour in small portions until the dough becomes elastic, elastic and holds well from your hands.
- Knead the dough well and let it rise in a warm place.
- Knead again and leave.
- You can make baked goods from the dough.
Five of the most nutritious recipes for dough made with milk and yeast:
- To prevent the dough from sticking to your hands when kneading, lubricate your hands with vegetable oil periodically
- All ingredients for the dough must be warm
- The dough should rise in a cozy, warm place without drafts
- sugar allows the yeast to rise faster, so it’s good to add it to dough and for savory baked goods, but just a little
1 Heat the milk until warm, approximately 35-36 C, if you cannot measure the temperature, then dip your finger in the milk, it should be quite warm and your finger should be bearable. The temperature of the milk is very important so that the yeast does not die and is activated. Pour sugar into the milk and stir, watch the temperature so that the milk does not cool down! Yeast loves sweet, warm environments. Next, stir the yeast in the milk and leave it alone for 15 minutes, in a warm place, without covering it with anything.
2 Milk with yeast will produce foam, which may then begin to fall off, do not be alarmed - this is a normal, natural process.

3 Beat the eggs with salt until smooth. Eggs should be at room temperature! If you did not have time to remove the eggs from the refrigerator in advance, dip them in warm water for a couple of minutes.

4 Melt the butter, I use the microwave and pour it into the eggs. The oil should not be hot to prevent the eggs from curdling.

5 Add the appropriate yeast with milk to the egg-butter mixture.

6 Add the sifted flour. I highly recommend sifting the flour through a fine sieve in advance, this will saturate it with oxygen and make the baked goods very airy. You can sift the flour directly into the liquid, a few tablespoons at a time. stirring first with a whisk while the dough is liquid, then, when it becomes impossible to stir, start kneading with your hands.

7 I always add flour to see how much the dough will take. We knead the dough so that it does not stick to your hands, but is not too steep, that is, if 300 grams of flour is enough for you, do not try to put more into the dough, referring to the recipe, since the flour is different and its quantity may vary and depend on very many factors: oil fat content, flour quality, egg size, etc. I usually knead the dough not in a bowl, but on a table lightly powdered with flour. When kneading the dough, keep in mind that the dough loves hands! Especially men's and children's. So feel free to invite your family and let them have fun. Knead it, throw it on the table, spank it, in general, the dough needs a very good massage! I usually knead this dough for about 5-8 minutes; I have to knead some types of baked goods for 15 minutes. I don’t have a bread machine, but if you have one, I advise you to use its services))

8 When you and I have kneaded the dough, grease it with vegetable oil so that a crust does not form and put it in a clean bowl, also greased with oil. Cover the dough with a towel or cling film and leave to rise in a warm place. I usually use the oven, there is no draft and it’s warm)) I preheat the oven to 50C and put a bowl of dough in there for two batches. After 45-50 minutes, check with you to see if the dough has increased, knead it lightly and wait again for 45-60 minutes. Two approaches will be enough.

9 The dough has doubled in size, do not knead it.

You can begin to form the products.
I never make yeast dough according to a recipe. Always by eye and as the hand takes it.
There is especially wide scope for creativity in butter dough; you can put all sorts of leftovers from the refrigerator into it - sour cream, kefir, whey (if you make homemade cottage cheese
). If there are unused whites or yolks left over from other dishes, you can add them instead of whole eggs.
So this recipe is very approximate.
When preparing butter dough, you need to follow only one rule - the amount of yeast per unit of flour increases by a third!
COMPOUND
OPARA
3 tbsp flour, 1 tsp sugar, 0.5 cup water, yeast (19g Dr. Otker dry yeast or 15g SAF-moment dry yeast or 67g fresh yeast)
DOUGH
1 cup liquid (milk or water or whey), 1~1.5 tsp salt, ~1/4 cup sugar, 0.5 cup vegetable or melted butter (110~120g), 2 eggs, 6~6.5 glasses of flour
First we need to calculate how much yeast we need.
It is necessary to calculate the entire volume of liquid used.
In this recipe: 0.5 cups of water + 1 cup of liquid + 0.5 cups of oil + 1/3 cup of eggs (the volume of one egg is ~1/6 cup). Total 2+1/3 cups.
This amount of liquid requires 6~6.5 cups of flour.
One 250 ml glass holds 160 g of flour. Therefore, in 6~6.5 glasses there will be 960~1050g of flour. To keep things even, let's round it up to 1 kg.
On the packets of dry yeast it is written how many grams of this yeast you need to take per 500g or 1kg of flour.
For example, the company Dr. Otker requires 7g of yeast per 500g of flour.
We got a kilogram of flour. This means you need 14g of yeast. But because the dough is rich, their quantity needs to be increased by 1/3 (in some cases the quantity of yeast has to be increased by 1.5 times).
As a result, we find that for our dough we need 19g of dry yeast dr.Otker or 15g of dry yeast SAF-moment or 67g of fresh yeast.
* * *
In a bowl, mix flour, sugar and yeast. Pour in about a third of 0.5 cups of warm water. Stir until a homogeneous thick dough is formed. Pour in the rest of the warm water.

Leave in a warm place until the dough bubbles.

Pour vegetable oil and 1 cup of any liquid into the dough. This can be water, milk, cream, whey, kefir, sour cream, etc.
Beat in the eggs and add salt and sugar.
Stir everything.
Add about 4 cups of flour. Stir (with a spoon, fork or whisk). You will get a sticky dough.
Continuing to mix the dough, add half a glass of flour until the dough stops stirring with a spoon.
Pour 0.5 cups of flour onto the table and dump out the dough.
Continue kneading with your hands, adding flour if it is all absorbed into the dough and it still continues to stick to the table.
Knead until the dough has a smooth, soft and non-sticky consistency.
It is advisable to knead the butter dough for a few more minutes after it has acquired the correct structure, because This dough gets better with prolonged kneading.
(For Christians, knead the smooth dough for an additional amount of time to have time to read the Lord’s Prayer 9, 12 or 15 times.)
Form the dough into a ball, cover it with polyethylene film and leave until it increases in size by 1.5~2 times.
Knead the risen dough, cover again with film and leave to rise again.
---
Attention! If you are using an instant yeast, such as SAF-moment, then the second approach is not necessary. After the first rise of the dough, you can begin to form the products.
---
When the dough rises a second time, knead it again and start cutting the pies.
Yeast dough recipes:
 |
|
 |
|