Khinkali - what kind of dish is it and how to prepare it? Khinkali - a classic recipe for dough and delicious filling. Making khinkali at home.
Khinkali with meat is a traditional dish of Georgian cuisine, which is also quite widespread in our country. When preparing them, it is necessary to observe a small number of subtleties. And it matters whether you are making the dough or already cooking the semi-finished product. From this material you will learn several culinary recipes for khinkali with meat, and you will also be able to familiarize yourself with the features of preparation and selection of all the necessary components.
Basic principles of preparation and serving
It is worth noting that this dish has its own set of special rules that should not be violated. Otherwise, you can ruin the final product:
- Knead the dough in water, adding salt. It is also possible to add eggs.
- This component takes quite a long time to prepare. Sometimes in two approaches. The output should be a dense and elastic product.
- The recipe for making khinkali with meat requires the use of either minced meat or finely chopped meat. Traditional options are: lamb, beef and pork. Sometimes you can find varieties in which the types are mixed. Chicken may be used.
- The filling always contains a large amount of herbs and spices. Be sure to add water to form a broth.
- The preparations can be cooked immediately or frozen and eaten when needed.
- In order not to tear fresh khinkali, they must be lifted by the tail, allowing the filling to settle. Only after this they are lowered into boiling water.
- The dish must be served hot. As a side dish there is a spicy sauce reminiscent of adjika.
- Traditionally, they are eaten with hands, holding the tail.
Now you can proceed to preparing the main components of the step-by-step recipe for khinkali with meat.
Preparing the dough
There are quite a lot of options for creating it. Almost every cook will have his own method. In this case, an algorithm for implementing the test according to traditional Georgian recipes is given.
Ingredients
To prepare the right base for the dish, you must use the following products:
- four tablespoons of premium flour;
- two tablespoons of water;
- four tablespoons of vegetable oil (its use is a slight deviation from the traditional Georgian khinkali recipe with meat);
- a pinch of salt.
Preparation
The entire cooking process presented below is quite simple, although it will take a decent amount of time. Let's get started:
- First you need to pass the flour through a sieve so that it is saturated with oxygen. You need to do this several times.
- Pour the sifted ingredient into a fairly deep cup. It should be a slide.
- Next, make a small hole in the very center, then slowly and carefully pour water and vegetable oil into it. Add salt at the end.
- Next, according to the recipe for making khinkali with meat at home, you need to knead the dough. This is done with a spoon, but extremely slowly and carefully. At first, the workpiece will be quite liquid, but during processing it will become increasingly thick.
- Once the mixture is hard enough, place it on the table and start kneading it as best you can.
- After the kneading process is completed, the resulting dough must be left in a large container covered with a kitchen towel. For about forty minutes. According to the recipe for khinkali with meat at home, this should help the base become more elastic.
Meat preparation
It was previously mentioned that the following varieties can be used as filling:
- beef;
- pork;
- mutton;
- chicken.
The recipe for khinkali with meat also allows for mixing different options to give a more interesting taste. Once you have decided what you will use, you can move on to the implementation process itself.
Preparing the filling
It is worth keeping in mind that it is necessary to use meat without veins. If they are present, it is necessary to clean them, otherwise the filling will be uncomfortable to chew. Let's start preparing it according to the recipe for khinkali with meat:
- Traditionally, it is recommended to chop the filling into small cubes with a knife. To do this, it is cut into layers and slightly frozen. When working with a meat grinder, you must use the largest grid.
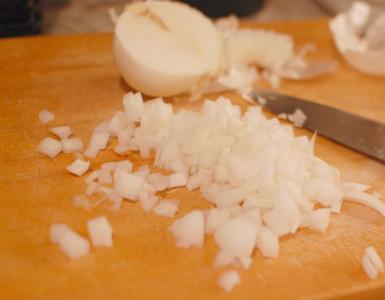
- Next, you need to peel and wash the onion, then either chop it finely or grind it in a blender. By the way, when choosing the second option, you can get quite a lot of juice, which will only improve the taste of the filling.

- Now you need to mix the meat, parsley, thyme, salt, pepper and onion in a large bowl. Garlic is squeezed on top.
- To form a broth, you need to add about 150 milliliters of water. It should be at room temperature to prevent the fat from clumping. It is better to add gradually.
- Start mixing the minced meat with your hands, not forgetting about the water. According to the recipe for khinkali with meat, the filling should be similar to sour cream, and at the same time mix well with a spoon.
- The minced meat must be covered with a lid and left to brew for about half an hour at room temperature. During this time, it will absorb water and acquire the aroma of added herbs and spices.
How to sculpt khinkali correctly?
Now you need to figure out how to create the correct shape of the workpiece and make sure that it does not fall apart during the cooking process. It is worth noting that the algorithm is quite simple:
- Sprinkle your work area with flour.
- Roll the prepared dough into a sausage and divide into pieces. To do this you need to use a sharp knife.
- Each individual part must be rolled in flour, then rolled into a flat cake with a rolling pin. Its thickness should not exceed 2 millimeters.
- Using a glass or any other round-shaped utensil, make several small circles. Repeat the procedure with each pancake;
- Now, using a spoon, place the filling in the center of each prepared piece. Don't put too much. This may result in no juice forming inside, which will spoil the taste of the dish.
- Next, according to the traditional recipe for khinkali with meat, you need to start making “tucks”, clockwise. The result should be a small bag with an open top. If you plan to steam it, then you don’t have to seal it, but if the dish is going to be cooked, then the top must be closed.
- The blanks must be placed on a board sprinkled with flour. Then you can either cook them or freeze them.

How to cook a dish in a saucepan?
Preparing khinkali with steamed meat is quite simple. But cooking is more difficult. First you need to prepare the broth:
- Bring water in a saucepan to a boil and add salt (should be slightly salted).
- Add a few bay leaves, wait about three minutes and remove them from the bowl.
- Now we need to remember the important note from the beginning. Before lowering the pieces into the pan, grab them by the tail, allowing the filling to settle. But that's not all.
- If you follow all the rules of the recipe, then before adding the khinkali you need to stir the water clockwise with a spoon to form a funnel. As soon as this happens, start adding the pieces one at a time, without stopping stirring. As a result, they must constantly spin.
- When the water boils again, you need to time it for 7 minutes and continue cooking the khinkali for the remaining time.
- At the end of cooking, place them in a separate bowl and grease them with oil to prevent them from sticking together.
Cooking in a slow cooker
Actually, there is nothing complicated here. The algorithm is simple, concise and clear:
- place the blanks on a special plastic bowl;
- pour a quarter of the total volume of water inside the multicooker;
- place the dishes with the preparations on top and close the lid;
- Next, you need to activate the “Steam” cooking mode;
- in an hour the dish will be ready.
Traditional option
- half a teaspoon of salt;
- a tablespoon of cold water;
- onion head;
- greenery;
- half a kilogram of beef;
- ground black pepper;
- chilli.
Cooking
To avoid taking up a lot of time and space by repeating how to prepare the dough and filling, these procedures will be presented in abbreviated form. Let's get started:
- Prepare the dough by mixing flour, water and salt in a deep bowl. Everything is as per the instructions given earlier. Stir until the desired consistency is obtained and cover with a lid, leaving for half an hour.
- At this time, rinse and remove films from the beef. Chop it into very small cubes.

- Also chop onions, herbs and chili peppers. Add to meat.
- Add salt, pepper, 150 milliliters of water and stir until a thick consistency is obtained. At the same time, remember that the finished minced meat should be stirred well with a spoon.
- Sprinkle flour on the work surface and dump out the dough. Roll it into a sausage and divide it into slices.
- Roll each of them into a pancake two millimeters thick and use a glass to make small circles.
- Place a little filling in each of them and form a bag.
- Boil water in a saucepan. Season with salt and add bay leaves. Don't forget to remove them after three minutes.
- Now, forming a funnel and without stopping stirring, put the khinkali into the dish.
- Cook until the water boils again. And then continue cooking for another seven minutes.
- Place the finished dish on a separate dish and grease with oil.
- Serve hot with various sauces or ketchup.
The result of the khinkali recipe with meat is in the photo below.

With Suluguni cheese
Another step-by-step recipe for khinkali with Georgian meat. As mentioned earlier, the filling can be absolutely anything. This option invites you to try cooking khinkali with meat and cheese. For this you will need:
- three tablespoons of premium flour;
- half a teaspoon of salt;
- a tablespoon of cold water;
- additional 250 milliliters of water at room temperature;
- kilogram of Suluguni cheese;
- the same amount of fresh beef;
- five small onions;
- half a stick of butter;
- greenery.
Cooking

The process is already familiar to you. Let's start with the test:
- Place flour, water and salt in a deep bowl. Mix everything until a thick consistency is obtained. Cover with a lid or towel and let sit for half an hour.
- Wash the beef. Cut into large pieces and pass through a meat grinder.
- Peel the onion and grate it on a coarse grater.
- Chop the greens and add everything to the meat. Add ground pepper and salt there. Mix until smooth. Not too thick.
- Use a medium grater to process the cheese. Mix it with softened butter and add to the prepared minced meat.
- Pour in water without stopping stirring.
- As before, make small circles, put some filling in the center and form khinkali.

- Add them to the prepared broth (as in the previous recipe), without stopping stirring.
- After boiling, cook for another seven minutes.
- Before serving, brush with oil.
Irina Kamshilina
Cooking for someone is much more pleasant than for yourself))
Content
Georgian cuisine has a huge number of delicious dishes, and many of them have gained immense popularity in other countries. Khinkali deserve special attention - dough bags with minced meat and broth inside. They can be purchased semi-finished at the store or made at home. Read how and how much to cook them.
How to cook khinkali
The whole process consists of four main stages: kneading the dough, processing the products for filling, shaping the products and their heat treatment. Cooking khinkali is not the easiest task, so you should remember a few useful tips regarding the recipe for this tasty and tender dish:
- The dough is made from flour, with the addition of water and salt. According to the recipe, eggs are not added to the composition to make the mass denser and more elastic.
- For the filling, minced meat is used (it should be finely chopped) or minced meat passed through a meat grinder. It can consist of beef, pork, lamb, chicken. Be sure to add ingredients such as onions, water or broth.
- Sometimes the filling is made with vegetables, mushrooms or sweets with the addition of raisins, dried apricots, and nuts.
- In the minced meat recipe, to improve the taste, be sure to add more chopped herbs: parsley, dill, cilantro, spinach.
- It is very important to use the right blend of spices. Cumin, garlic, ground black pepper and peas, mint, coriander, and basil give the dish a unique aroma.
- Khinkali needs to be sculpted correctly. From a layer of dough rolled out a couple of millimeters thick, cut out circles with a diameter of 10-13 cm. Place minced meat in the middle of each of them. Then folds are formed from the edges. Then they need to be collected in a bag, wrapped and pinched.
- If you decide to boil the preparations not by steaming, but in water, salt it well so that they turn out tasty.
- Traditionally, the dish is eaten with hands. The bag is taken by the tail and bitten. First, they drink the rich meat juice that appears inside, and then eat the minced meat and dough.
- To prevent the workpieces from sticking together during cooking, the container you are going to use for cooking must be treated with oil. It is also recommended to add a teaspoon of cold water to boiling boiling water.
- Serve the dish with tomato or sour cream sauce and butter.
There are several ways to cook khinkali:
- steam processing (multi-cooker, double boiler);
- in boiling water (saucepan, microwave).

Khinkali in a slow cooker
This cooking method is one of the simplest. Khinkali is steamed in a slow cooker as follows:
- Pour from 500 to 700 ml of water into the device’s container (100 ml per piece).
- Grease the steam cooking grate with butter or vegetable oil. place it on the bowl.
- Place the bags so that they do not touch each other.
- Set the "Steam" function. Cook for half an hour with the appliance lid closed.
Steamed Khinkali
With this cooking method, the dough becomes denser. How to cook khinkali in a double boiler:
- Fill the device container with water to the maximum level.
- Treat the lower bowl of the steamer with oil. Place the pieces on it so that there is free space between them.
- Place the bowl on the appliance and cook the dish for 20-25 minutes.
If you don’t have a steamer, you can steam the bags using a saucepan:
- Take a sieve of the same diameter.
- Fill the pan three-quarters full with water. Boil it.
- Place the blanks on a sieve and place on a pan. Cover with a lid and cook for about 10 minutes.
Khinkali in the microwave
The fastest way. How to cook khinkali in the microwave:
- Place the blanks (5-6 pcs.) in a deep bowl suitable for a microwave oven.
- Pour in 0.25 liters of cool water, add salt and spices. Cover the container.
- Cook at highest power for 10-12 minutes.

How to properly cook khinkali in a saucepan
If you don't have kitchen appliances like a slow cooker, steamer or microwave, you can still cook this dish. How to cook khinkali in water:
- Choose a wider pan. Before you start cooking khinkali, boil a large amount of water and add salt.
- Use a slotted spoon to make a funnel and lower the workpiece into it.
- Second method: hold the bag by the tail and move it through the water so that the dough boils. Release after five seconds.
- Third method: lower the workpiece with a spinning top, quickly unwinding it with your hand by the tail.
- The bags should be placed in one layer so that they do not stick together.
- The water should boil strongly; the pan should not be covered with a lid.
- When the workpieces are completely cooked, they will turn over with their tails down and float up. Typically this takes 13 to 15 minutes.
How long to cook khinkali
This is a very important question, because without knowing the answer to it, you can end up with a raw or overcooked dish. The cooking time for khinkali depends on many parameters: their size, the filling you choose, and the cooking method. It is also important what kind of preparations you have: fresh or frozen. How long does it take to cook khinkali? Taking into account all the above factors, the process takes from 10 minutes. up to half an hour.
How long to cook frozen khinkali
You can make a lot of preparations and place some of them in the refrigerator for storage. Please note that you cannot defrost them more than once, so take out exactly the number of pieces from the chamber that you can eat at one time. How long does it take to cook frozen khinkali after boiling? Two to three minutes more than fresh ones. In the microwave, for example, they cook for almost a quarter of an hour.

I have been to Georgia several times and the first thing I always eat is khinkali. They cost in Tbilisi, if translated into ours, 15 rubles per piece or 50 tetri! You take 7 pieces for a hundred and overeat.
If you are an ardent fan of Georgian cuisine, then khinkali is worth trying. Modeling this dish is considered a real art, requiring a creative approach and originality.

There is no rush to prepare this delicious dish, so it is best to prepare khinkali on the weekend. You will learn more about how to sculpt and cook khinkali by reading this article, in which I will explain in detail and step by step.
— Don’t drink khinkali with wine, Georgians believe that beer is much better

Some landscapes. I filmed it in November.

View of the mighty Caucasus Mountains

I cook khinkali in Georgia, Mtskheta, local cafe.

I cook khinkali in Georgia, Mtskheta

I cook khinkali in Mtskheta, Georgia. Khinkali is ready!

Read my full review for more details
The main ingredients in the khinkali recipe are flour, water and meat. However, before you start cooking, it’s worth mastering the secrets of Georgian chefs, which will make the process of cooking at home easier.
Preparing the dough and minced meat for khinkali
The secret to preparing the dough is very simple - just stick to the required consistency when kneading. The ideal dough for khinkali, a step-by-step recipe with photos of which is presented below, should have sufficient elasticity and softness, but not tear during modeling. The test preparation process takes place in several stages with short breaks. To save time during these breaks, you can start preparing the minced meat.
Without properly prepared minced meat, khinkali will not work. According to Georgian traditions, previously only lamb was used for this dish. After some time, various variations of khinkali appeared, combining several types of meat. In modern khinkali you can find beef or pork, both individually and in combination with lamb meat.
When preparing the traditional and extremely appetizing khinkali presented in the photo, the meat must be finely chopped into small pieces. To improve the taste, it is recommended to add chopped onions. Water is added to the almost finished minced meat, which makes it possible to add juiciness to the finished dish. If you still prefer rolled meat, then use a large grinding grid for this.
To give the dish a unique aroma, add cilantro, parsley or mint to the minced meat to taste. You can use a mixture of Georgian herbs - and then your dish will be impossible to distinguish from the traditional one made in Georgia.
Features of preparing and serving Georgian khinkali
Having understood the intricacies of preparing dough and minced meat for khinkali, you can begin to sculpt them. To do this, you need to roll out the dough into a sausage with a diameter of 3 cm, cut it into “nickels” the thickness of a finger and roll them out to a thickness of 3 mm, and a diameter of 12-15 cm. Then a tablespoon of minced meat is placed in each circle. And here awaits you the most exciting stage in preparing khinkali - creating a bag with folds. Famous Georgian chefs manage to create khinkali with about thirty-six folds. A novice cook can create literally twenty folds.
— Khinkali is not eaten with sauces, as there is a lot of broth inside
When creating bags of minced meat, you should pay attention to how tightly you pinch the resulting tail. If you rush and do not secure the edges of the curled tail, then during cooking the tasty broth will simply flow out of the khinkali. It is also worth considering that when cooking khinkali, a broth is formed, so you should not be overzealous with the amount of minced meat, otherwise the dough will simply break - and all efforts will be in vain.


Machine for sculpting khinkali and a lot of khinkali
How to cook khinkali? — The secret of cooking khinkali is quite simple: just arm yourself with a large container of water and cook in several stages. Khinkali should never be crowded. It is recommended to stir very carefully during cooking so as not to damage the almost finished dish. This should be done not with a metal, but with a wooden spatula. Make sure that the water does not boil too much - otherwise the bags may open, losing the precious broth. The average cooking time for khinkali is six to seven minutes.

Chef Niko with whom I studied in Telavi
Gourmets recommend serving khinkali hot, after sprinkling them with coarse black pepper. It is customary to eat Khinkali with your hands - this is the only way you can experience all the facets of the taste of this unusual dish with a truly Georgian flavor. Below is a recipe for making khinkali at home.
— If the khinkali has cooled down on the plate, ask them to fry it. Fried khinkali is a separate story.
Dumplings, dumplings, ears, dolma, ravioli, manti, wontons....
One day I was looking through my shelf of cookbooks and was surprised to find that none of them knew anything about khinkali.
Even the “Book of Tasty and Healthy Food” in 1953, published with the goal of telling people about food that they had never seen in their lives. This thick book even includes illustrated instructions for cutting artichokes and the percentage of edible parts of ten species of fish. The alphabetical index for a given letter lists - halva, kharcho, brushwood, horseradish, persimmon. There are no khinkali themes.
And although many years have passed since then and new people have grown up, not everyone still knows about khinkali. About real khinkali.
But it always happens that if you ask correctly, you will definitely get the right answer.
And I didn’t need to go to distant Georgia, because in Lvov there is a restaurant of Georgian cuisine “Khinkalnya”, which held a master class on making khinkali, in which I took part with pleasure and great benefit for myself.
Of course, you can just go to Khinkalnya on Krivy Lipa, order khinkali and eat them, while looking at the interior details. But how much more interesting is it to try to make it yourself, eat them, and then order khinkali...
Let's not get distracted, let's open the door.

And we find ourselves in a cozy room with many interesting things and details.


We are offered to drink coffee while waiting for the others.

We drink aromatic coffee in the company of hospitable men.

The participants of the master class have gathered and are checking the operation of the devices.

Restaurant Development Director Irina Klimenko introduces us to chef Livan Meparishvili and khinkal maker Svyatoslav.

In order to make khinkali we need dough and minced meat. The dough is simple, made from flour and water, no frills like eggs or baking powder are added.
The minced meat is made from veal with the addition of lard, spices and finely chopped hot pepper and cilantro. The consistency of the minced meat should be liquid so that the finished khinkali also contains broth in addition to meat.
Stanislav is ready to make about three hundred khinkali in an hour if they help him roll out the dough.

The dough pieces are stored wrapped in film to prevent them from drying out.
When it comes time to sculpt, they are rolled out thinly. Those who do not have such a special machine can use a regular rolling pin.

Circle diameter 12-15 cm

Minced meat is placed in the middle.

For beginners, it will be easier to sculpt on a saucer so that the juice does not spill out.

We take uniform folds in a circle. There is no need to press down hard.

Neatly folded folds are compressed and a knot with a long top is obtained.

The tip of the nodule is pinched off with a rotational motion.

And it turns out such a beautiful khinkali.

Raw khinkali must be placed carefully so that they do not flatten, but keep their shape.

It's the bloggers' turn. yellow_mamba makes his first khinkali


Some study, while others carefully record the process.


Juice should not be allowed to get on the edge of the dough; the dough will not stick well and all the juice will leak out during cooking.

orest_zub examines the consistency of minced meat.

All the folds of the dough are collected, now you need to squeeze it - and you're done!

It's your turn vovando


Elena Luganskaya- a big fan of khinkali, now she can make them herself :)

You need to sculpt and cook quickly so that they don’t lose their shape and look beautiful after cooking.

Our works are taken to the kitchen to cook, we are looking forward to the result.
Cooking occurs in a large amount of boiling water with constant stirring. As one would expect, extra people are not allowed into the kitchen. And they are doing absolutely the right thing.

While the khinkali are cooking, we learn to eat them using a ceramic model as an example.

And according to paper instructions.

Between sculpting and waiting for the tasting, a bonus awaits us.
Now we will touch on the secret of making Mingrelian khachapuri.

Yeast dough, cow cheese, crushed. Cheese cheese is poured onto the flattened circle, a lot and tasty.

It is pinched in the manner of a khinkali, in a circle.

It will flatten out again.

And again it is thinly rolled into a flat cake.

The flatbread is placed on a baking sheet, and the top is greased with a mixture of milk/egg/cheese cheese.
Thus, when baked, a fragrant, slightly crispy crust is formed, the most delicious thing in the world.

Temperature 260 degrees, time 7 minutes.
Here it is!!!


The first batch of khinkami arrived.

By this time, the theory of eating has been mastered, let’s begin practice.


The second batch was made by professionals, but just as tasty as the first :)
Especially with Georgian wine.

And now the biggest secret. The tail, as you already know from the instructions, is not eaten. The dough there is quite thick and it simply doesn’t have time to cook.
By the number of tails on the plate it is convenient to count how much was eaten.
But one day this tradition caused some problems in the then Soviet Georgia.

Intrigued? Go and order khinkali, they will tell you not only this story.
Good day, dear readers and subscribers! I don’t know about you, but I really love cooking and khinkali. But I especially like the last ones. Lots of juicy meat filling, herbs and spices, tender dough and original shape... It’s impossible not to fall in love with this Caucasian dish. There are several options for how to prepare khinkali. Georgian, Dagestan and Avar recipes have their own characteristics, but the principles of kneading and boiling dough are generally similar.
Khinkali is boiled in a saucepan, cooked in a steamer or slow cooker, and even fried in a frying pan - who knows what! We make them for future use with the whole family, when we have free time, and freeze them. Then just take it out of the freezer and cook it. The taste will not suffer at all, and you will get a delicious instant dish.
From today's collection of recipes you will learn how to prepare the dough and filling correctly. And also, the features of the varieties of this juicy meat dish. I hope you find your option to your liking.
Recipe for making juicy Georgian khinkali at home
This is a classic recipe for a Caucasian dish that I cook myself. For the filling they use the pulp of chopped lamb, but I prefer the “meat mix” - a mixture of lamb and beef. It turns out not so fatty, and the taste is more familiar.
What products you will need:
- 500 g beef;
- 250 g lamb;
- 2 onions;
- a bunch of parsley;
- 1 glass of meat broth (or water);
- ground red and black pepper, cumin to taste;
- 4 cups flour;
- 1 glass of water;
- salt to taste.
Step by step recipe:
1. Sift the flour and pour it into a deep bowl in a heap.

2. Dissolve salt in a glass of cold water - about half a teaspoon.

3. Make a hole in the mound of flour and pour in half a portion of water. Start kneading the dough in a bowl, gradually adding the remaining water.

4. Place the lump on a table sprinkled with flour and continue kneading for another 10 minutes until pliable. Then place the dough in a bag and refrigerate for 30 minutes.

5. Cut the meat as finely as possible - you should get a chopped filling.

6. Finely dice the onion and chop the parsley.

7. Salt the meat to taste, add spices and mix well. Add onion and parsley, mix thoroughly again.

8. Pour a few tablespoons of meat broth into the filling and mix well. Add liquid until the meat pulp absorbs it. The filling should be juicy, but not liquid.

9. Remove the dough from the refrigerator, roll it into a rope and cut into 2.5-3 cm pieces.

10. Roll out each piece with a rolling pin into a circle shape.
Try to maintain the thickness of the cake at 2 mm so that it does not tear, but does not turn out too thick.

11. Place a tablespoon of minced meat in the center of the flatbread. Pinch the edges of the cake, gathering them at the top into a pouch and pressing the folds tightly. If there is a lot of dough at the top, cut it off with a knife.

12. Using the same principle, form bags from all the cakes.
13. Boil water, add salt and carefully place the khinkali one at a time into the boiling water. Stir immediately to prevent the semi-finished products from sticking to the bottom.

14. As soon as the khinkali float to the surface, note the time and cook for 15 minutes.

Serve the finished dish with any sauce that your family loves. My dad likes to serve with or. Traditionally, they are eaten with their hands - they take them by the tail, bite off the edge and drink the aromatic broth. Then they are taken as a base, leaving the tail on the plate.

How to cook khinkali with kefir - Avar cooking recipe
This meat dish differs from the traditional Georgian one primarily in its form and presentation. It is much easier to prepare - no modeling or preparation of minced meat is required. Avar khinkali are boiled pieces of soft dough, served along with boiled meat. Sometimes Avars prepare corn khinkali, using corn flour rather than wheat flour for modeling.
Ingredients:
for test:
- 2 glasses of kefir;
- 2 tsp soda without a slide;
- meat;
- flour;
- 1 chicken egg;
- salt to taste;
for sauce No. 1:
- sour cream;
- garlic;
- salt;
for sauce No. 2:
- tomatoes;
- vegetable oil;
- garlic;
- salt.
How to cook step by step:
1. Place the meat in cold water and boil.

2. Half an hour before the meat is ready, start kneading the dough. Pour kefir into a bowl, add salt, soda and mix with a whisk.
3. Add flour in portions and knead the dough - it should turn out dense, but plastic. Cover the mixture with a bowl and leave to rest.

4. Prepare tomato sauce. Place the tomatoes chopped in a blender into a frying pan heated with sunflower oil. Fry over medium heat until the water has completely evaporated.
5. Add garlic and salt to taste. Stir and remove from heat.

6. For the second sauce, in a separate bowl, combine sour cream, garlic and salt - the sour cream sauce is ready.
7. Remove the meat, boiled until half cooked, from the broth and place on a dish.
8. Roll out the dough, cut into small squares or diamonds.

9. Place the pieces of dough into the boiling broth left after boiling the meat. Stir and cover with a lid. Once the liquid boils, remove the lid and cook for 3-4 minutes, stirring occasionally.
10. Take out the pieces, place on a flat plate and pierce each with a toothpick.

Serve on one large platter along with pieces of meat, broth and two sauces. They eat it like this: dip the boiled dough into the sauce, take a bite, then put a piece of meat in your mouth and wash it down with broth. Even suitable for sauce.

How to cook real Dagestan puff khinkali at home?
This dish in its appearance resembles delicious lush roses. It turns out nourishing and rich - because, in addition to the dough, it contains pieces of chicken, potatoes and two sauces. Your family will definitely not go hungry! Here is a detailed video recipe.
Delicious and juicy khinkali, steamed in a slow cooker
If you are afraid that your khinkali will stick together and instead of appetizing bags you will end up with a lump of dough, then I recommend this recipe. There is practically no need to monitor the preparation of a dish in a slow cooker. The products will steam evenly and will not stick together or fall apart.
Grocery list:
For minced meat:
- 100 g lamb;
- 100 g pork;
- 150 g onions;
- 1 bunch of cilantro;
- 1 bunch of parsley;
- 10 g ground cumin;
For the test:
- 100 ml cold water;
- 320 g flour;
- 10 g fine salt;
For cooking:
- 2 bay leaves;
- 3-5 peas of allspice;
- 1 glass of water.
How to cook:
1. Knead a stiff dough from salt, flour and cold water. Knead for at least 15 minutes - the longer the better.
2. Wrap the dough in cling film and place in the freezer for 10 minutes.

3. Chop the meat, onion and herbs very finely. Combine all the ingredients, add salt, spices and a little cold water to make the filling juicy.

4. Remove the dough from the refrigerator, cut into pieces, roll each into a thin flat cake.
5. Place a portion of the filling in the center of the cake and begin to pinch the edges to form a pouch shape.

In classic khinkali, the number of folds should be at least 20! Try to ensure that the dough fits tightly to the filling and does not leave much free space inside.

6. Pour water into the multicooker bowl, add peppercorns and bay leaves. Set the steam cooking mode - its name may differ depending on the model.
7. Grease the steam grate with vegetable oil to prevent the products from sticking. Place it in the slow cooker. Place the khinkali at a distance of 2-3 cm from each other, since the dough will increase in volume during cooking.

8. Cook the dish for 30 minutes in the “Steam” mode.
You can cook ready-made frozen khinkali in the same way. Just remember to oil the steam grate. Serve the dish with any sauce - even regular ketchup will do.

How to deliciously cook khinkali fried in a frying pan?
It happens that after lunch or dinner there are ready-made khinkali left over. It’s not tasty to eat them cold, so you have to reheat them in the microwave. But there is a much more interesting way - frying it in a frying pan. The dough will acquire an appetizing crispy crust, and you will get an original dish. Let's look at the entire cooking process - from kneading to frying.
3. Place the elastic dough in a bag and leave it on the table to allow the gluten to dissolve for 1 hour.
4. Pass the meat through a meat grinder. Grate the onion directly into the finished minced meat. Season with salt and pepper, stir in finely chopped herbs. Add water in small portions, thoroughly mixing the filling.

5. Roll out the dough into a layer 7-8 mm thick and cut out circles with a glass. Roll out the circles with a rolling pin into thin cakes about 1 mm thick.
6. Place the minced meat in a heap on the flatbread and tuck in a circle. Form a bag and press the resulting “leg” tightly.

7. Boil water in a large saucepan, add plenty of salt and add the khinkali to boiling water one at a time. Stir after each addition to prevent sticking. After the water boils, cook for 5 minutes.

Each of today's recipes has its own twist, but they all allow you to get juicy, aromatic khinkali. After all, it is precisely for the juiciness of the filling that many people love this dish so much. Do you know how to cook this dish? Share your experience in the comments and look forward to the next delicious selection very soon. Bye bye!