Experiment for 11 year olds without fire. Master class with teachers on experimentation “Experiments with salt
Olga Guzhova
Experiments for children preparatory group in kindergarten
In the preparatory group, conducting experiments should become the norm; they should be considered not as entertainment, but as a way of familiarization children with the surrounding world and the most effective way to develop thought processes. Experiments allow you to combine all types of activities and all aspects of education, develop observation and inquisitiveness of the mind, develop the desire to understand the world, all cognitive abilities, the ability to invent, use non-standard solutions in difficult situations, and create a creative personality.
Some important tips:
1. Conduct experiments are better in the morning when the child is full of strength and energy;
2. It is important for us not only to teach, but also interest the child, make him want to gain knowledge and create new ones himself experiments.
3. Explain to your child that you cannot taste unknown substances, no matter how beautiful and appetizing they look;
4. Don't just show it to your child. interesting experience, but also explain in a language accessible to him why this is happening;
5. Do not ignore your child’s questions - look for answers to them in books, reference books, Internet;
6. Where there is no danger, give the child more independence;
7. Invite your child to show his favorites experiments for friends;
8. And most importantly: Rejoice at your child’s successes, praise him and encourage his desire to learn. Only positive emotions can instill a love for new knowledge.
Experience No. 1. "Vanishing Chalk"
For spectacular experience We will need a small piece of chalk. Dip chalk into a glass of vinegar and see what happens. The chalk in the glass will begin to hiss, bubble, decrease in size and soon disappear completely.
Chalk is limestone; when it comes into contact with acetic acid, it turns into other substances, one of which is carbon dioxide, which is rapidly released in the form of bubbles.
Experience No. 2. "Erupting Volcano"

Necessary equipment:
Volcano:
Make a cone from plasticine (you can take plasticine that has already been used once)
Soda, 2 tbsp. spoons
Lava:
1. Vinegar 1/3 cup
2. Red paint, drop
3. A drop of liquid detergent to make the volcano foam better;
Experience No. 3. "Lava - lamp"

Needed: Salt, water, a glass of vegetable oil, several food colors, a large transparent glass.
Experience: Fill the glass 2/3 with water, pour vegetable oil into the water. Oil will float on the surface. Add food coloring to water and oil. Then slowly add 1 teaspoon of salt.
Explanation: Oil is lighter than water, so it floats on the surface, but salt is heavier than oil, so when you add salt to a glass, the oil and salt begin to sink to the bottom. As the salt breaks down, it releases oil particles and they rise to the surface. Food coloring will help make experience more visual and spectacular.
Experience No. 4. "Rain Clouds"

Kids will love this simple activity that explains to them how it rains. (schematically, of course): Water first accumulates in the clouds and then spills onto the ground. This " experience" can be done in a science lesson, in a kindergarten, in an older group, and at home with children of all ages - it enchants everyone, and children ask to repeat it again and again. So, stock up on shaving foam.
Fill the jar with water about 2/3 full. Squeeze the foam directly on top of the water until it looks like a cumulus cloud. Now pipette onto the foam (or better yet, entrust this to a child) colored water. And now all that remains is to watch how the colored water passes through the cloud and continues its journey to the bottom of the jar.
Experience No. 5. "Red Head Chemistry"

Place finely chopped cabbage in a glass and pour boiling water over it for 5 minutes. Strain the cabbage infusion through a cloth.
Pour cold water into the other three glasses. Add a little vinegar to one glass, a little soda to the other. Add the cabbage solution to a glass with vinegar - the water will turn red, add it to a glass of soda - the water will turn blue. Add the solution to a glass of clean water - the water will remain dark blue.
Experience No. 6. "Blow up the balloon"

Pour water into a bottle and dissolve a teaspoon of baking soda in it.
2. In a separate glass, mix lemon juice with vinegar and pour into a bottle.
3. Quickly place the ball onto the neck of the bottle, securing it with electrical tape. The ball will inflate. Baking soda and lemon juice mixed with vinegar react to release carbon dioxide, which inflates the balloon.
Experience No. 7. "Colored milk"

Needed: Whole milk, food coloring, liquid detergent, cotton swabs, plate.
Experience: Pour milk into a plate, add a few drops of different food colors. Then you need to take a cotton swab, dip it in the detergent and touch the swab to the very center of the plate with milk. The milk will begin to move and the colors will begin to mix.
Explanation: The detergent reacts with the fat molecules in the milk and causes them to move. That's why for experience Skim milk is not suitable.
April 23rd, 2014What does everyone have at home and never get tired of playing with? Water! Personally, I have not met a single child who was indifferent to her. You can come up with an endless number of games with water, we have collected the most interesting ones here. Games with water for kids are known to everyone, but we tried to come up with something for each well-known game that would also interest older children. We also included simple and spectacular experiments in the review!
Let `s start?
Games for kids and more
1. Drowning - not drowning
In addition to floating and sinking objects, it is interesting to watch how something sinking slowly and smoothly sinks to the bottom. Here is a video with beautifully sinking flowers:
Or the egg experiment:

Take 3 jars: two half-liter and one liter. Fill one jar with clean water and place a raw egg in it. It will drown.
Pour a strong solution of table salt into the second jar (2 tablespoons per 0.5 liters of water). Place the second egg there and it will float. This is explained by the fact that salt water is denser, which is why it is easier to swim in the sea than in a river.
Now place an egg at the bottom of a liter jar. By gradually adding water from both small jars in turn, you can get a solution in which the egg will neither float nor sink. It will remain suspended in the middle of the solution.
When the experiment is completed, you can show the trick. By adding salt water, you will ensure that the egg floats. Adding fresh water will cause the egg to sink. Externally, salt and fresh water are no different from each other, and it will look amazing.
2. Water in the form of... what?
You can take a plastic cup, a transparent bag, a surgical glove. And everywhere the water is the same, but so different.
And if you pour water into plastic sand molds and freeze them, then you will get shaped pieces of ice.
For older children, you can experiment with volume. Here is one of Piaget's experiments: we take two containers - one is a narrow, tall glass, and the second is low and wide. We pour the same amount of water and ask the children which glass has more? Up to a certain age, children answer that there is more water in a tall glass - because it is SEEN!
3. Leaky package
Does a bag with holes leak? Let's try it together.
4. Color the water

pic
When my son was little, he could endlessly dilute paint in water. Mixed all imaginable and inconceivable colors. And when he got tired of playing with the liquid, he poured it all into molds and we made colored ice.


pic
By the way, for older kids, suggest sprinkling salt on the ice and observing what happens

pic
5. Freezing
In addition to colored ice, my son really liked to freeze little figures and then save them. We timed how long it would take for natural defrosting, defrosted it with our finger, and dripped warm water from a pipette. The process of freezing and thawing fascinated my son and it was one of his favorite activities at home in bad weather.
We also loved making ice boats and launching them.

And if you put a thick thread on a piece of ice and sprinkle salt on top, then after a few seconds it will freeze and the ice can be lifted by holding it solely by the thread. This trick can be performed by throwing a piece of ice into a glass of cold water.
Here's another very exciting experiment with ice.
You need to put several cubes of colored ice into a jar with vegetable or baby oil. As the ice melts, its colored droplets will sink to the bottom of the jar. The experience is very spectacular.


6. Spell water
2. Sieve - sippy cup
Let's do a simple experiment. Take a sieve and grease it with oil. Then we’ll shake it and demonstrate another trick - pour water into the sieve so that it flows along the inside of the sieve. And, lo and behold, the sieve is filled! Why doesn't the water flow out? It is held in place by a surface film; it was formed due to the fact that the cells that were supposed to let water through did not get wet. If you run your finger along the bottom and break the film, the water will flow out.
3. Lava lamp

We talked about this experience in more detail.
4. Experiment with glycerin
Not exactly an experience, but a very beautiful result.

All we need is a jar, glitter, some kind of figurine and glycerin (sold at the pharmacy)


Pour boiled water into a jar, add glitter and glycerin. Mix.
Glycerin is needed to make the glitter swirl smoothly in the water.


And if you don’t have a jar at hand, you can simply arrange swirling sparkles in a bottle

pic

pic
5. Growing crystals

To do this, you need to dissolve a lot of salt in hot water, so much that it stops dissolving. You need to lower a thread (preferably woolen, with fluff) into a jar with the solution, although you can also use a wire or a twig so that part of it is above the water. Now all you have to do is arm yourself with patience - in a few days beautiful crystals will grow on the thread.
Or you can use sugar. Here's more details
6. Making a cloud

Pour hot water into a three-liter jar (about 2.5 cm). Place a few ice cubes on a baking sheet and place it on top of the jar. The air inside the jar will begin to cool as it rises. The water vapor it contains will condense to form a cloud.
This experiment simulates the process of cloud formation as warm air cools. Where does rain come from? It turns out that the drops, having heated up on the ground, rise upward. There they get cold, and they huddle together, forming clouds. When they meet together, they increase in size, become heavy and fall to the ground as rain.
7. In search of fresh water
How to get drinking water from salt water? Pour water into a deep basin with your child, add two tablespoons of salt there, stir until the salt dissolves. Place washed pebbles at the bottom of an empty plastic glass so that it does not float, but its edges should be higher than the water level in the basin. Pull the film over the top, tying it around the pelvis. Squeeze the film in the center above the cup and place another pebble in the recess. Place the basin in the sun. After a few hours, clean, unsalted drinking water will accumulate in the glass. This is explained simply: water begins to evaporate in the sun, condensation settles on the film and flows into an empty glass. The salt does not evaporate and remains in the basin.
8. Tornado in a jar
The tornado that rages in the bank is actually very spectacular; it can captivate children for a long time. You need a jar with a tight-fitting lid, water, and liquid dishwashing detergent. You need to pour enough water into the jar so that the distance from the water level to the neck of the jar is approximately 4-5 cm. Now add a little liquid product to the water, close the lid tightly and shake the jar. It should turn out to be a tornado.
9. Rainbow
You can show the children a rainbow in the room. Place the mirror in the water at a slight angle. Catch a ray of sunlight with a mirror and point it at the wall. Rotate the mirror until you see a spectrum on the wall. Water acts as a prism, splitting light into its components.
10. Lord of matches
If you put a piece of sugar in a saucer with water and matches floating in it, then all the matches will float towards it, and if a piece of soap, then away from it.
11. Changing the color of the water
Make a soap solution in a jar - dilute the soap. Then we take liquid (transparent) phenolphthalein (purgen laxative) purchased at the pharmacy and show the child how by pouring clear water into another clear water we get bright crimson! Transformation right before your eyes. Then we take clear vinegar again and add it there. Our “chemical” turns from crimson to transparent again!
12. Ink transformations
Add ink or ink to a bottle of water until the solution is pale blue. Place a tablet of crushed activated carbon there. Close the neck with your finger and shake the mixture.
It will brighten before your eyes. The fact is that coal absorbs dye molecules on its surface and it is no longer visible.
And here are the bizarre, fascinating patterns that ink forms in water


pic
13. Water flows upward
Capillary phenomena. We tint the water, put white flowers in it (preferably carnations or tulips) and......

14. Optical illusion in a glass of water
For the development of a child, it is necessary to use all possible means, including experiments for children, which trained parents can conduct at home. This type of activity is very interesting for preschoolers, it helps them learn a lot about the world around them and take direct part in the research process. The main rule that mothers and fathers should adhere to is the absence of coercion: classes should be conducted only when the child himself is ready for experiments.
Physical
Such scientific experiments will interest an inquisitive little one and help him gain new knowledge:
- about the properties of liquid;
- about atmospheric pressure;
- about the interaction of molecules.
In addition, under clear parental guidance, he will be able to repeat everything without difficulty.
Bottle filling
You should prepare your inventory in advance. You will need hot water, a glass bottle and a bowl of cold water (for clarity, the liquid should be pre-tinted).
The procedure is as follows:
- It is necessary to pour hot water into the bottle several times so that the container warms up properly.
- Pour out the hot liquid completely.
- Turn the bottle upside down and place it in a bowl of cold water.
- You will see that water from the bowl will begin to flow into the bottle.
Why is this happening? Due to the effect of the hot liquid, the bottle was filled with warm air. As the gas cools, it contracts, causing the volume it occupies to decrease, forming a low-pressure environment in the bottle. As water flows in, it restores balance. This experiment with water can be done at home without any problems.
With a glass
Every child, even at 3-4 years old, knows that if you turn over a glass filled with water, the liquid will spill out. However, there is an interesting experience that can prove the opposite.
Procedure:
- Pour water into a glass.
- Cover it with a piece of cardboard.
- Holding the sheet with your hand, carefully turn the structure over.
- You can remove your hand.
Surprisingly, the water will not spill out - the molecules of the cardboard and the liquid will mix at the moment of contact. Therefore, the sheet will hold on, becoming a kind of lid. You can also tell the child about atmospheric pressure, that it exists both inside the glass and outside, while in the container it is lower, outside it is higher. Due to this difference, water does not spill out.
A similar experiment is best carried out over a basin, since gradually the paper material will get wet and the liquid will drip.
Developmental experiments
There are a lot of really interesting experiments for kids.

Eruption
This experience is rightfully considered one of the most exciting and therefore loved by children. To carry it out you will need:
- soda;
- red paint;
- citric acid or lemon juice;
- water;
- a little detergent.
First, you should build the “volcano” itself by making a cone out of thick paper, fastening it along the edges with tape and cutting a hole on top. Then the resulting blank is put on any bottle. To resemble a volcano, it should be covered with brown plasticine and placed on a large baking sheet so that the “lava” does not spoil the surface of the table.
Procedure:
- Pour soda into the bottle.
- Add paint.
- Add a drop of detergent (1 drop).
- Pour water and mix well.
For the “eruption” to begin, you need to ask the child to add a little citric acid (or lemon juice). This is the simplest example of a chemical reaction.

Dancing worms
This simple, fun experiment can be done with both preschoolers and elementary school students. Necessary equipment:
- corn starch;
- water;
- baking tray;
- paints (food coloring);
- music column.
First you need to mix 2 cups of starch and a glass of water. Pour the resulting substance onto a baking sheet, add paint or dye.
All that remains is to turn on loud music and place the baking sheet on the speaker. The colors on the workpiece will be mixed in a chaotic manner, creating a beautiful, unusual spectacle.
We use food
To make an experiment that is unusual, interesting for your child and educational, it is not at all necessary to purchase complex equipment and expensive materials. We invite you to get acquainted with very simple options available for execution at home.

With egg
Necessary equipment:
- glass of water (tall);
- egg;
- salt;
- water.
The idea is simple - an egg immersed in water will sink to the bottom. If you add table salt (about 6 tablespoons) to the liquid, it will rise to the surface. This physical experience with salt helps illustrate the concept of density to your child. So, salted water has more water, so the egg can float on the surface.
You can also show the opposite effect (which is why it was recommended to take a tall glass) - when you add plain tap water to a salted liquid, the density will decrease and the egg will sink to the bottom.

Invisible ink
A very interesting and simple trick, which at first will seem like real magic to the baby, and after the parents explain it, it will help to learn about oxidation.
Necessary equipment:
- ½ lemon;
- water;
- spoon and plate;
- paper;
- lamp;
- cotton swab.
If lemon is not available, you can use analogues, such as milk, onion juice or wine.
Procedure:
- Squeeze the citrus juice, add it to a plate, mix with an equal amount of water.
- Dip the tampon into the resulting liquid.
- Use it to write something the child can understand (or draw).
- Wait until the juice dries, becoming completely invisible.
- Heat the sheet (using a lamp or holding it over a fire).
Text or a simple drawing will become visible due to the fact that the juice has oxidized and turned brown when the temperature rises.
Color explosion
The little ones can enjoy a fun experiment with milk and paints, which can be carried out without any problems in the kitchen.
Required products and equipment:
- milk (preferably high fat content);
- food coloring (several colors - the more, the more interesting and brighter it will be);
- dishwashing liquid;
- plate;
- cotton buds;
- pipette.
If dishwashing liquid is not available, liquid soap can be used.
Procedure:
- Pour milk into a plate. It should completely hide the bottom.
- Let the liquid sit for a while until it reaches room temperature.
- Using a pipette, carefully drop several different food colors into the bowl of milk.
- By lightly touching the liquid with a cotton swab, you need to show the baby what is happening.
- Next, take a second stick and dip it in detergent. It touches the surface of the milk and holds for 10 seconds. There is no need to mix colorful stains, a gentle touch is enough.
Next, the baby will be able to observe the most beautiful thing - the colors begin to “dance”, as if trying to escape from the soap stick. Even if you remove it now, the “explosion” will continue. At this stage, you can invite the child to participate himself - add dye, immerse a soapy stick in the liquid.
The secret of the experiment is simple - the detergent destroys the fat contained in the milk, which causes the “dance”.
With sugar
For children 3-4 years old, various experiments with food will be very interesting. The child will be happy to learn about new qualities of his usual food.
For this entertaining activity you will need:
- 10 tbsp. l. Sahara;
- water;
- food colors of several colors;
- two spoons (teaspoon, tablespoon);
- syringe;
- 5 glasses.
First you need to add sugar to the glasses according to this scheme:
- in the first glass - 1 tbsp. l.;
- in the second - 2 tbsp. l.;
- in the third - 3 tbsp. l.;
- in the fourth - 4 tbsp. l.
Add 3 tsp to each of them. water. Mix. Then you need to add a dye of your own color to each of the glasses and mix again. The next step is to carefully take the colored liquid from the fourth glass using a syringe or a teaspoon and pour it into the fifth, which was empty. Then colored water is added in the same order from the third, second and finally from the first glasses.
If you act carefully, the colored liquids will not mix, but, when layered on top of each other, they will help create a bright, unusual pyramid. The secret of the trick is that the density of water changes depending on the amount of sugar added to it.

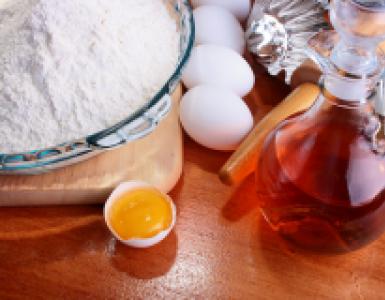
With flour
Let's consider another interesting experience for children, simple and safe. It can be carried out both in kindergarten and at home.
Necessary equipment:
- flour;
- salt;
- paints (gouache);
- brush;
- sheet of cardboard.
Procedure:
- In a small glass you need to mix 1 tbsp. l. flour and salt. This is a blank from which we will later make paint of the same color. Accordingly, the number of such blanks is equal to the number of flowers.
- Add 3 tbsp to each glass. l. water and gouache.
- Using paint, ask your child to draw a picture on cardboard using a brush or cotton swab, one for each color.
- Place the finished creation in the microwave (power 600 W) for 5 minutes.
The paints, which are dough, will rise and harden, making the drawing three-dimensional.
Lava lamp
Another unusual children's experiment allows you to create a real lava lamp. After watching just once, even a novice researcher will be able to repeat the experiment with his own hands, without the help of adults.
Required equipment and materials:
- vegetable oil (glass);
- salt (1 tsp);
- water;
- food coloring (several shades);
- glass jar.
Procedure:
- Fill the jar 2/3 full with water.
- Add vegetable oil, which at this stage forms a thick film on the surface.
- Add food coloring.
- Slowly add salt.
Under the weight of the salt, the oil will begin to sink to the bottom, and the dye will make the spectacle more colorful and impressive.

With soda
An experiment with soda is perfect for demonstrating to a preschool child:
- Pour the drink into a glass.
- Drop a few peas or cherry pits into it.
- Watch how they gradually rise from the bottom and fall again.
An amazing sight for a child who does not yet know that the peas are surrounded by bubbles of carbon dioxide, which brings them to the surface. Submarines operate on a similar principle.
With water
There are several educational optical experiments that, despite their simplicity, are very interesting.
- The missing ruble
Water is poured into a jar and an iron ruble is dropped into it. Now you need to ask the baby to find the coin by looking through the glass. Due to the optical phenomenon of refraction, the eye will not be able to see the ruble if it is directed from the side. If you look into the jar from above, the coin will be in place.
- curved spoon
Let's continue exploring optics with a preschooler. This easy but visual experiment is carried out like this: you need to pour water into a glass and dip a spoon into it. Ask your baby to look from the side. He will see that at the boundary of the media - water and air - the spoon appears curved. By taking out the spoon, you can make sure that everything is okay with it.
The child should be explained that a ray of light bends when passing through water, which is why we see a modified image. You can continue the water theme and lower the same spoon into a small jar. Curvature will not occur since the walls of this container are smooth.

This biological experiment will help the child get acquainted with the world of living nature and observe how a sprout is formed. Beans or peas are required for this.
Parents can invite the young botanist to independently moisten a piece of gauze folded several times with water, place it on a saucer, place peas or beans on the cloth and cover with damp gauze. The baby’s task is to carefully ensure that the seeds are moistened at all times and check them regularly. In a couple of days the first shoots will appear.

Photosynthesis process
This plant and candle activity is best suited for younger students who know that trees and grass absorb carbon dioxide and release oxygen.
The gist is this:
- Carefully place burning candles into two jars.
- Place a living plant in one of them.
- Cover both containers with a lid.
Observe that the candle in the jar with the plant continues to burn because oxygen is present in it. In the second bank it goes out almost immediately.

Entertaining
We catch electricity. This small and safe experiment can be done with kids.
- One inflated balloon is placed on the wall, several others lie on the floor.
- The mother invites the child to place all the balls on the wall. However, they will not hold on and will fall.
- The mother asks the baby to rub the ball on his hair and try again. Now the ball has been attached.
After this, you need to tell that the “miracle” happened thanks to the electricity that was generated when the ball was rubbed on the hair.
Another option for the curious is an experiment with foil. It goes like this:
- A small piece of foil needs to be cut into strips.
- Ask your little one to comb her hair.
- Now you need to lean the comb against the strip and observe. The foil will stick to the comb.
You can also demonstrate “The Lost Chalk” to children. To do this, a piece of ordinary chalk is placed in vinegar. The limestone will begin to hiss and decrease in size. After some time it will completely dissolve. This is due to the fact that chalk, when in contact with vinegar, turns into other substances.
Experiments with preschool children are an excellent opportunity to develop their curiosity and answer many questions in a visual and understandable form. In addition, by offering children a variety of experiments, attentive parents will help them outline their own range of interests at an early age. And the research itself will be a great and fun pastime.
For the experiment in part 1 we will need:
- containers: transparent and equal in volume, these can be jars, plastic cups
- thick thread and regular thin thread
- dye
Option 1
Step 1. Fill the jars with water and dissolve the salt until it stops dissolving. Next, we lower one end of the thread and rope into one container with salt water, and the other into another.


Step-2.
Observation. Our experiment is not for five minutes or even three hours; we will study it for several days. Therefore, you will need patience, observation and a desire to notice something new.


Place jars of salt water in a place convenient for further observations. Approach them daily and note the changes that have occurred. Make assumptions, such as what the thread will look like tomorrow, what will happen to the salt water, and so on.
Option-2
Required. In this version, we will need everything we used above, plus food coloring. Progress of the experiment. We carry out all the steps as in experiment option 1, only we tint the salt water with dye in one jar
. The second bank remains unchanged.
- Since the child already knows the course of the experiment, and he has also seen the result, let’s ask him the following questions:
- what will we see during the experiment?
- What color will the salt on the string be? And on the bank?

What color will the crystals be?


During the experiment, it turned out that colored water dripped from the thread, a puddle formed and part of the blue pigment ended up on a nearby jar. In the photo we see how a jar of clear salt water has turned blue in places. This raised a new question: How could this happen?

The salt water evaporated and white crystals formed at the bottom of the jar. And, if you look closely, you can find perfectly smooth square crystals.
- Let’s not keep the child from exploring; there is still a lot of interesting stuff here. For example, he may notice that:
- the rope became hard
- The salt crust is coming off the jar


crystals of different sizes and different shapes


Take a magnifying glass and look at the crystals with it. Ask your child what these crystals look like? And they can be compared to diamonds and pieces of ice.
Vlad and I did this experiment four times. Last winter we had a research point like this on our windowsill for about two months.
- At the end of your observations, summarize. Discuss:
- what did you do
- what did you get
- how many days did you conduct observations?
- What unusual did you see?
- What did the child like about this experiment?
- remember how the experiment grew
- what the bank, the thread became, where the water disappeared
Friends, good afternoon! Agree, how interesting it is sometimes to surprise our little ones! They have such a funny reaction to . It shows that they are ready to learn, ready to absorb new material. The whole world opens up at this moment before them and for them! And we, parents, act as real wizards with a hat from which we “pull out” something incredibly interesting, new and very important!
What will we get out of the “magic” hat today? We have 25 experimental experiments there for children and adults. They will be prepared for kids of different ages in order to interest them and involve them in the process. Some can be carried out without any preparation, using handy tools that each of us has at home. For others, we will buy some materials so that everything goes smoothly. Well? I wish us all good luck and move forward!
Today will be a real holiday! And in our program:
So let's decorate the holiday by preparing an experiment for a birthday, New Year, March 8, etc.
Ice soap bubbles
What do you think will happen if simple bubbles that are tiny in 4 years loves to inflate them, run after them and burst them, inflate them in the cold. Or rather, straight into a snowdrift.
I'll give you a hint:
- they will burst immediately!
- take off and fly away!
- will freeze!
Whatever you choose, I can tell you right away, it will surprise you! Can you imagine what will happen to the little one?!
But in slow motion it’s just a fairy tale!
I'm complicating the question. Is it possible to repeat the experiment in the summer in order to get a similar option?
Choose answers:
- Yes. But you need ice from the refrigerator.
You know, although I really want to tell you everything, this is exactly what I won’t do! Let there be at least one surprise for you too!
Paper vs water

The real one is waiting for us experiment. Is it really possible for paper to defeat water? This is a challenge for everyone who plays Rock-Paper-Scissors!
What we need:
- Paper;
- Water in a glass.
Cover the glass. It would be good if its edges were a little damp, then the paper would stick. Carefully turn the glass over... No water leaks!
Let's inflate balloons without breathing?

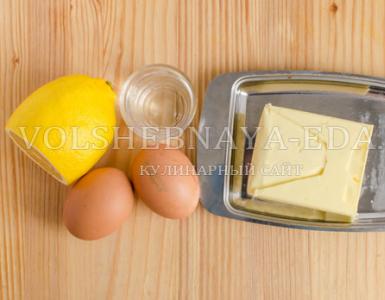
We have already carried out chemical children's experiments. Remember, the very first room for very little babies was a room with vinegar and soda. So, let's continue! And we use the energy, or rather, the air, that is released during the reaction for peaceful and inflatable purposes.
Ingredients:
- Soda;
- Plastic bottle;
- Vinegar;
- Ball.
Pour soda into the bottle and fill 1/3 with vinegar. Shake lightly and quickly pull the ball onto the neck. When it is inflated, bandage it and remove it from the bottle.
Such a small experience can show even in kindergarten.
Rain from a cloud

We need:
- Jar of water;
- Shaving foam;
- Food coloring (any color, several colors are possible).
We make a cloud of foam. A big and beautiful cloud! Entrust this to the best cloud maker, your child. 5 years. He will definitely make her real!
 author of the photo
All that remains is to distribute the dye over the cloud, and... drip-drip! Rain is coming!

Rainbow

Maybe, physics the children are still unknown. But after they make Rainbow, they will definitely love this science!
- Deep transparent container with water;
- Mirror;
- Flashlight;
- Paper.
Place a mirror at the bottom of the container. We shine a flashlight on the mirror at a slight angle. All that remains is to catch the Rainbow on paper.
Even easier is to use a disk and a flashlight.
Crystals

There is a similar, but already finished game. But our experience interesting the fact that we ourselves, from the very beginning, will grow crystals from salt in water. To do this, take a thread or wire. And let's keep it for several days in such salty water, where the salt can no longer dissolve, but accumulates in a layer on the wire.
Can be grown from sugar
Lava jar
If you add oil to a jar of water, it will all accumulate on top. It can be tinted with food coloring. But in order for the bright oil to sink to the bottom, you need to pour salt on top of it. Then the oil will settle. But not for long. The salt will gradually dissolve and release beautiful droplets of oil. The colored oil rises gradually, as if a mysterious volcano is bubbling inside the jar.
Eruption

For toddlers 7 years It will be very interesting to blow up, demolish, destroy something. In a word, this is a real element of nature for them. and therefore we create a real, exploding volcano!
We sculpt from plasticine or make a “mountain” from cardboard. We place a jar inside it. Yes, so that its neck fits the “crater”. Fill the jar with soda, dye, warm water and... vinegar. And everything will begin to “explode, lava will rush up and flood everything around!
A hole in the bag is no problem

This is what convinces book of scientific experiments for children and adults Dmitry Mokhov "Simple Science". And we can check this statement ourselves! First, fill the bag with water. and then we'll pierce it. But we won’t remove what we pierced with (a pencil, a toothpick or a pin). How much water will we leak? Let's check!
Water that doesn't spill
Only such water still needs to be produced.
Take water, paint and starch (as much as water) and mix. The end result is just plain water. You just can't spill it!
"Slippery" egg

In order for the egg to actually fit into the neck of the bottle, you need to set fire to the piece of paper and throw it into the bottle. Cover the hole with an egg. When the fire goes out, the egg will slip inside.
Snow in summer

This trick is especially interesting to repeat in the warm season. Remove the contents of the diapers and wet them with water. All! The snow is ready! Nowadays such snow is easy to find in children's toys in stores. Ask the seller for artificial snow. And no need to ruin diapers.
Moving snakes
To make a moving figure we will need:
- Sand;
- Alcohol;
- Sugar;
- Soda;
- Fire.
Pour alcohol onto a pile of sand and let it soak. Then pour sugar and baking soda on top and set it on fire! Oh, what a funny this experiment! Children and adults will love what the animated snake gets up to!
Of course, this is for older children. And it looks pretty scary!
Battery train

The copper wire, which we twist into an even spiral, will become our tunnel. How? Let's connect its edges, forming a round tunnel. But before that, we “launch” the battery inside, only attaching neodymium magnets to its edges. And consider that you have invented a perpetual motion machine! The locomotive moved on its own.
Candle swing

To light both ends of the candle, you need to clear the wax from the bottom down to the wick. Heat a needle over the fire and pierce the candle in the middle with it. Place the candle on 2 glasses so that it rests on the needle. Burn the edges and shake slightly. Then the candle itself will swing.
Elephant tooth paste
The elephant needs everything big and a lot. Let's do it! Dissolve potassium permanganate in water. Add liquid soap. The last ingredient, hydrogen peroxide, turns our mixture into a giant elephant paste!
Let's drink a candle
For greater effect, color the water in a bright color. Place a candle in the middle of the saucer. We set it on fire and cover it with a transparent container. Pour water into a saucer. At first the water will be around the container, but then it will all be saturated inside, towards the candle.
Oxygen is burned, the pressure inside the glass decreases and
A real chameleon

What will help our chameleon change color? Cunning! Instruct your little one 6 years Decorate a plastic plate in different colors. And cut out the chameleon figure yourself on another plate, similar in shape and size. All that remains is to loosely connect both plates in the middle so that the top one, with the cut out figure, can rotate. Then the color of the animal will always change.
Light up the rainbow

Place Skittles in a circle on a plate. Pour water inside the plate. Just wait a little and we get a rainbow!
Smoke rings

Cut off the bottom of the plastic bottle. And stretch the edge of the cut balloon to get a membrane, as in the photo. Light an incense stick and place it in the bottle. Close the lid. When there is continuous smoke in the jar, unscrew the lid and tap on the membrane. Smoke will come out in rings.
Multicolored liquid
To make everything look more impressive, paint the liquid in different colors. Make 2-3 batches of multi-colored water. Pour water of the same color into the bottom of the jar. Then carefully pour vegetable oil along the wall from different sides. Pour water mixed with alcohol over it.
Egg without shell

Place a raw egg in vinegar for at least a day, some say for a week. And the trick is ready! An egg without a hard shell.
The egg shell contains calcium in abundance. Vinegar reacts actively with calcium and gradually dissolves it. As a result, the egg is covered with a film, but completely without a shell. It feels like an elastic ball.
And the egg will be larger than its original size, as it will absorb some of the vinegar.
Dancing men
It's time to get rowdy! Mix 2 parts starch with one part water. Place a bowl of starchy liquid on the speakers and turn up the bass!
Decorating the ice

We decorate ice figures of different shapes using food paint mixed with water and salt. The salt eats away at the ice and seeps deep, creating interesting passages. Great idea for color therapy.
Launching paper rockets
We empty the tea bags of tea by cutting off the top. Let's set it on fire! Warm air lifts the bag!
There are so many experiences that you will definitely find something to do with your children, just choose! And don’t forget to come back again for a new article, which you’ll hear about if you subscribe! Invite your friends to visit us too! That's all for today! Bye!